|
M5A1 Stuart |
AFV Club, 1/35 scale |
 |
| by Valentin E. Bueno |

Oh the Wait!
After what seemed like an eternity, my Holy Grail of model kits has been released in the 21st Century up to 22nd Century standards. Well maybe not 22nd Century, it just seems like that way after building the Tamiya kit for over 25 years.
The biggest surprise I had while assembling this kit straight out of the box was the amount of flash all the parts had. What the hell! This is a new kit with new molds and how in tarnations did this much flash get all over the parts. Not only the new parts for the M5, but all the previously released parts for the M3A3 too! And to add insult to injury, some of the parts were warped! No, no, no it isn’t because I am holding the parts too close to my eyeballs that make the parts appear warped, they ARE warped! The previously released parts didn’t have warping so what happened?
This last bit clued me into what happened and it’s all my fault. Yup, I am to blame. After over a year of chanting “I want my M5A1 from AFV Club, I want my M5A1 from AFV Club, I want my M5A1 from AFV Club” over and over in my nightmares, AFV Club rushed the production of the kit just to make me stop. They probably reduced the amount of pressure applied to the tooling dies and reduced the timing of the plastic cooling sequence in order to pop the still warm parts out of the mold. Both of these factors contribute to flash and warped parts.
Thankfully, the warpage of the parts isn’t so bad that a drop of CA glue and pressure from my stubby digits cannot cure it, but it does take time in this instant gratification world.
Build It!
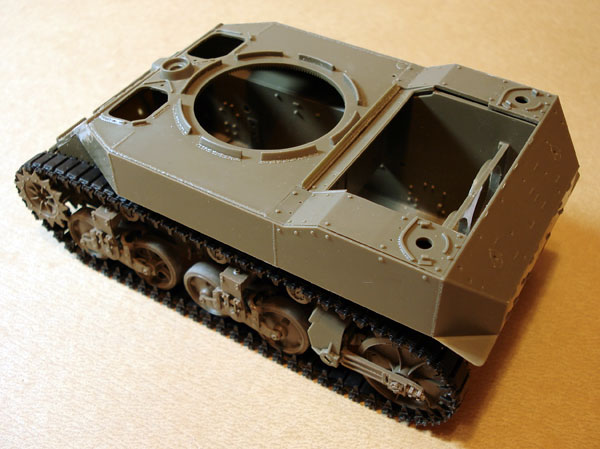
Instead of following the instructions like an automaton, I started with step #3, the lower hull. I was eager to get started here because this is where this kit departs from the older M3A3 kit. On this kit the lower hull is made from flat plates.
The trickiest part of building a lower hull out of flat plates versus using the traditional tub is keeping the panels square. Thankfully, this kit will come with an interior at sometime in the future and the engine bulkhead is included in this kit with detail on both sides. I used this bulkhead to keep the sides of the hull square to the bottom hull plate. I taped everything together and used a few drops of Tenax to start the gluing process. After it had set for a few minutes, I shot the rest of the joints with my usual Zap-a-Gap CA glue. Due to the unexpected presence of flash on many of the parts, test fitting three times, removing flash twice over and gluing once is the order of the day. Almost every single part has a little bit of flash inhibiting perfect ft on all the parts. So be warned and please be patient with the kit.
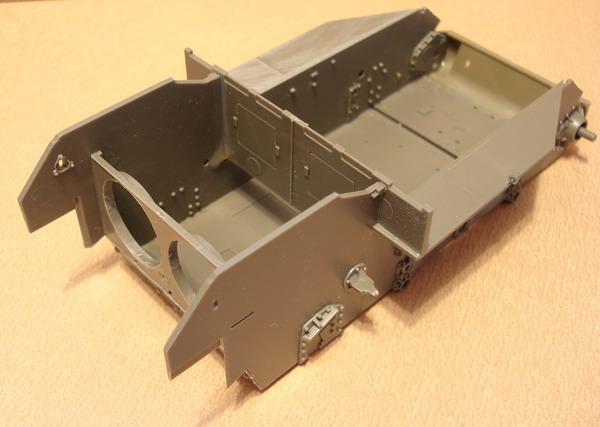
The photo above shows the seven parts of the lower hull assembled. The sponson blanking plates for the rear half of the hull are molded separately in order to render the drain plug for the fuel tanks and the air filter access doors better.
Run It!
Running gear time. These parts are familiar to anyone who has built AFV Club’s M3A3. These are simply the most accurate rendition of Stuart running gear around. Thankfully, AFV Club has released these parts as a separate kit for use on the Tamiya and Academy Stuarts. Not to mention, there are other one off test vehicles that use these running gear parts also. The new idler spring housing included in the M5 sprues assembles the same way the old M3A3 idler spring housing did, two halves with separate idler swing arms trapped in between.
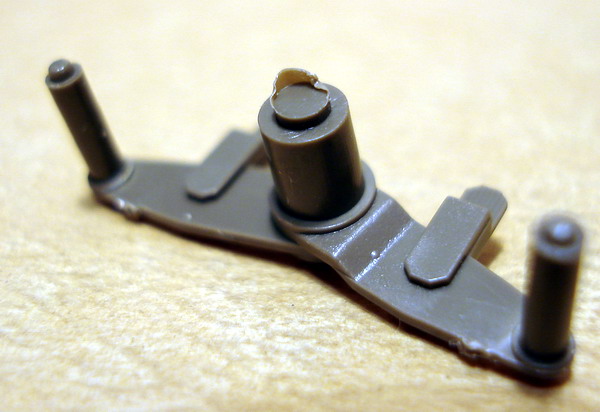
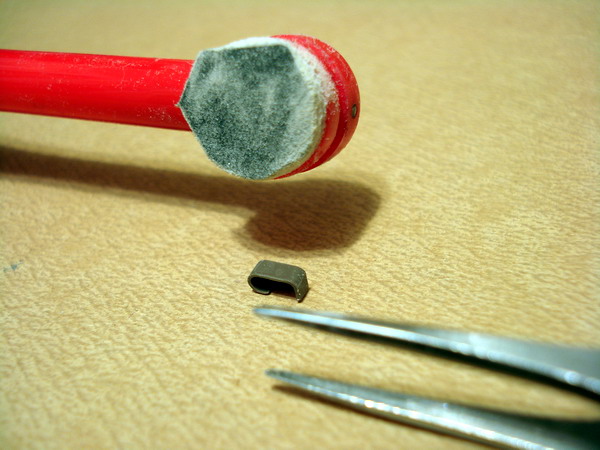
The swing arms had a trio of HUGE ejector pin marks sticking up on the insides of the arms. These must be removed.
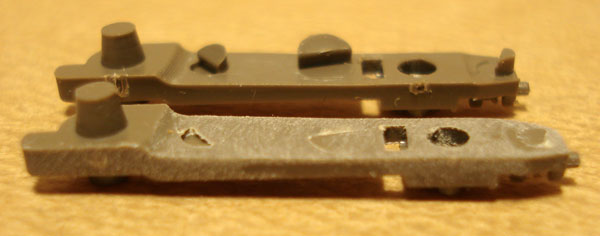
I used a sprue cutter to nip most of the offending plastic from the part and used my very handy Mr. Polisher Pro (a modified electric tooth brush with 280 grit sandpaper contact cemented on.
The Mr. Polisher Pro was also used to pretty much clean up all the little nubs of plastic off of the parts. This was especially true of the steel skids installed over the bogie units.
I decided to use all the dish wheels and the solid idlers on this model. The rest of the running gear assembly went quickly. The kit rubber band tracks were used to make this kit as much as out of the box as possible. They fit on the running gear rather loosely, so on the other M5’s I build, I will use AFV Club’s own link to link tracks.
Cover it!
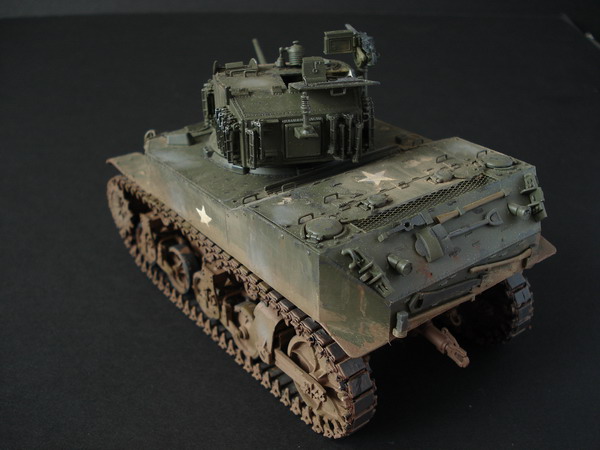
The upper hull of the Tamiya M5A1 is notorious for being too short. When compared to the new AFV Club hull, the new hull is roughly 1/8” longer. Cool.
The hull roof and glacis plate go onto the one piece upper hull. Easy peasy. The two parts of the engine deck that cover the gasoline tanks are added next with the main engine cover (aka the Hood) follows that.
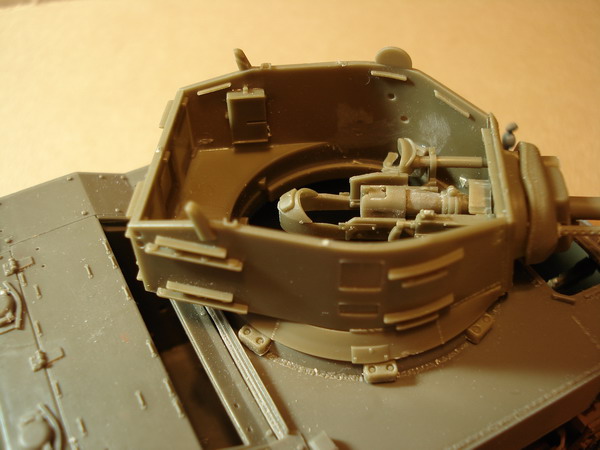
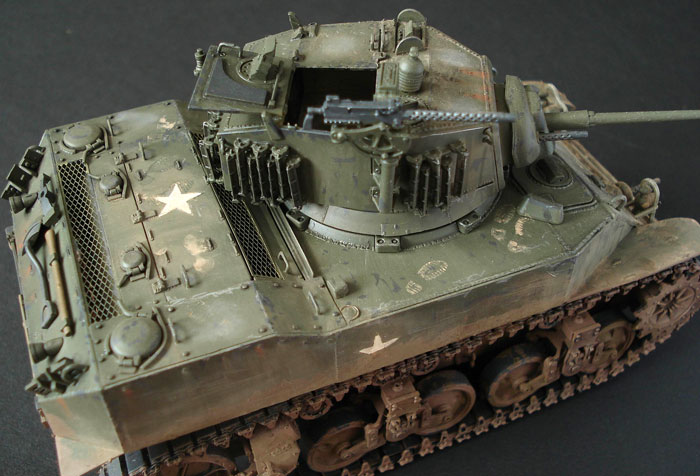
Next up is the turret! Because this kit represents the early version, that cool looking shield used on the late version (kitted by Tamiya) and the turret of the M3A3 has the grousers stored in different positions, this kit get an all new turret while keeping the old M3A3 turret still in the box. Many of the parts from the M3A3 turret are used here, including the forward roof part that has that mysterious hole in it. Some say that it was for signal flags, I have no idea and haven’t found evidence that it remained open, suffice to say, I positioned the searchlight over it and it cannot be seen on the finished model! Cheeky bugger!
The 37mm gun from the M3A3 kit is a beauty and is used here as well. As I have been saying (writing) all along, WATCH OUT for the FLASH! Like the mythical superhero on Nike’s wings, it’s all over the place getting in everyone’s way.
There’s also a minimal amount of stuff to be added to the walls, and no turret floor/basket. Too bad. But then again, with all the detail in here and the precedent set by the Sturmtiger Interior, maybe an M5A1 interior set complete with turret floor/basket is not to far off….
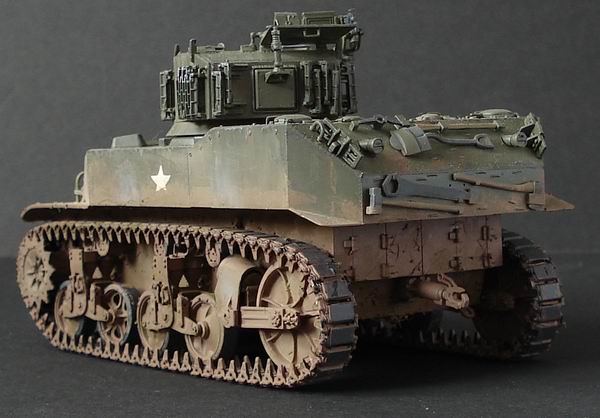
Paint It! Weather It!
I assembled the entire model before painting.
I don’t do all that pre-shading shenanigans like other modelers do, I just slather Polly S Dirt mixed with Mig Pigments on the running gear and tracks, then blast the upper works with Olive Drab from a Tamiya rattle can. I don’t have time to take out my long languishing airbrush to paint models properly anymore.
I let this set a few days before forgetting to add the decals.
I decided early on to cover this model in a fine coat of dust.
After the usual pin wash of black pastel powder mixed with Tamiya thinner in all the nooks and crannies, I gave the entire model a thin dusting of Mig weathering Dust and used a damp (not wet) brush to take some of it off. By stroking the dust off in a downwards direction, it looks like the rain washed some of the dust off the tank.
Along the hull just above the tracks, I applied a heavier coat of dust and mud to mimic the mud and dust thrown up by the tracks as the tank moves through the terrain. More Mig Dust was mixed with Polly S Dirt and Verlinden Static grass to give the impression of debris caught up in the tracks and thrown up onto t the sponson undersides and sides.
Using Caliber 35’s rubber boots stamping kit, I added boot marks all over the model.
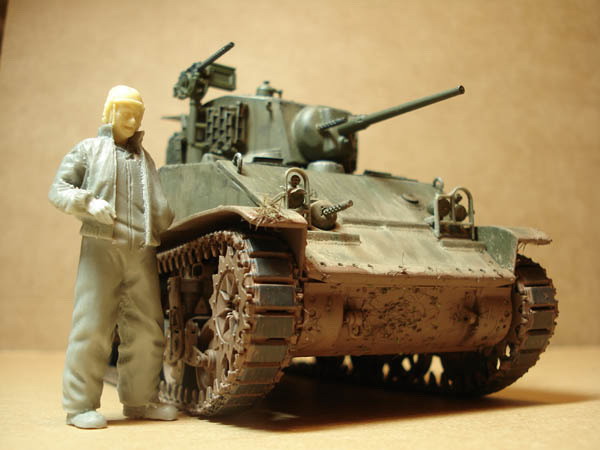
Finished it?
That’s all I will write for this model. I do plan on adding some figures from Alpine Miniatures and Nemrod for the crew, some puppies and place the entire thing on a base, but in the interest of getting Neal something to print in the newsletter, I’ll stop describing the build here.
Needless to say this kit was, is and will be a joy to build. It is easily light years ahead of the Tamiya kit. I hope AFV Club releases an injection molded interior for this kit, but at the very least the 75mm Howitzer Motor Carriage (HMC) M8? Hint Hint AFV Club. I know I’ll be building this as a later M5A1 as well as the early M5 with the horseshoe turret as well as a multitude of conversions that will include a 81mm mortar carrier, 105mm Howiter Motor Carriage (think shrunken M7 Priest with an open fighting compartment) and at least one Super Detailed build using the Verlinden engine compartment and Tiger Werke’s interior!
Model, Images and Text
by Valentin E. Bueno
Page Created 13 March, 2010
Page Last Updated
13 March, 2010
|