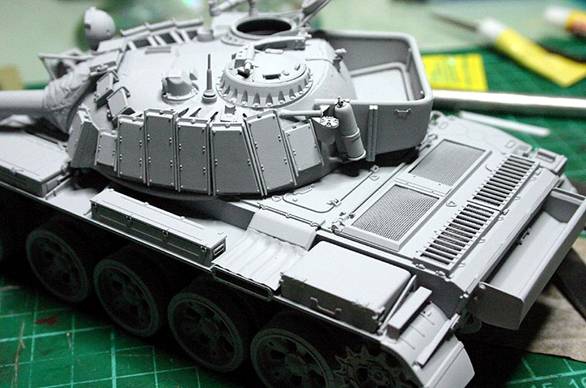
Priming and CheckingNext up is priming. It allows us to check for irregularities along with using it to fuse small gaps. I gave it a liberal spray coating using Gunze’s Surfacer 1200. Errors are also enhanced and eradicated. The good thing about Gunze’s surfacer is that we can melt it with Tamiya thin cement and still glue parts to the painted surface later.
Model primed and ready for the track to be added in. Kudos to the coffers at Tamiya, they have finally made an industry first! The track can actually be cemented into place! It is important as track sag is a feature in T55 and T62 tanks. I have decided to give it more sag than the usual one wheel “sprung free” tension since it is impossible to simulate without the use of Fruil Metal links, which is a nightmare to fit needing 4 hands in the final link! Given my wife being not a model maker herself, I find myself at the mercy of gambling away efforts amounting to 40 hours so far on some tracks! So I decided to let the track sit on every wheel.
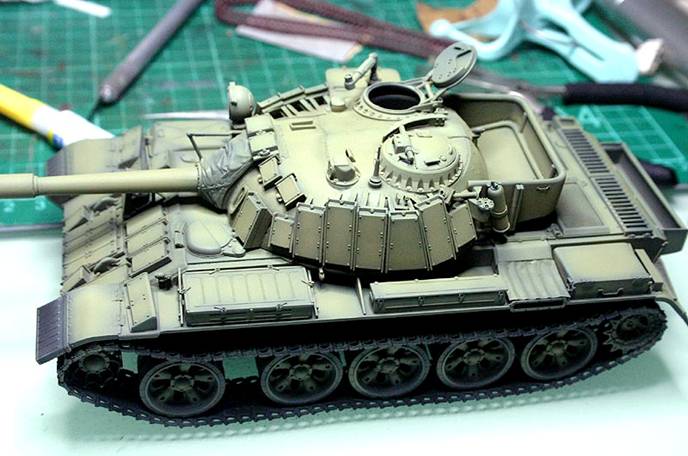
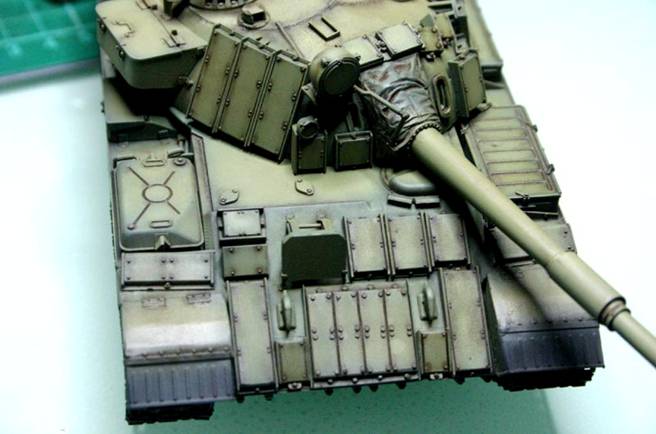
Basic colours painted is a mixture of olive green and sand over the black under coat. Note that the front track links are not glued down yet and it floated to defy physics. Dinesh Ned helped me to pin that down and his eagle eyes was quick to spot the mistake. Such attention to details is what made him a world class model maker and top ebay pricer. The model is given an overall coat of Matt Black from Gunze. I use Gunze, even though it is toxic, but it is the most resilient paint to weathering in the market today. Next, an olive green is mixed with 20% sand and clouded over the model giving it a 20% opacity and then we work from the centre of each open area outward edging it nearer bit by bit while building up the solidity of the colour from the middle outwards. This will give the model a good 3D effect. We should tone it a good 40% to 50% lighter than the final colour we want to achieve as the filters and washes later will take on a darkening effect on the overall turnout of the model. Dinesh Ned, the famous model maker appearing often in Xtreme Modelling and now writing a book on the Tiger for Osprey, pointed out to me that the “float” from the front return roller looked like it defied physics. I glued the thing in place with the aid of his pointing finger and some rolled tissue papers. After 2 hours and having a good lunch with him, we are back in the workshop and the track looked natural with the “tampons” now removed! Good to have friends like him around who are not selfish and is willing to share, unlike some at sore losers in competitions that we inadvertently bumped into from time to time. It is attention to details and problem solving creativity that differentiates a good model maker from great model makers! This observation saved me heaps of embarrassments! The model is then highlighted with a central clouding spray of about 50% opacity to give it a highlighted effect of the sun. To do this properly without given the model a weird perspective, one must imagine the light source and give the shadows its proper placing. I decided on the noonday sun and work the shadows on the undersides and to careful to only cloud the areas reached in full intensity by the sun in higher doses than the areas that do not.
Another look of the shaded model, note the shadows in areas not reached in high intensity by the sun? Filtering and Washing
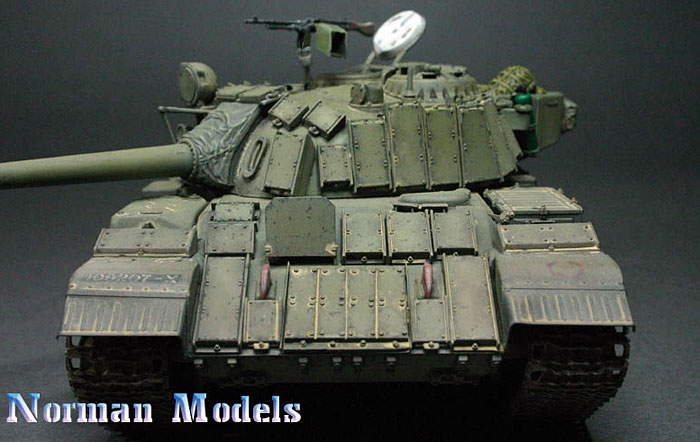
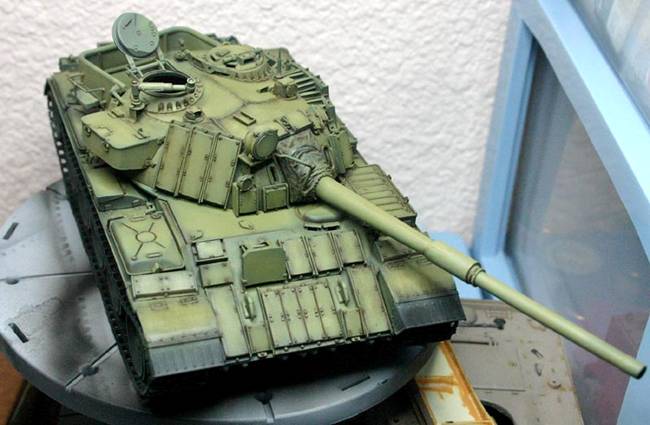
Tank is being washed first with a raw umber filter and pin washed with 50% black added The model is set aside to cure the paint for 24 hours so that it will stand up for large amounts of abuse later. The next evening, I gave the model a filter effect of raw umber and while it is still wet, I pinned in the black/umber mixture into the crevices and rivets. This is done in sections of 1 square inch at a time working from the front to the rear paying attention always to rain flow directions so that we achieve rain streaks, pin wash and filtering all at one go.The model have parts of it given a coat of gloss so that decals can be added smoothly. Then it is set aside for 24 hours and the decal panels are over sprayed with matte finish to seal in the decals.
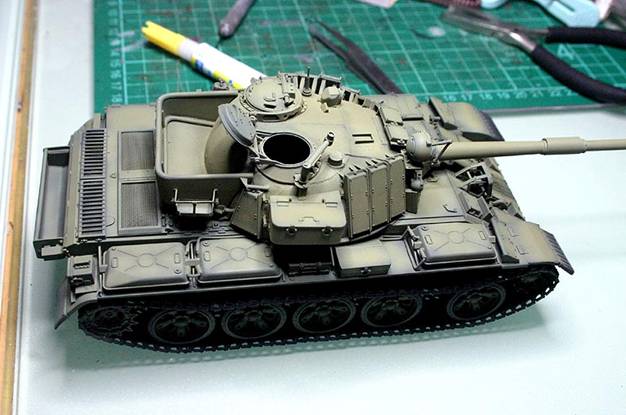
Tank that is washed and pinned washed. Once the model is oversprayed, it is the set aside for chipping 24 hours later. The chips of paint is contrary to normal practice, happened mainly at ridges and edges where metal thinning and paint stress to the binder allows faster oxidation. This is aggravated by frequent traffic over these areas. Pastel is mixed into acrylic to produce the chips.
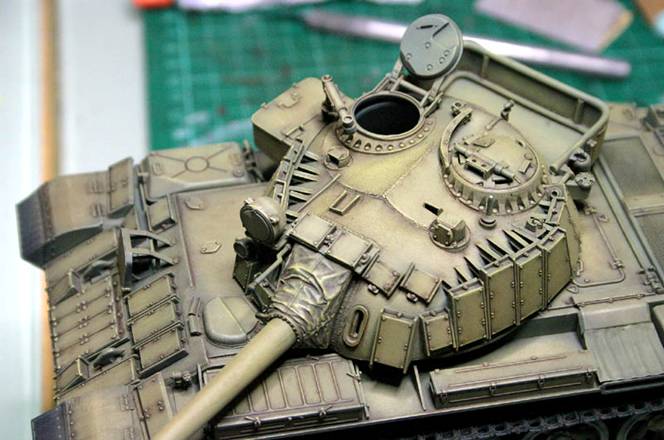
Prior to chipping the model is given a good dry brush to accentuate minor details of the super tooling by Tamiya and the rivets I painstakingly punched. To be continued in Part Three
Home
Model and Text by Norman
Lim |
||||||||