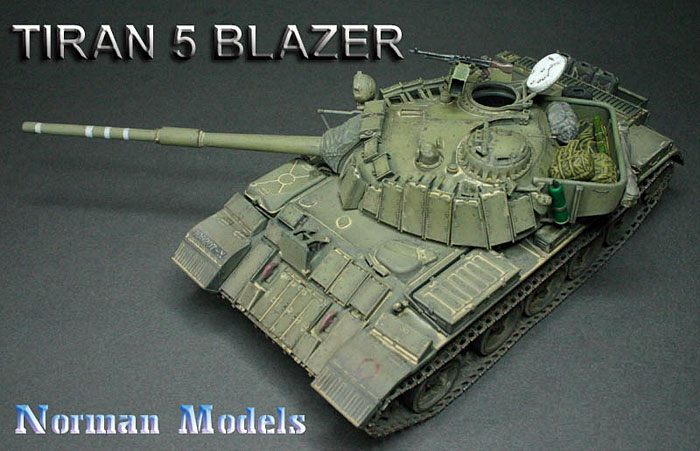
IntroductionI was really thrilled when I learnt that the IDF actually made a few units of Tiran prototypes out of the 140+ fleet of captured T55 to test the effectiveness of the Blazer Explosive Reactive Armour System sometime before the Lebanon Peace for Galilee operations began in 1982. I found some photographs in the internet recently and decided to go for it. But with a goal that we will pay attention to it as it were for the next Euromilitaire or Tamiya Competition. I ordered the Verlinden Tiran 5 conversion kit and the Tamiya T55 kit since it is a long shot better than the ESCI one that I bought some ten years ago and a mile away from the offerings from Trumpeter though they are both significantly more expensive. Construction The first thing that needed to be done is to remove the metal fenders of the T55 as depicted in the kit and replace it with an 8 part photo etched material from the Verlinden kit. To my dismay, the photo etched part was almost 2mm narrower than the kit and nothing can be done to remedy it. So I filed the kit part to slope it in so that it will look less conspicuous. However, there is still a stepped difference in the width of the two. Another gripe about the conversion kit is that the fenders needed to be bent without a template, plus the fact that the part joining the outer part is so small and fragile that you are better off using a plastic sheet and flood the thing with super glue and filed into shape later. Attempts to use that part led to huge holes and made the thing look funny. Fortunately, we can place it in a compromising manner where the inside difference will be more or less blocked from the casual observer by the large Blazer block sitting on the Glacis plate. The whole structure is very weak and I reinforced the underside with plastic strip and flood the whole thing with superglue and allow it to set for 24 hours. There are some mounting holes provided in the kit for the light assembly and wooden fording screen. These are filled up, sanded down and later “danced” over with wet liquid cement to simulate Russian metal plate natural surface patterns.
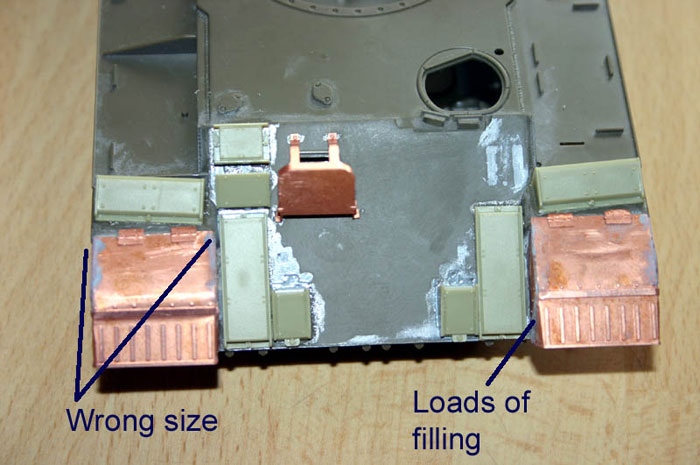
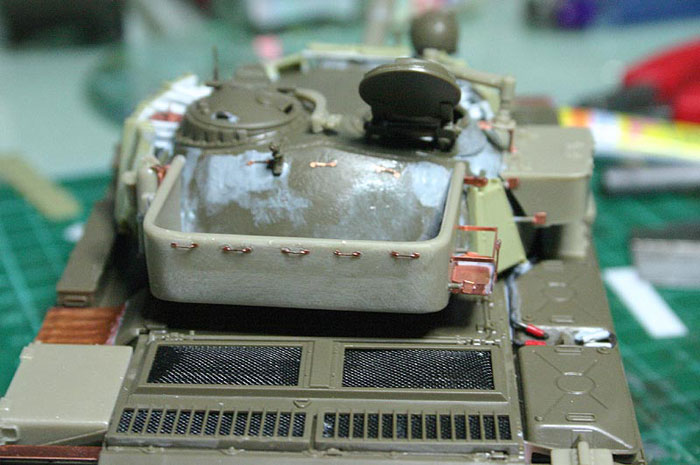
The picture illustrates the size difference between the conversion kit from the actual Tamiya kit, it is so significant that it affords 1mm steps on each side. The fit is also bad as seen here with heaps of liquid cement and cellulose putty mixture alongside with a good half tube of super glue. The one on the right is with attempted rectification. Once we got that settled, we went on to cover the front glacis plate with the lighting system and Blazer armour. The Resin Magach 6 set is used but about 40% of it can’t be used as the units are too large. Especially the four plates in the middle. Therefore, I fabricated it with plastic cards, 0.2mm brass sheet and punched a whole lot of rivets using a Waldron punch and die set. The nuts are punched with the larger size sitting at the bottom while the smaller one sits on top.
Light assembly sits lower than normal, the central 4 plates are made with styrene and brass.
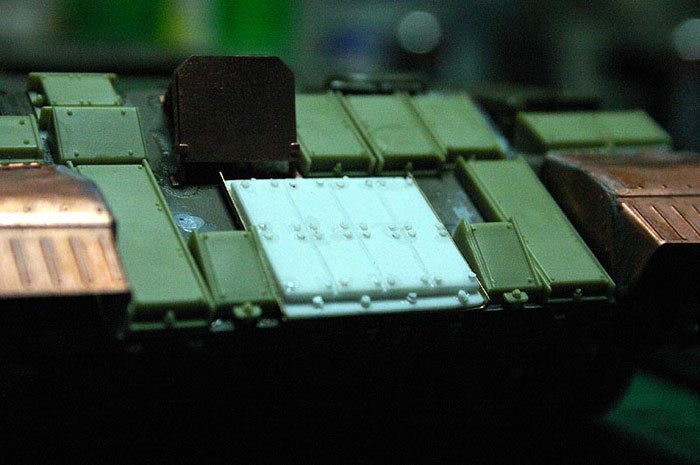
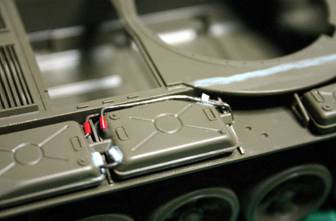
Exhaust fender in 0.1mm copper plate and the rest of the conversion kit bins added. Next I used a 0.1mm copper plate to rub and scrub to burnish the features of the bends in the guard as the piece provided in the kit looked too neat and thick. It was given some uneven treatment so that when we rust the thing later, it will look very battered, just like the real thing.
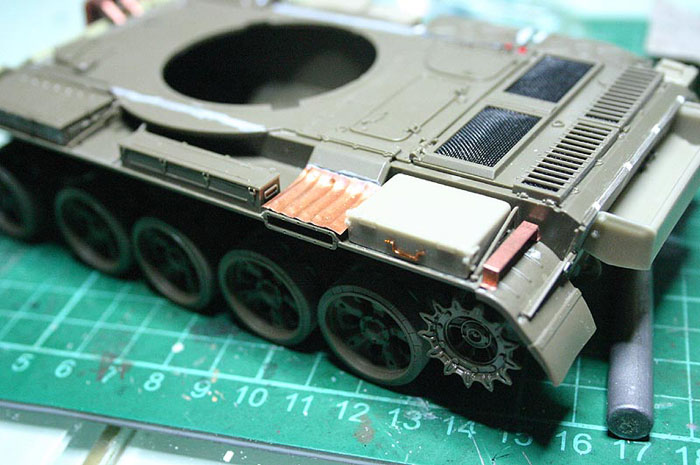
Fuel Lines rear and front were added with clips and rubber connectors. Next, I added the fuel lines that looked too obvious if we left them out. I used 0.9mm binding steel cables to make the lines as they stay in shape and do not bend irregularly like solder. Only thing is that these chaps are really tough to bend. These fuel lines in T55 are joint with silicone rubber hoses and held in place with clips. I decided to strip down the cables and leave the PVC housing intact in the small areas to simulate the clipped on rubber hoses. I wasn’t too bothered with the clips as these can be hand painted on when the model is painted.
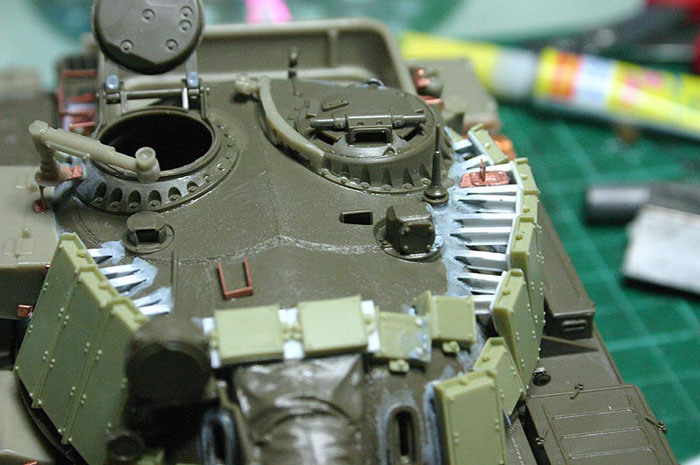
Turret with rear and side bins added with tie down hooks attached The next thing was to add the turret details. I converted the turret and added in the bar extensions. The markings for the tie down points were blanked out with liquidized cellulose putty and dabbed till it retains the cast steel features homogenous with the rest of the turret. One major gripe here is that the Verlinden jerry can holder have to be folded in place but the ends do not meet and it looked like someone sawn off huge chunks of metal for scraps from it. It had to be filled with super glue again! This is expensive spending of a good brand built up over the years given the competition from Legend, Eduard, Lion Roar and the likes from the eastern bloc, it will pay huge dividends if Verlinden do keep up the standards that it has been famous for in the last decade, this latest kit definitely is deviant from the norm. Could be some foul up with a sub contractor somewhere, otherwise, I had always enjoyed using Verlinden kits not minding to pay the premium in price over the rest. Next, we converted the copula in the turret removing the machine gun mounting and sanding it smooth. This is done by slowly shaving the plastic off little by little with the last part of carving the stepped edge from the leading edge. It has been fused with one solid piece of plastic. The armour is next fabricated with supporting framework from using “I” beams from Plastruct. The beams had to be individually cut and formed to shape and size by a sharp scalpel. This part is tricky as the beams need to seat neatly on an almost flat row and the gaps needed to be filled. Once done, it can’t be sanded? I got round by the trusty cellulose with Tamiya super thin cement. The mixture is added slowly and allowed to dry for two hour intervals. Next the process is repeated so that the gaps are filled without melting the beams! If it happens, it’s the end of our story and project! Then the built up is carefully “sculpted with brush wet with liquid cement and the final part is to dabbed it into texture like the rest of the turret face so that it looked homogenous.
The framework on a flat plane and filled in to blend with the rest of the turret Next is the swinging machine gun mount using the conversion part and cooper sheet to form the support. The 60mm mortar base plate is scaled down and added along with the barrel support and the tie down clip. The mortar is left out to enhance the look of the overall thing even though I have one in my spare parts bin from the Tamiya Merkava kit. To be continued in Part Two
Home
Model and Text by Norman
Lim |
||||||||