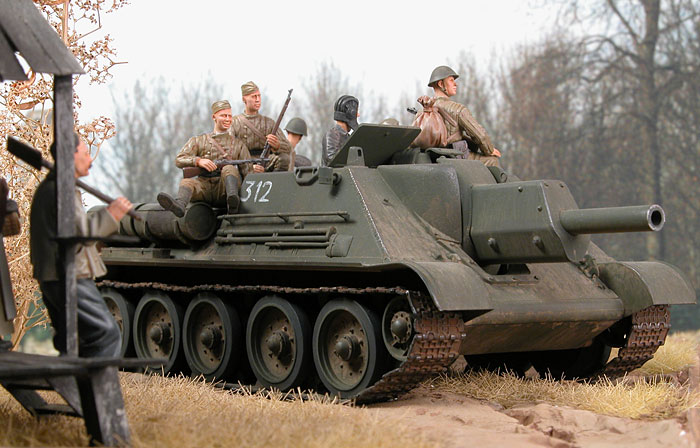
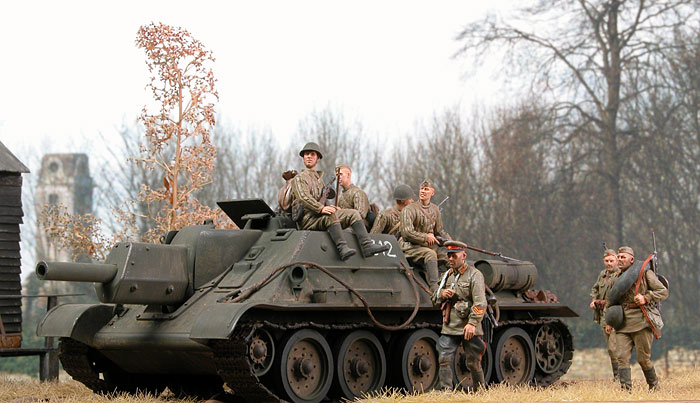
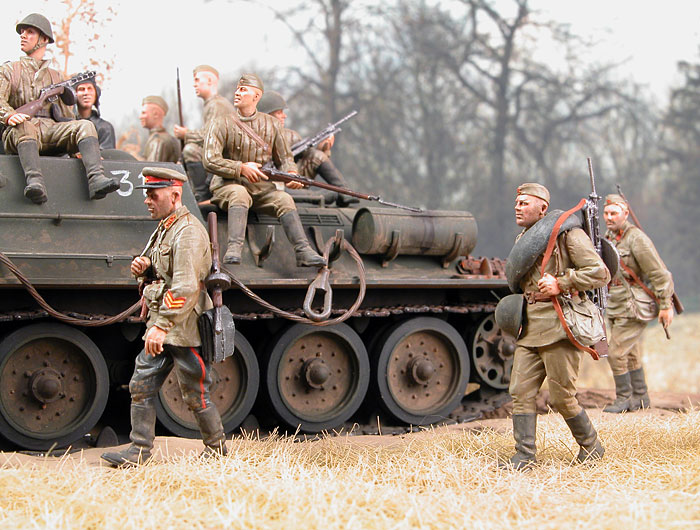
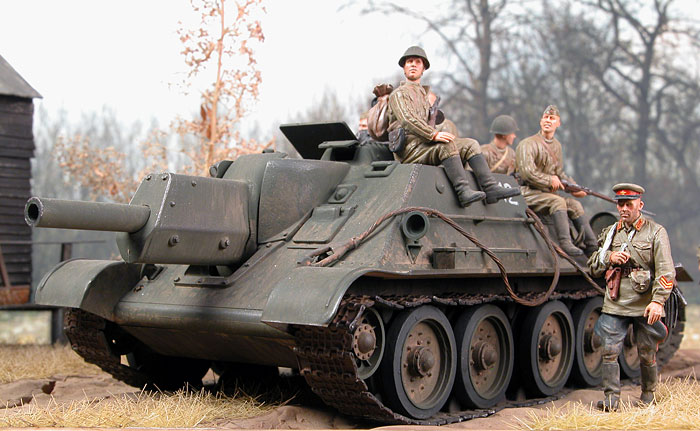
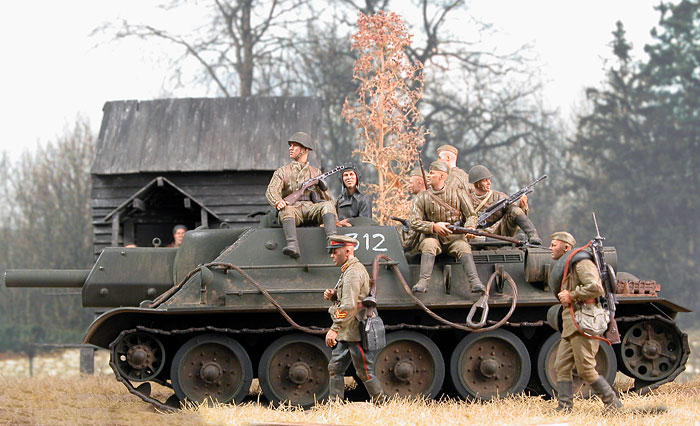
The Tank
|
|||||||||||||||||||||||||||||||||||||||||||||||||||
|
|
|
||
As you can see, l did a bit of extra work to bring it up a notch, with everything going together really well.
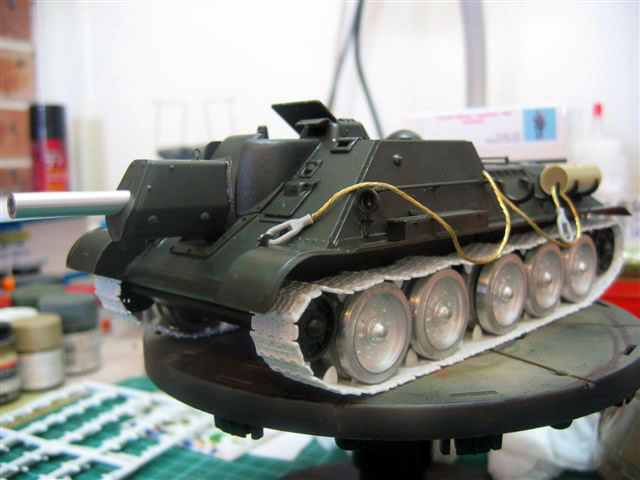
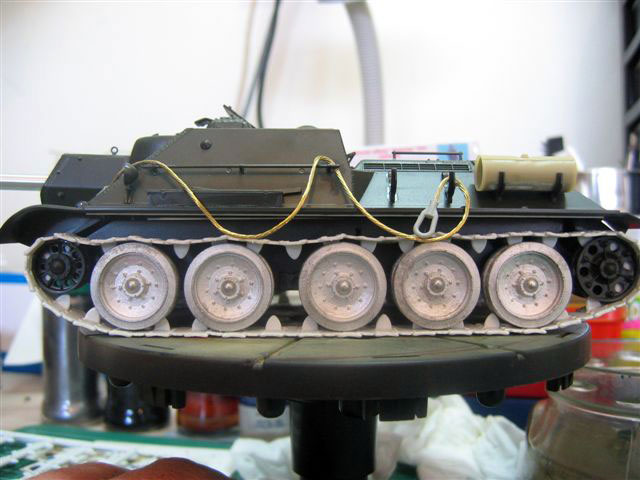
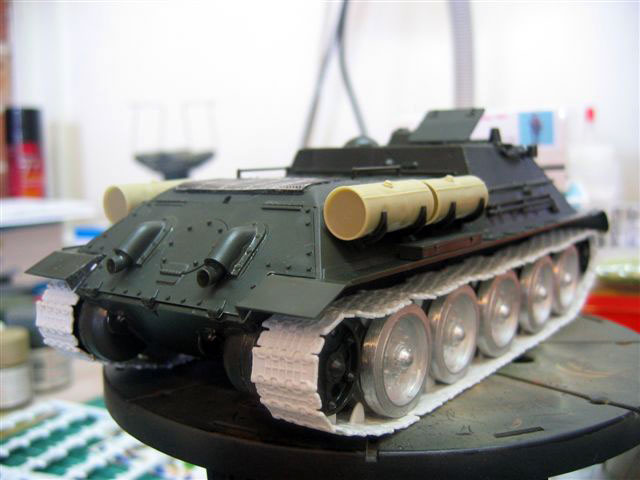
Next , was the painting, which was done using an Aztek A470 Airbrush and various brands of Acrylic paints, mainly, Tamiya, Gunze and Vallejo.
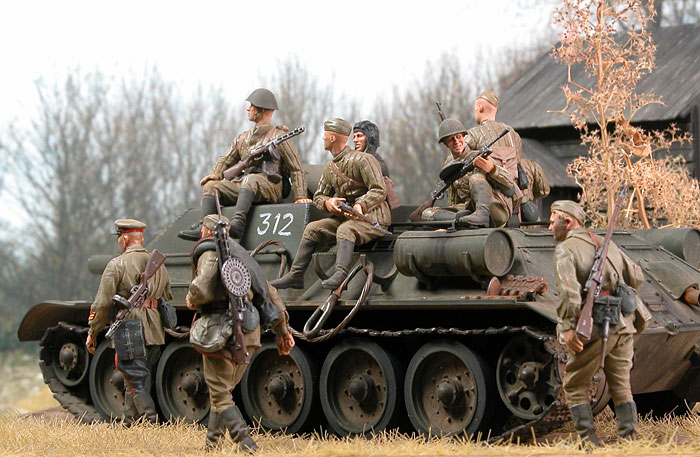
The base color was Tamiya IJN green, followed by different mixtures of Dark and Khaki Green, followed by a mixture of Mig pigment, earth tones applied wet and toned down once dry.
The tracks were painted in a dark dirty brown mix and then Mig Pigments of earth and rusty tones applied as before. Once dry l then rubbed Graphite Powder over the raised areas to depict the areas where the tracks have made contact with the ground.
l then added smaller weathering details such as rust on the exhausts, soot and oil and fuel spills around the tanks and engine deck.
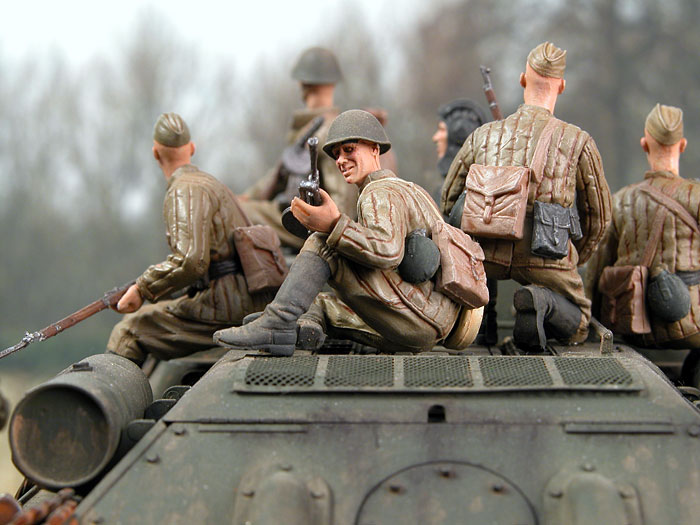
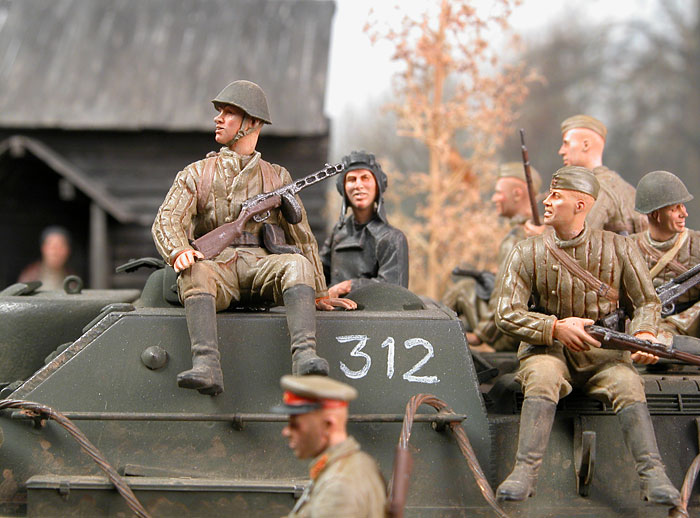
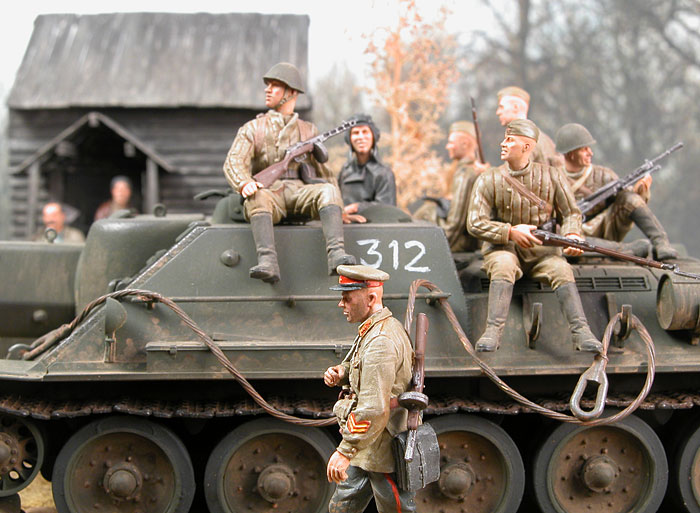
The Figures
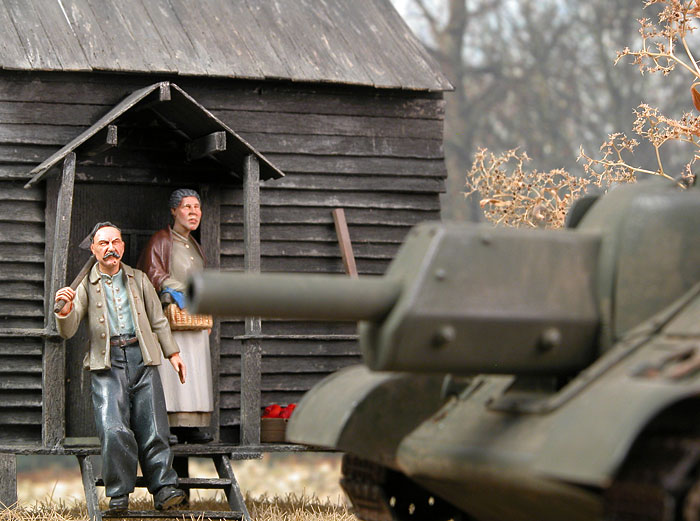
The figures used in this diorama were from a few different manufacturers.
The old couple on the porch are from Verlinden, the tank riders are from Dragon all with Hornet heads, the tank commander is Tristar, also with a Hornet head and finally, the infantry walking alongside the tank are from Tank.
All of these went together without any problems or modifications except for the replacement heads. The Tank figures were excellent to work with as this was my first time with this brand, and dare say will probably be getting more in the future.
All figures were painted with Tamiya and Vallejo Acrylics with a very light dry brush with Testors Modelmaster and a dusting of Mig Pigments.
Scratchbuilding The Cabin
This is a first for me, as usually l would just go out and buy an aftermarket product, but now with a little boy and one wage, one must try other means to save on costs, so here is what l came up with.
I only wanted a portion of the building as my base was not as spacious as l thought, so out came the cardboard and various timber strips. l drew the rough design onto the cardboard and then started cutting the timber to size and gluing it in place with White glue. Once all generally together l then added some smaller details to it like the frame work around the door and smaller details to the door itself.
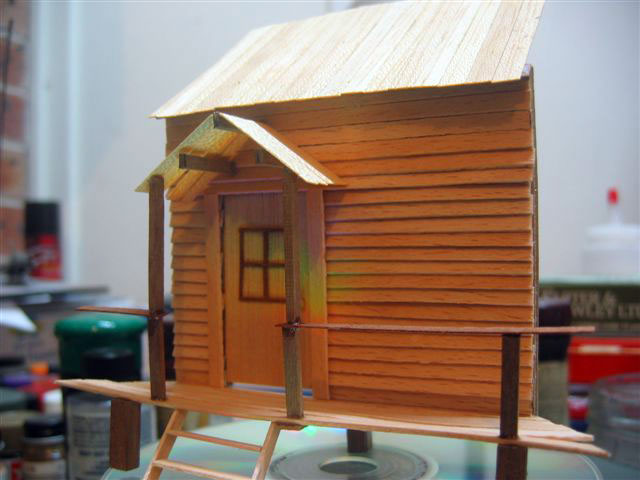
I then painted it with a mixture of Tamiya Acrylics as a base coat and then weathered it with Testor's Modelmaster Enamels and finally a light dusting of Mig Pigments.
The basic design was found in one of my Concord Publications on Russian Light and medium Tanks and just by chance also inspired me to do this diorama.
The Groundwork
The ground work on this diorama was very simple, an old bread board and some timber strips for the base, filled with plaster and the a fine layer of Final Coat finishing compound used by plasterers.
It was this product that caused the cracked ground effect.
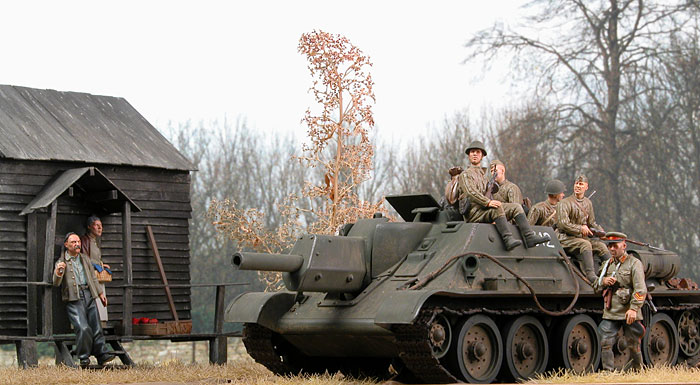
I then painted the entire area with Tamiya Flat earth and once dry then applied white glue to the required areas and layed on a thick layer of coarse Static grass. Once this was dry l then glued everything in place and misted on a very diluted coat of Tamiya buff and then brushed on various earth tones of Mig Pigments again.
This project was a lot of fun for me to build and hope you enjoy it.
Click the thumbnails below to view additional images:
|
|
|
|
|
|
|
|||
Home
![]() Discussion Groups
Discussion Groups
![]() Gallery
Gallery
![]() Articles
Articles
![]() Reviews
Reviews
Copyright
![]() Vendors Room
Vendors Room
![]() Links
Links
![]() Contact us
Contact us
Copyright www.missing-lynx.com 2006
Model and Text by Andrew
Judson
Page Created 15 May, 2006
Page Last Updated
15 May, 2006