|
Broken Bridge |
AFV Club, 1/35 scale |
| |
| by David Porter |


Description
SUMMARY
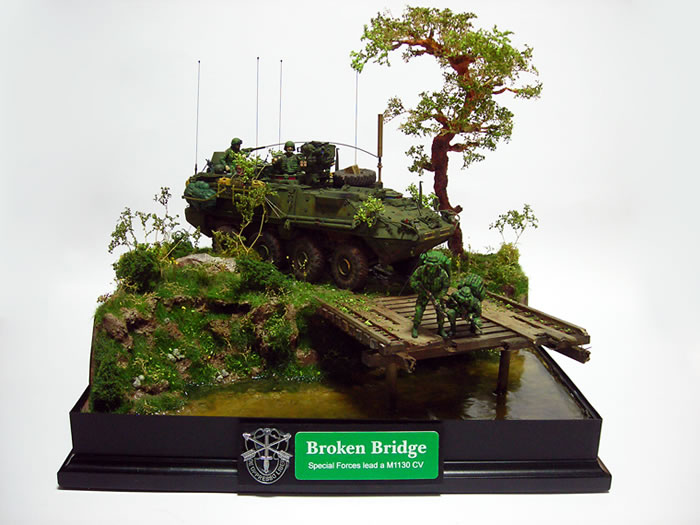
Title: Broken Bridge
Period: Modern
Country: United States of America
Vehicle: Stryker M1130 Command Vehicle diorama with US Special Forces
Scale: 1/35
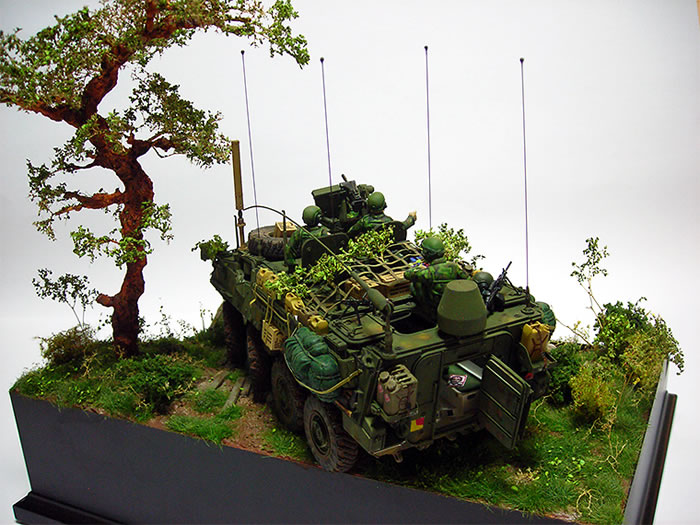
Kits and Accessories: AFV Club M1130 CV/TACP 35130, Trumpeter M1127 Stryker RV TSM395, AFV Club M151 Remote Weapon Station AF35157; Tamiya Modern U.S. Military Equipment Set T35266; Tamiya Modern U.S. Accessory Set T35141, Accurate Armour Carbon Fibre Aerials A094, Eduard Ammunition Belts TP510, Dragon DML3020 U.S. Tank Crew, Dragon DML3024 U.S. Army Special Forces.
Decals: AFC Club kit decals for Stryker and Echelon P353001 US Army & USMC Patches Part 1, & Echelon P353003 US Army & USMC Patches Part 3 for figures.
For this diorama my main incentive was to learn how to put down a large body of water. This was because I had this bee in my bonnet about making dioramas more attractive by using water as a ‘glamour’ element in their basic composition. For this I began with two of Richard Windrow’s reference works, namely; both the Osprey Masterclass works “Terrain Modelling” ISBN 978-1-84176-975-2 and “Advanced Terrain Modelling” 978-1-84176-062-9. These are both available on Amazon and are two of the best books I have seen on this topic, invaluable for kick-starting your diorama.
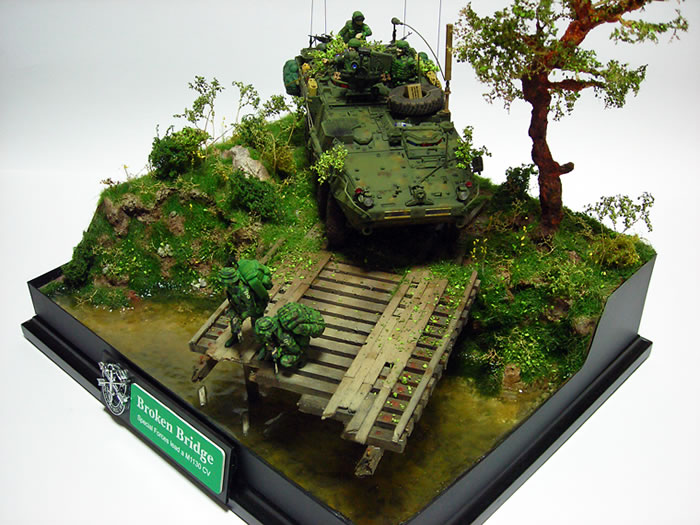
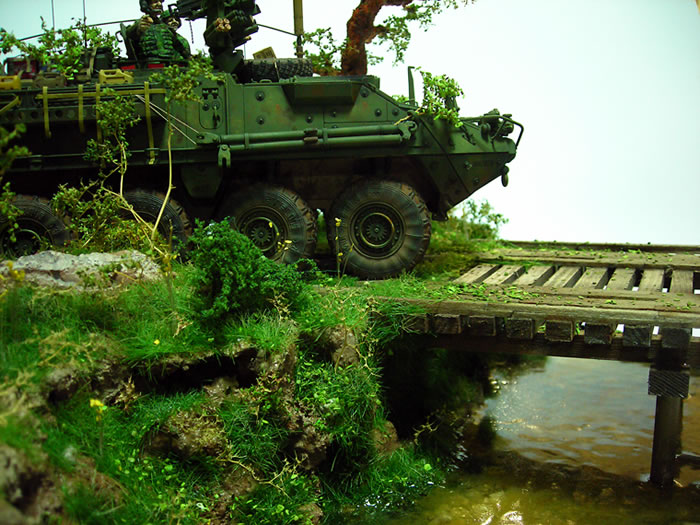
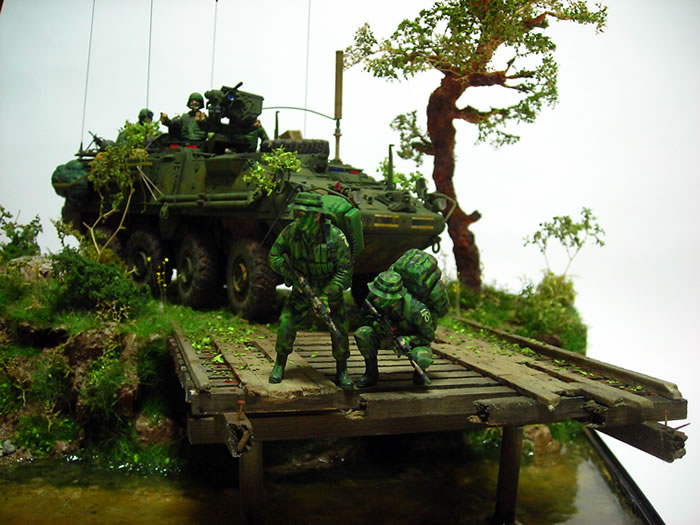
For this model I wasn’t particularly interested in building a super historically accurate representation of a modern military event, but rather making an aesthetically pleasing vignette that despite having some ‘creative license’ was nevertheless believable. My thoughts logically moved from the water to the need for a bridge. The bridge was constructed from balsa and basswood and weathered using a product called “Weather-It” which I picked up from my local store ‘Tom’s Hobbies’ which is a shop in West Ryde (for those that live in NSW) specialising in model rail but nevertheless has many items useful for dioramas of which I included here. To age the wood for the bridge you simply chip it and bash it around a bit and then soak it in the weather-it for that aged look. This worked better on the basswood but was not too effective on the balsa. I used some oil paint wash for the balsa and some airbrushing for the final effect. The tree was constructed from twisted wire and plaster, with leaves of seafoam and scale leaves using Richard Windrows technique. Its not perfect, but is far better than anything obtainable as stock in model shops.
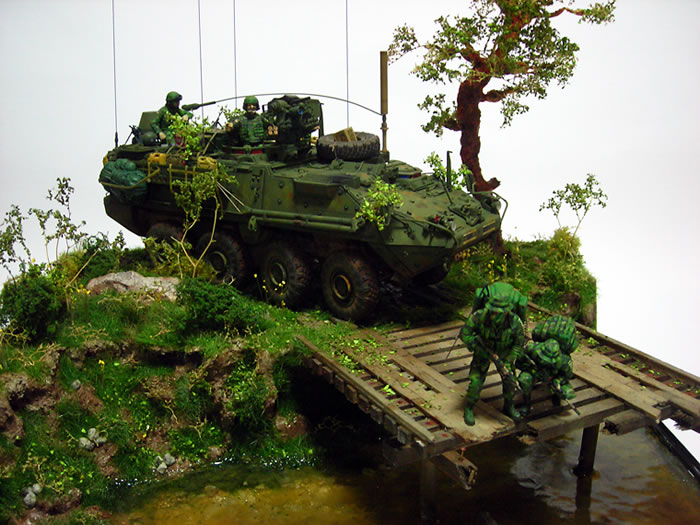
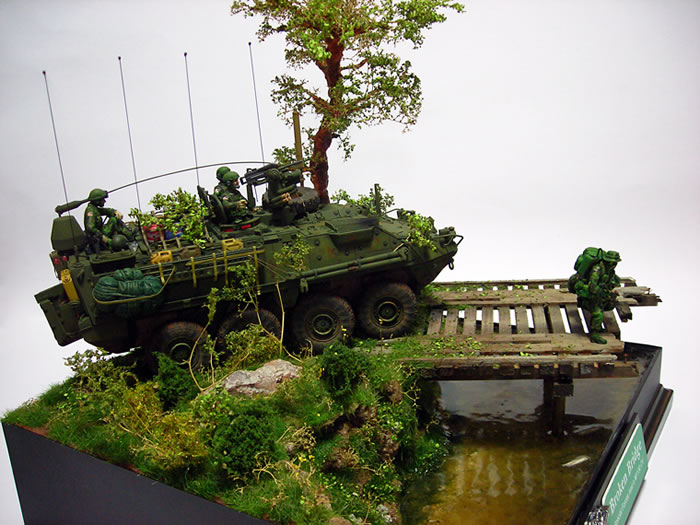
Initially I wanted just to include a couple of Special Forces figures moving through the bush but soon enough my ideas progressed to including a vehicle. In the end I settled on a Special Forces reconnaissance team leading a Stryker through the bush before stumbling on a downtrodden bridge. Since I needed a break from building things with tracks I took an interest in wheeled vehicles and the Stryker took my eye. I made the M1130 CV by combining the best of the AFV Club M1130 kit and the Trumpeter M1127 kit. I found that each kit was better in its own ways so I combined them but mostly stuck to the AFV Club kit since I wanted the M1130 overall. The interior took months and was entirely scratch built from plastic card, metal screws, screens and spare PE kits. A real pain to do. Next time if I build an interior I will wait for an aftermarket item. The Stryker crewman where from the Trumpeter kit are were done out of the box with the exception of the driver and the guy on the back who were from Dragon (not that you can see the driver!). The Special Forces soldiers were DML and are OOB with the exception of their weapons and the wires for the radio. The weapons are M4s, one with a 203 underneath and an ACOG scope added and also a M4 modified with a silencer and a PEQ-2 as part of the SOPMOD kit for the M4, also in this case with the Trijicon ACOG scope.
The diorama base is built on a trophy plaque obtained from a local trophy shop in Gladesville (who also do the badges for me). The diorama is then built up from there in the standard way using polystyrene covered in casting plaster. This was then painted by washes of oil paints and mig pigments before covering with foliage. Once again I refer you back to Richard Windrow’s work on how to do this. For the water - which was my original goal in building this in the first place – I used a product called ‘Diggers – Casting and Embedding Resin’ and its catalyst available in OZ from certain Bunnings hardware stores. You mix 1.5ml of the catalyst for every 100ml of the resin. It smells quite a bit for a day or so, and I allowed three days drying time between each layer of about 10mm. In between each layer I dropped a wash of oil paint. The resin does contract some upon drying so you will have a slight meniscus problem, though this is more a problem for the deeper layers than it is at the edges. What I found was the resin contracted slightly off the rocks on the bottom creating a slight sparkle. This would be solved if I had not used plaster to seal the gaps near the front of the diorama, a little more effort here would have neatened it up some more. A lesson for next time. All in all I used about 400ml of resin and it turned out well enough that I would definitely add water to my dioramas on future. Hope that you enjoy.
If anyone wants more pics or information then feel free to email me at daveporterau@hotmail.com
Model, Images and Text
by David Porter
Page Created 4 April, 2010
Page Last Updated
4 April, 2010
|