|
|
|
|
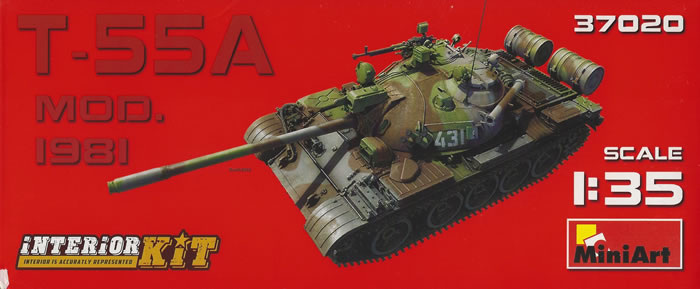
T-55A Model 1981 - Interior Kit
MiniArt, 1/35 scale
Reviewed by Cookie Sewell
Summary
| Stock Number and Description | Miniart 1/35 Scale Kit No. 37020; T-55A Model 1981 - Interior Kit |
| Scale: | 1/35 |
| Media and Contents: | 2,203 parts (1,917 in grey styrene, 259 etched brass, 27 clear styrene) |
| Price: | US retail price US$65.00 |
| Review Type: | First Look |
| Advantages: | Extremely highly detailed kit of this nuclear-war ready T-55 variant; excellent details on parts; accurate road wheel layout, working RMSh tracks |
| Disadvantages: | Still no transmission or radiator/fan assemblies. Tracks account for 684 parts |
| Recommendation: | Highly Recommended for all Soviet Cold War and “55" fans |

FirstLook
While there were only four basic T-55 models produced – the T-55 Model1958, the T-55A Model 1961, and the T-55 and T-55A Model 1969 with AA machine guns added back – they were in constant evolution as new systems and components were introduced.
By 1981 these included the addition of the 12.7mm DShKM machine gun on the loader’s station for anti-helicopter defense, a more compact four-section snorkel for the OPVT system mounted on the turret, Type 902B “Tucha” smoke grenade launchers, modified sights with consideration of new ammunition (HEAT and APDSFS), a KTD-2 laser rangefinder, and R-123 radio sets and R-124 tank intercom systems. They also received the later RMSh rubber-bushed tracks with much longer life spans.
This level of upgrade was later built upon with the addition of the BDD passive armor array package based on experience in Afghanistan, explosive reaction armor arrays, and finally the M series upgrades with new sights, computer fire control, new engines and through-the-bore ATGM capability.
Miniart has now released this version of the T-55A with all of the interim upgrades as well as the RMSh tracks, which if assembled with care are moveable. There are three parts to each one – one link and two external fitted pins – so will take time and care to assemble. Compared to the preceding T-55A Model 1965 kit this one now has 820 new parts added or replacing previous ones.
As with all preceding Interior kits this one has a very complete interior from the bow to the rear of the engine, but once more there is no radiator, transmission, fan or oil cooler provided. A number of those parts have to be replaced as they now replicate the “podboy” fittings, but as many of the T-55 kit parts are retained there will be some for the spares box.
Once again Miniart provides a very detailed manual for this kit with five different finishing options found at either end of the manual, plus a very handy “number jungle” for those wishing other options. There are 110 sprues (!) and three etched brass frets (many are duplicates) to sort through on this kit.
As with all earlier kits assembly begins with the V-55 engine (Steps 1-8) which uses a similar parts breakdown to the early V-2 and V-54 engines.No wiring or cabling is provided or shown and while easily doable will take a manual for the engine to match!
Next is the belly pan and torsion bars with separate mounts for the torsion bars and many other small details. The tank has four lever-type shock absorbers that go on the 1st and 5th road wheel sets. Road wheel arms consist of either four or five parts each (based on whether or not they have a connector for the shock absorbers). This also offers up the upper and lower glacis mounts for engineer-equipment fittings (bulldozers or mine plows).
The interior starts with the fixed floor sections and the driver’s compartment starts with the skid control levers and shifter, which has an etched brass gate for all six speeds (5 forward and reverse). Cable runs are molded together for simplicity. Note that the center section is designed to rotate with the turret when attached; with some finagling it could be left out and attached to the turret base later.
This kit installs more of the interior before adding the sides which is unlike the previous kits. This includes the “stellazh” ammo rack and fuel tank in the right front and the controls for the driver and his SGMT machine gun. Again note that holes must be drilled in the inner side of the driver’s compartment.
The tank has both interior and exterior side panels. The left side begins at Step 18, and there are a lot of details which go on the inside on the new “podboy” fitted part. The right side follows with 100mm rounds racked up on its inside atop that section of “podboy”. Next is the firewall assembly which includes more rounds and internal assemblies to include the air compressor and controls.
The engine, firewall and air cleaner assembly are added next. Once the sides are attached to the hull in Step 35, the glacis is assembled and added.
Wheels start at Step 39 but note that the Station 1 road wheels are different from the Station 2-5 ones; they have the correct larger wheel center bearings and caps. Once the wheels are added to the hull, the hull roof is attached to the lower hull.
Next is the engine deck and rear louver assembly (Steps 45-51). This kit includes the internal armor deflectors for the louvers as well as etched brass screens. The two rear louver assemblies come with protective grill bars made from etched brass which will be a bit fiddly to install. Note that in assembly Step 51 it shows subassembly C - the protective cover over the fan for use in underwater driving - installed down. It can also be installed up leaning on the right 200 liter fuel tank so it will be your choice.
The tracks now come next, and Miniart notes they have the pins provided with small pips for making installation easier (sort of like a small handle) which must be removed from the sprue and then cut off after installation. They recommend no cement be used in assembly. 91 links are indicated as providing the correct length with sag – properly adjusted tracks touch the top of the center (No. 3) road wheel when at rest.
The right fender with fuel tanks and fuel lines is next. This one has the 20 liter oil tank and pump on the right fender as well. The kit provides late style pressed steel 95 liter fuel tanks. This is followed by the left fender with the ZIP bins and tools. Prior to installation of the fenders the tracks go on, with 90 links per side. The tow cables are added, but no wire or string seems to be provided and oddly enough only an asterisk indicates the cable. I could not find one in my kit so guess you are on your own, which seems odd considering how complete the rest of the kit is.
The auxiliary fuel tanks attach with etched brass straps and separate tie-down loops (Steps 71-72). Some may need to be annealed (heat treated) to make them more flexible however.
Assembly of the turret begins at Step 74. This tank uses the “Tsiklon” stabilizer system plus the relocated ventilator and five ready rounds plus an R-123 radio set. It even provides for one round in the breech. Much of the basic gun and mount appear carried over from the T-54B kit, which is correct. The SGMT machine gun and ammo box are nicely done and the complete mount and gun requires 15 parts. The gunner’s seat includes ammo for the SGMT and guards so is quite an impressive subassembly.
But there is a new level of detail inside the turret as it now has to be fitted with all of the sections of “podboy” liner as well as details; also for once the gun is fixed in elevation due to the concentration on accuracy over operating features.
Externally you have some options such as the clear sight window or just the frame for the direct fire sight. Both the main and commander’s IR searchlights are also nicely detailed. Two lens options are given for the auxiliary headlight - either smooth (IR) or lined (white light). The mantlet cover comes in four sections to cover the beading detail but the main gun barrel is in one piece. Rain seal fittings are made of etched brass. Note that this kit now offers three HEAT rounds and one APFSDS round for use in the turret ready rack vice the older AP and HE-FRAG rounds.
The DShKM installation begins at Step 112 and consists of some 27 parts for the gun and mount. The KTD-2 comes with the option of open or closed lenses at the front.
The rear of the turret may be fitted with the stowage tarp but also includes the foul weather hood for the driver (here either folded and stored or opened up for installation on the driver’s hatch). Assembly takes 125 steps over 31 pages.
Finishing options for five tanks plus a number jungle are provided on its nicely done decal sheet. The options include: Limited Contingent of Soviet Troops in Afghanistan, 40th Army, Turkestan MD, 1980s (protective green, bort number 202); unidentified VMF (Naval Infantry) unit, 1980s (protective green, bort number 513, VMF flag on glacis); Suggested Desert Camouflage, standard practice circa 1977 (protective green with sand brown bands, bort number 307); Suggested Woodland Camouflage, standard practice circa 1977 (protective green with grey bands, bort number 431); Suggested Winter Camouflage, standard practice circa 1977 (protective green with white bands, bort number 301). The sheet also includes an anchor insignia for the VMF Naval Infantry.
Overall, while possessing the largest number of parts for a 1/35 scale tank kit that I have ever encountered, assembly is logical and fit is not bad. As with all other “Interior” kits a less expensive exterior only kit should come coming later.
Sprue Layout:
A 12 - T-55 sides, hull roof, turret base, engine deck
B 31 - Belly pan, fenders, hatches, final drives, details
Ca 48 - 14 x 100mm rounds, interior controls and details
Cb 41 - Turret floor, interior components
Da 62 - Exterior details - lights, fuel lines, linkages
Db 46 - Engine deck details, OPVT frame, louvers, covers, fender braces
Eb 37 – Turret shell, hatches, details, Tucha launcher tubes
Fa 33 - Interior “podboy” liner elements, 3 x 100mm rounds, details
Fb 30 - Interior “podboy” left hull side, commander’s roof and cupola, details
Ga 1 - D-10T2S gun barrel
Gb 38 - D-10T2S details, breech, recoil mechanism
Gc 23 - V-55 engine block and base elements
Gd 19 - ZIP bins
H 5x6 - Five100mm rounds, guard
Ha 18 - Fuel lines, covers, components
Hb 24 - Engine block, mounts, details
Hd 8x4 Jounce stops, details
Hj 2x7 -12.7mm ammo can
Hm 8x6 “Starfish” wheel sets, torsion bars
Hn 6x4 100mm round, ammo can, air tank, details
Ho 10x4 Road wheel arms, details
J 18 – 12.7mm DShKM machine gun and mount
Jb 14 - Interior details
Kd 17x2 - Drivers, idlers, idler mounts
N 51 - Turret floor, stabilizer components, interior details
Na 41 - Turret interior, 100mm rounds, details
P 55 - Gun guards and details, radio, turret details
Pa 13 - Searchlights
Pb 12 - Glacis, lights, wave breaker
S 40 - T-54A/B hull sides, fenders, firewall, details
T 12x2 - Hull details, shovel
Ta 4x2 - Idlers, driver outside ring
Tc 16x3 - Turret hand rails, hand holds, torsion bar mounts
Td 4x3 - Shock absorber fitted road wheel arms
Ub 27 - Clear styrene
Uc 16 – laser range finder, mantlet
Wa 4x2 – 7.62mm Ammo cans
Wb 4x2 – RMSh drivers
Wc 27 – new 100m rounds, “Podboy” liner sections, details
Wd 10 – Interior details
We 3x3 - 95 liter fender fuel tanks
Wf 4x2 - ZIP bins
Wg 11x2 – Details
Wh 18x2 - 200 liter auxiliary fuel tanks, tow hooks
Wi 12x4 - 200 liter tank mounts, tow cable heads, details
Wj 6x2 - Station 1 “Starfish” road wheels
Wk 3x2 Details
Wm 7x4 - 2 x 100mm rounds, details
Y 36x19 – RMSh tracks (working single link)
PEa 22 - Etched brass
PEb 147 - Etched brass
PEc 90 – Etched brass
Home
![]() Discussion Groups
Discussion Groups
![]() Gallery
Gallery
![]() Articles
Articles
![]() Reviews
Reviews
Copyright
![]() Vendors Room
Vendors Room
![]() Links
Links
![]() Contact us
Contact us
Copyright www.missing-lynx.com 2018