|
|
|
|
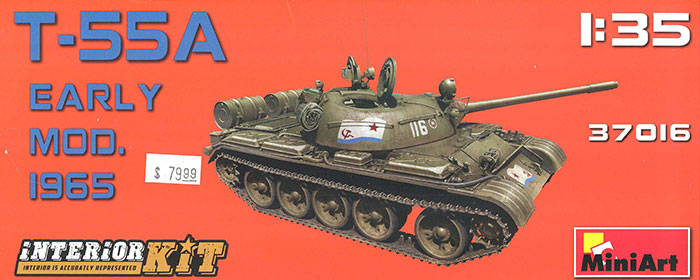
T-55A Model 1965 - Interior Kit
MiniArt, 1/35 scale
Reviewed by Cookie Sewell
Summary
| Stock Number and Description | Miniart 1/35 Scale Kit No. 37016; T-55A Model 1965 - Interior Kit |
| Scale: | 1/35 |
| Media and Contents: | 1,500 parts (1,318 in grey styrene, 155 etched brass, 27 clear styrene) |
| Price: | US retail price US$79.95 |
| Review Type: | First Look |
| Advantages: | Extremely highly detailed kit of this nuclear-war ready T-55 variant; excellent details on parts; accurate road wheel layout |
| Disadvantages: | Still no transmission or radiator/fan assemblies |
| Recommendation: | Highly Recommended for all Soviet Cold War and “55" fans |

FirstLook
Soon after the T-55 entered production, the Soviet General Staff began to seriously examine the prospect of tactical nuclear warfare. They found that the armor protection on all of their tanks was not able to stop gamma radiation, the most dangerous problem on the battlefield, nor could they prevent the ingestion of radioactive dust into their tanks.
Their research led them to develop a hydrogen-infused plastic called VOD which was found to slow or stop the neutron radiation from leaking into the tank, and that drastically increased the survivability of the crew. This was added to the tank as an internal liner (“podboy” in Russian) to the inhabited parts of the tank, and where the liner could not be fitted such as hatches and some parts of the turret an external applique (“nadboy”) was used. Also the tank was fitted with automatic seals and a small compressor to create overpressure inside the inhabited parts of the tank to keep out the radioactive dust.
This version was introduced in 1961 as the T-55A medium tank and later a T-55AK command version as well. It mirrored the Model 1958 T-55 in that it had no external AAMG mount when introduced. It was designed at Omsk and most of the tanks were built their by Factory No. 174 rather than in Nizhniy Tagil, albeit some were also built in Kharkov.
These tanks went into full production in 1962 and entered service in 1963. About one tank in four produced was an A model as not all tanks were seen as having to occupy a nuclear contaminated battlefield.
The tanks were produced through 1979 and as of 1990 some 2,800 were still in Soviet service.
There is a line in the movie “Beetlejuice” where he gives his qualifications, one of which is the fact he has seen “The Exorcist” 167 times and it keeps getting funnier every time he sees it. In a similar vein, Miniart continues to make great kits of the T-54/T-55 family and they keep getting better every time a new one comes out!
This kit builds on their excellent T-55 Model 1963 (No. 37018) and has now added 124 new parts for the different external hatches and the complete “podboy” liner suite inside the hull. Miniart designates this kit as a “Model 1965" but as with the Model 1963 I cannot place any such version per se. It does have the new front road wheel hubs and upgraded headlights used after 1964, as well as slightly different fittings for the OPVT-54B snorkel tube.
As with its predecessor kits this one has a very complete interior from the bow to the rear of the engine, but once more there is no radiator, transmission, fan or oil cooler provided. A number of those parts have to be replaced as they now replicate the “podboy” fittings, but as many of the T-55 kit parts are retained there will be some for the spares box.
Once again Miniart provides a very detailed manual for this kit with no less than nine different finishing options. This kit comes with nine finishing options found at either end of the manual. There are 95 sprues and two etched brass frets (many are duplicates) to sort through on this kit.
As with all earlier kits assembly begins with the V-55 engine (Steps 1-8) which uses a similar parts breakdown to the early V-2 and V-54 engines.No wiring or cabling is provided or shown and while easily doable will take a manual for the engine to match!
Next is the belly pan and torsion bars. These are new mold parts with separate mounts for the torsion bars and many other small details. The tank has four lever-type shock absorbers that go on the 1st and 5th road wheel sets. Road wheel arms consist of either four or five parts each (based on whether or not they have a connector for the shock absorbers). This also offers up the upper and lower glacis mounts for engineer-equipment fittings (bulldozers or mine plows).
The interior starts with the fixed floor sections and the driver’s compartment starts with the skid control levers and shifter, which has an etched brass gate for all six speeds (5 forward and reverse). Cable runs are molded together for simplicity. Note that the center section is designed to rotate with the turret when attached; with some finagling it could be left out and attached to the turret base later.
This kit installs more of the interior before adding the sides which is unlike the previous kits. This includes the “stellazh” ammo rack and fuel tank in the right front and the controls for the driver and his SGMT machine gun. Again note that holes must be drilled in the inner side of the driver’s compartment.
The tank has both interior and exterior side panels. The left side begins at Step 18, and there are a lot of details which go on the inside on the new “podboy” fitted part. The right side follows with 100mm rounds racked up on its inside atop that section of “podboy”. Next is the firewall assembly which includes more rounds and internal assemblies to include the air compressor and controls.
The engine, firewall and air cleaner assembly are added next. Once the sides are attached to the hull in Step 35, the glacis is assembled and added.
Wheels and tracks start at Step 37 but note that the Station 1 road wheels are different from the Station 2-5 ones. Once the wheels are added to the hull, the hull roof is attached to the lower hull.
Next is the engine deck and rear louver assembly (Steps 45-51). This kit includes the internal armor deflectors for the louvers as well as etched brass screens. The two rear louver assemblies come with protective grill bars made from etched brass which will be a bit fiddly to install. Note that in assembly Step 51 it shows subassembly C - the protective cover over the fan for use in underwater driving - installed down. It can also be installed up leaning on the right 200 liter fuel tank so it will be your choice.
The right fender with fuel tanks and fuel lines is next. This one has the 20 liter oil tank and pump on the right fender as well. The kit provides for both early and late style pressed steel 95 liter fuel tanks so you also have that option. This is followed by the left fender with the ZIP bins and tools. Prior to installation of the fenders the tracks go on, with 90 links per side. The tow cables are added, but no wire or string seems to be provided and oddly enough only an asterisk indicates the cable. I could not find one in my kit so guess you are on your own, which seems odd considering how complete the rest of the kit is.
The auxiliary fuel tanks attach with etched brass straps and separate tie-down loops (Steps 60-64). Some may need to be annealed (heat treated) to make them more flexible however. This one also racks up the OPVT-54B two-section snorkel under the fuel tanks with loops that simulated bolts now hold to the 200 liter fuel tank brackets.
Assembly of the turret begins at Step 66. This tank uses the “Tsiklon” stabilizer system plus the relocated ventilator and five ready rounds plus an R-113 radio set. It even provides for one round in the breech. Much of the basic gun and mount appear carried over from the T-54B kit, which is correct. The SGMT machine gun and ammo box are nicely done and the complete mount and gun requires 15 parts. The gunner’s seat includes ammo for the SGMT and guards so is quite an impressive subassembly.
But there is a new level of detail inside the turret as it now has to be fitted with all of the sections of “podboy” liner as well as details; also for once the gun is fixed in elevation due to the concentration on accuracy over operating features.
Externally you have some options such as the clear sight window or just the frame for the direct fire sight. Both the main and commander’s IR searchlights are also nicely detailed. Two lens options are given for the auxiliary headlight - either smooth (IR) or lined (white light). The mantlet cover comes in four sections to cover the beading detail but the main gun barrel is in one piece. Rain seal fittings are made of etched brass.
The rear of the turret may be fitted with the stowage tarp but also includes the foul weather hood for the driver (here either folded and stored or opened up for installation on the driver’s hatch). Assembly takes 104 steps over 29 pages.
Finishing options for nine tanks are included as are specific decal markings. They are: Romanian Army, 1990s (protective green with roundels, bort number 5049); Red Army parade markings, 1960s-70s (protective green with white trim, Guards badges); Somali Army, Ogaden War 1977 (protective green with national markings front and rear); Soviet Naval Infantry, 1970s (protective green with VMF flag, bort number 512); Red Army, 1960s-70s (protective green, bort number 423); Hungarian People’s Army, Operation Danube, August 1968 (protective green, white diamonds, white cross marking); 55th Soviet Naval Infantry Division, Pacific Fleet, Ethiopia 1980 (protective green with VMF flag, white square in circle, bort number 116); Yugoslav People’s Army, 1980s (protective green, bort number 18131); Hungarian Army, 1990s (protective green, national pennant flash, white circle with half colored in, bort number 122). A large decal sheet and two supplemental ones cover the markings.
Overall this second T-55 kit is even better than the first, and already a “Model 1981" (upgraded one with AAMG, LRF and smoke grenade launchers) has been listed to come. Keep in mind that the stunning number of parts also includes 190 track links as well as close to 100 parts not used in this kit! As with all other “Interior” kits a less expensive exterior only kit is coming later.
Sprue Layout:
A 12 T-55 sides, hull roof, turret base, engine deck
B 31 Belly pan, fenders, hatches, final drives, details
Ca 48 14 x 100mm rounds, interior controls and details
Cb 41 Turret floor, interior components
Da 62 Exterior details - lights, fuel lines, linkages
Db 46 Engine deck details, OPVT frame, louvers, covers, fender braces
Ea 13 Turret shell, mantlet, right roof section, details
Fa 33 Interior “podboy” liner elements, 3 x 100mm rounds, details
Fb 30 Interior “podboy” left hull side, commander’s roof and cupola, details
Ga 1 D-10T2S gun barrel
Gb 38 D-10T2S details, breech, recoil mechanism
Gc 23 V-55 engine block and base elements
Gd 19 ZIP bins
H 6x6 5 x 100mm rounds, guard
Ha 18 Fuel lines, covers, components
Hb 24 Engine block, mounts, details
Hd 8x4 Jounce stops, details
Hf 19x10 OMSh track links
Hm 8x6 “Starfish” wheel sets, torsion bars
Hn 6x4 100mm round, ammo can, air tank, details
Ho 10x4 Road wheel arms, details
Jb 14 Interior details
Kd 17x2 Drivers, idlers, idler mounts
N 51 Turret floor, stabilizer components, interior details
Na 41 Turret interior, 100mm rounds, details
P 55 Gun guards and details, radio, turret details
Pa 13 Searchlights
Pb 12 Glacis, lights, wave breaker
S 40 T-54A/B hull sides, fenders, firewall, details
T 12x3 Hull details, shovel
Ta 4x2 Idlers, driver outside ring
Tc 16x3 Turret hand rails, hand holds, torsion bar mounts
Td 4x3 Shock absorber fitted road wheel arms
Ub 27 Clear styrene
Ud 16 Left interior wall, left turret roof, commander’s cupola, hatches
Ue 10 Interior “podboy” right side, loader’s hatch, details
Wa 4x2 Ammo cans
We 3x3 95 liter fender fuel tanks
Wf 4x2 ZIP bins
Wh 18x2 200 liter auxiliary fuel tanks, tow hooks
Wi 12 200 liter tank mounts, tow cable heads, details
Wj 6x2 Station 1 “Starfish” road wheels
Wk 3x2 Details
Wm 7x4 2 x 100mm rounds, details
PEa 135 Etched brass
PEb 20 Etched brass
Home
![]() Discussion Groups
Discussion Groups
![]() Gallery
Gallery
![]() Articles
Articles
![]() Reviews
Reviews
Copyright
![]() Vendors Room
Vendors Room
![]() Links
Links
![]() Contact us
Contact us
Copyright www.missing-lynx.com 2018