|
|
|
|
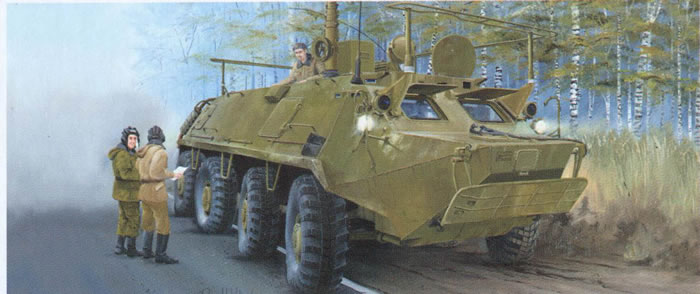
Trumpeter 1/35 scale Kit No. 01576; Russian BTR-60PU
Trumpeter 1/35 scale
Reviewed by Cookie Sewell
Summary
| Stock Number and Description | Trumpeter 1/35 scale Kit No. 01576; Russian BTR-60PU |
| Scale: | 1/35 |
| Media and Contents: | 580 parts (473 in grey styrene, 67 etched brass, 23 clear styrene, 8 black vinyl, 8 clear vinyl, 1 length of copper wire |
| Price: | USD $53.99 |
| Review Type: | First Look |
| Advantages: | First kit of this vehicle in styrene; nicely done driveline, full interior in the control and fighting compartments |
| Disadvantages: | Model is NOT a BTR-60PU! (See Text) |
| Recommendation: | Highly Recommended for Soviet and “Third World” armored vehicle and wheeled armor fans |

FirstLook
During WWII the Soviets realized how backward both their doctrine and their electronics industry really were when they began to examine both captured German vehicles and their Lend-Lease equipment from the US.
In the case of the former they found that the Germans succeeded more often as not in spite of having poorer armored vehicles and artillery compared to the Soviets as they were able to control it better via combination radio sets in command vehicles. A good commander could coordinate his attacks with infantry, artillery and often close air support; the Soviet commander facing him for the first half of the war was stuck to a few short-range radio sets, flags, whistles and bugles.
In the case of the latter they found the US had excellent VHF FM radio sets which had clear reception and good range, plus the armored vehicles had a slight overlap at each end of their radio spectrum to speak to either infantry or artillery when needed. US command vehicles also had compact high-power HF AM radio sets for longer range communications with rear headquarters and occasionally ground-to-air liaison sets for controlling close air support as well.
In the 1950s the Soviets completely redid their radio industry and switched over to VHF FM radio sets for most tactical communications, leaving HF AM for long range command and control. A standard combination of command vehicle radios such as the R-125 series had a pair of dedicated arm of service VHF FM sets, a single VHF FM maneuver radio sets, an HF AM command set, and an HF AM receiver to monitor the weather or nuclear warning net.
Their first dedicated armored command vehicles, the BTR-152K and BTR-50PU, were bigger and bulkier than the line vehicles they supported, so in the late 1960s they switched over to the new BTR-60P chassis for a dedicated series of armored command vehicles. There were two basic vehicles used: the R-145B “Chayka” which was the maid-of-all-work command vehicle for combined arms and artillery, and the PU-12 air defense command and control vehicle for air defense units. Both were dubbed “BTR-60PU” as a general term.
The R-145BM model – many of which are still in service – was fitted with two R-111 high-power VHF radios, one R-123M VHF set for maneuver (e.g. convoy control), one R-130M HF AM long range radio, one R-323 HF AM receiver, and in some cases a T-217 cryptologic device and T-012 automated calling device. This was the primary command and control vehicle at battalion and above in support units and regiment and above in motorized rifle and tank units.
The PU-12 was fitted with a large number of input devices for direct radar feeds from various types of radars, all of which were processed and presented on a scope for the controller to see where the air threats were developing. He used a mouse-like device to track them and send data out to his subordinate units such as SA-8 or SA-13 batteries, but any other units had to receive data by voice as they lacked the data feed devices. This vehicle used an R-111 radio for command, an R-407 simplex/duplex VHF radio for data feeds, and an R-123 for maneuver.
Visually the difference between an R-145BM and a PU-12 was the presence of a large rail antenna (not too subtly called CLOTHES RAIL by NATO) for the R-130M radio. The Soviets preferred a method of communications called near vertical incidence skywave or NVIS and that would give them a communications range of 50-350 kilometers from a fixed position. The R-145BM had it, the PU-12 did not.
Trumpeter has released another variant in its excellent BTR-60P family and this was designated the BTR-60PU by them. A total of 230 new parts are added to this kit over the PB version. But I say that while it comes with a full interior including all of the radios and racks found in the original, it is NOT quite accurate. By examining the parts, what Trumpeter has provided is a complete kit of the PU-12 air defense vehicle, not the R-145BM. Having actually had the chance to “operate” a PU-12 which was captured in Iraq, this is the interior with one R-111, the R-407, and the radar tracking position for the controller in the rigth rear of the troop compartment.
Externally as noted the R-145BM has the big CLOTHES RAIL antenna and the PU-12 does not; ergo Trumpeter got it exactly backwards.
Other than that, this kit matches its predecessors for quality. Many parts are well protected (delicate ones are wrapped in foam inside the poly bag) and it also comes with two frets of etched brass. The kit also provides for a complete interior to the “control compartment” - the Russian term for the driver’s and commander’s seat area – with all of the PU-12 items in the troop compartment.
Its construction is more akin to recent kits like the AFV or Trumpeter Stryker vehicles than the old DML BTRs. The first four steps cover just attaching the bump stops and suspension A frame brackets to the lower hull. You also have an option for the early (winch in the front of the hull plate) or late (absent) hull front plates. Also, the hull pan needs to be modified to correct it for the PB by removing bits from the P kit.
It takes nine full steps before the lower hull pan is flipped over to start on the interior. Given the details on these kits it is odd they do not provide an etched grating for the water jet intake on the rear of the hull floor.
Step 10 covers the fixed parts of the interior; note that holes must be drilled for some options in this kit.
Step 12 begins interior assembly with the racks and mounts for the electronics being installed; note that some are styrene and some are etched brass requiring bending to shape. This version has two seats at the front for the driver and commander and the rear seat for the radio operator/radio mechanic, the commander/controller and another crew member. (Interior is white with grey floor, but the boxes are either silver or black based on era of construction; radios tend to be silver and the rest black.)
Oddly enough in Step 19 the R-123 radio (R-15/R-22) is shown being installed backwards – the control panel faces the driver/commander, NOT the sidewall! Also a decal is provided for the driver’s instrument panel, but as it is embossed many may simply want to paint and drybrush it.
Step 21 starts the upper hull assembly but as noted “Estate One” is the R-145BM version and “Estate Two” is the PU-12. Note that if installed at this point parts J11 – the clear glass windscreens - will need to be masked. If building the PU-12 fill in the attachment points for the mast in Steps 30 and 31 for the supports and leave off the antenna itself in Step 32. Both versions do have the extendable mast (provided in retracted mode only).
Decals and finishing directions are only provided for two Czech vehicles, but as they have reversed the PU-12 and R-145BM I suggest swapping markings.
Soviet era vehicles are usually given numbers in the 00x range within a regiment or higher, and as there are usually two or three around you can number them from 001 upward. The PU-12 today would be in the air defense element (regiment or battalion) and be given a 60x number. Some today sport the current camouflages of their parent units, so some research on the Internet should give some good options.
Overall, both these vehicles are in wide use and very handy, but my assessment of the kit is this: for a PU-12, Highly Recommended; for an R-145BM with the hatches closed, Highly Recommended; but for an R-145BM with hatches open, Recommended with Reservations. Hopefully someone will do a proper resin interior for an R-145BM.
Sprue Layout:
A 32x4 Two wheels, drive line elements
C 43 Interior details - steering wheel, R-123 radio, fittings
C 2x4 Outer wheel halves
D 25x2 Seats, suspension links
F 17x2 Hand rails, external detail parts
J 23 Clear styrene
K 12 Floor, sidewalls, fenders
L 37 Hull details, wave breaker, hatches
M 23 Engine deck, guard, details
R 31x2 Command interior seats, mounts, details
U 86 Interior details, radios, scopes, detail boxes, mast elements
Y 31 CLOTHES RAIL antenna, mast, mountings
– 8 Vinyl tires
– 8 Vinyl keepers
– 1 Upper hull
– 1 Lower hull
– 26 Etched brass
– 41 Etched brass
– 1 Length of copper wire
Thanks to Mike Benolkin of Cybermodeler for the review sample.
Home
![]() Discussion Groups
Discussion Groups
![]() Gallery
Gallery
![]() Articles
Articles
![]() Reviews
Reviews
Copyright
![]() Vendors Room
Vendors Room
![]() Links
Links
![]() Contact us
Contact us
Copyright www.missing-lynx.com 2013