|
|
|
|
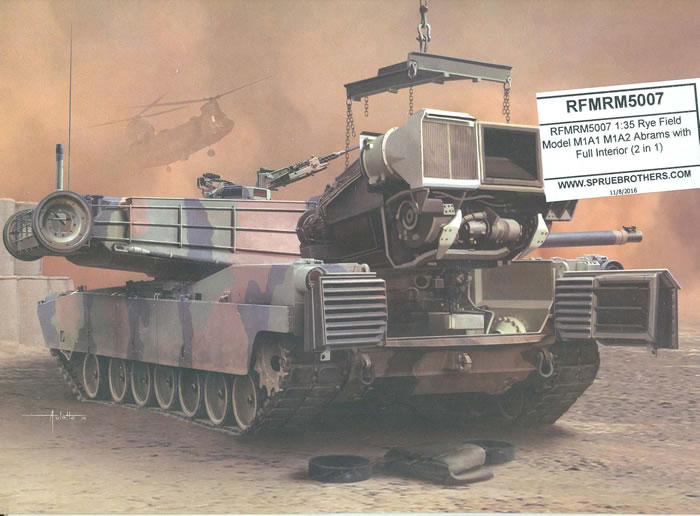
| Home > Reviews > Modern > Rye Field Model 1/35 Scale Kit No. RM-05007; M1A1/A2 Abrams Main Battle Tank 2-in-1 w/Full Interior- M1A1 TUSK / M1A2 SEP Abrams TUSK 1 / M1A2 SEP Abrams TUSK II |
M1A1/A2 Abrams Main Battle Tank 2-in-1 w/Full Interior- M1A1 TUSK / M1A2 SEP Abrams TUSK 1 / M1A2 SEP Abrams TUSK II
Ryefield Model, 1/35 scale
Reviewed by Cookie Sewell
Summary
| Stock Number and Description | Rye Field Model 1/35 Scale Kit No. RM-05007; M1A1/A2 Abrams Main Battle Tank 2-in-1 w/Full Interior- M1A1 TUSK / M1A2 SEP Abrams TUSK 1 / M1A2 SEP Abrams TUSK II |
| Scale: | 1/35 |
| Media and Contents: | 1,722 parts (860 in dark grey styrene, 448 in tan styrene, 205 in light grey styrene, 131 etched brass, 78 clear styrene). |
| Price: | TBA |
| Review Type: | First Look |
| Advantages: | All-in-one kit permits building anything from mid production M1A1 tanks through early upgraded M1A2 tanks; interior for turret, driver’s compartment, ammo bay and engine bay. |
| Disadvantages: | Five piece “workable” tracks are tedious; many, many very small styrene and etched brass parts |
| Recommendation: | Highly Recommended for all Desert Storm and Iraqi Freedom M1 fans |

B a c k g r o u n d
29 years ago I received one of only two reprimands for improper receipt of classified materials in my career. I had ordered a number of documents from Warren Tank & Automotive on early US armored personnel carriers (M44, M75, M59) and after several weeks a package showed up in my office (G-2, 3rd US Armored Division). My lieutenant (all warrant officers need one!) opened it up while we were talking and handed it to me. It was addressed to G-2 3AD so thought it was the one I ordered; but when I opened it up it was classified with special compartmented code words and turned out to be a cross section of the turret and hull of the M1A1 tank. We reported it and G-2 Security (who was supposed to get it) wrote me up.
We went in to see the G-2 (a lieutenant colonel and my boss) and the Security captain was in high dudgeon over it. The G-2 asked where I was when I opened it up and I told him the SCIF - Sensitive Compartmented Information Facility, the most secure part of the division headquarters. He looked at, said “don’t do it again” and ripped up the captain’s violation request.
Needless to say I was impressed with what little I did see about the Abrams, and have always thought about doing one with the unclassified parts of the interior to it. While there are a good number of various M1s on the market from DML, Trumpeter, Academy and Tamiya this new effort from Rye Field Model of Hong Kong is the first one to provide a fairly detailed interior for the turret, the driver’s compartment, and the engine bay. It also offers two different versions of the M1A1, the Desert Storm variant and the later Iraqi Freedom M1A2. The main differences between them are the addition of the commander’s independent thermal viewer (CITV) on the front left of the turret roof, the final design of auxiliary power unit (APU) in the bustle rack, and the new commander’s cupola with the manual control M2HB machine gun.
F i r s t L o o k
This kit comes with the box literally stuffed with over 1,700 parts and is some 120mm thick. The parts are in four different colors of styrene and also three frets of etched brass.
The tracks are probably going to be the section of assembly many modelers are going to hate. Each track link consists of six parts: the guide tooth, two top and two bottom track pad sections, and a molded two-bar link assembly with end connectors in place. They do provide two little jigs for assembly of the tracks, as they are deemed to be workable, but it will take a long time to clean up the parts and assemble them. The kit needs 156 links (78 per side) so there are NO extras. They also only build the later “Big Foot” style tracks and not the earlier chevron type, which were in transition during Desert Shield/Storm.
There are a lot of options with this kit and Rye Field does call them out as to which vehicle has which parts used to complete it. These include the two different commander’s cupolas and M2HB fits, two different bustle racks, different options for the bustle blow-off panels, two different driver’s hatches, two different front mud guards, two different intake grilles for the engine deck, two different access panels, and a good number of jerry cans, water jugs, ammo cans and separate water bottles for stowage.
Oddly enough for a tank kit, this model begins assembly with the turret. The M256 gun is put together from sections that are slide molded with six parts for the gun tube and bore evacuator. 10 more parts from the recoil mechanism and mantelet and four more the breech. After the loader’s station is assembled, the directions offer two paths: one for the remote control machine gun station for the commander (A1) or the later improved manual control one (A2). As this is only up to Iraqi Freedom there are no “crow’s nest” parts for either the commander or loader and no TUSK options with this kit.
The kit is based on the full production M1A1 and comes with the blanking plate for the A1 without the CITV or with the viewer for use with the A2. There are two different options for the A1 and A2 blow-off panels, but as the kit comes with the full ammo load for the bustle stowage you may wish to leave them loose to view the ammo if desired.
The grenade launchers also offer either with or without protective caps for the tubes.
In Step 6 the interior begins with the turret basket assembly and again there are differences between the A1 and A2 here. Fittings differ based on the two tanks as you move along. Ammunition consists of grouped rounds with separate grouped stub casings (“pucks”) so they can simplify painting as well. Two completely different sighting systems for the gunner are offered. The Iraqi Freedom IR reflector panels are also provided for the A2.
The supplemental bustle rack (subassembly L) is fitted in Step 14, but it is only in the last step (Step 27) it shows the APU being fitted; however, this was not available for Desert Storm and was a later upgrade to the tank. But if not installed, there is a blank spot in the etched metal grille for the rack.
The lower hull has a large number of small details to be added, but it does provide separate torsion bars to the suspension. Road wheel pairs all come with the correct clear plastic grease caps. The driver’s compartment comes with the correct “lounge chair” driver’s seat and different instrument groups for the A1 and A2.
Steps 21 and 22 cover the assembly and installation of the air cleaner assembly which is quite bulky. The engine is relatively small as it is a turbine but is still neatly detailed. The last components are the exhaust shroud and heat exchangers.
Holes for an A2 assembly need to be drilled in Step 24 for assembly in Step 25. Tracks and the engine deck follow in Step 25. Note that the directions are somewhat fouled up, as there are two Step 25s and no Step 26 (which is added as an inserted sheet!) That is an important step a it covers the exhaust grille and the heat exchanger grilles as well.
The last items installed are the skirts, which come complete but photos show most tankers did not use the last panel with cutout (B9/B10) in service. Each panel has extra details and brass strips for their attachment to the tank. Standoff rods (C28) are also included.
The directions are a neat booklet with color plates for finishing options as well as a color cutaway of the M1A1 (unclassified here!) Finishing covers four vehicles, but all paints are only keyed to MIG Ammo paints. The names are given and will have to be cross indexed as none of the FS 595a designations are provided.
The kit does come with two Cartograf sheets, one for all stenciling and panels inside and outside the tank. The finish options are for: M1A1 NATO tricolor tank, in European service (no bumper codes provided); M1A1, B24 3-7 CAV, 3rd US Infantry Division (sand with black markings and preservation/shipping markings); M1A2, B66 “Beastmaster”, 1-47 Armor (sand with black markings); M1A2 “Can’t Get it Right”, no bumper codes (sand with black markings).
C o n c l u s i o n
Overall this is a superb effort and one with a lot of options. USMC fans may be a bit disappointed there are none of the Marine options such as the wading stack and fittings but those could be purloined from another kit. Also better marking options are available from after-market sets. Some will want to replace the tracks with those which are simpler to assemble.
Sprue Layout:
A 12 Upper hull, engine deck, details
B 41 Skirts, side panels, APU, crow’s nest parts
C 91x2 Wheels, torsion bars, drip pans, details
D 30 Turret, bustle rack, rear exhaust grilles
E 121 Turret details, commanders’ cupolas, machine guns
F 82 Main gun, mantlet, drivers’ hatches, hull details
G 43 Turret interior walls, driver’s compartment
L 76 Turret interior components
N 38 Turret ammunition compartment components
0 50x2 Fuel cans, water jugs, ammo cans, .50 machine gun
P 48 Engine and transmission assembly
T 78 Clear styrene
X 64x4 Guide teeth
Y 112x4 Track pads
Z1 115 Etched brass
Z2 14 Etched brass
Z3 2 Etched brass
– 1 Lower hull pan
– 2 Track assembly jigs
– 156 Track pins (frames)
Home
![]() Discussion Groups
Discussion Groups
![]() Gallery
Gallery
![]() Articles
Articles
![]() Reviews
Reviews
Copyright
![]() Vendors Room
Vendors Room
![]() Links
Links
![]() Contact us
Contact us
Copyright www.missing-lynx.com 2016
![]()
Text and Images by Cookie Sewell
Page Created 27 November, 2016
Page Last Updated
27 November, 2016