M2A2 Bradley O.I.F.
Reviewed by Saul Garcia
Summary
| Stock Number and Description |
Academy Model Kits 1/35 Scale Static Model
Kit No. 13205; M2A2 Bradley O.I.F. |
| Scale: |
1/35 |
| Media and Contents: |
387 parts (369 in yellow sand styrene, 16
in sand vinyl, 2 in dark silver grey vinyl) |
| Price: |
retail price US $38.00 |
| Review Type: |
First Look |
| Advantages: |
Well packaged;armour correct for later
versions; suspension staggered for torsion bar system; plenty of nicely
presented new parts; good turret. |
| Disadvantages: |
Anti-skid texture must be added; idler
wheels not staggered; motorisation holes; roadwheel arms are different
lengths; wrong style tracks for this version; some fit chellenges |
| Recommendation: |
Recommended |
FirstLook
Academy has followed the trend of updating older kits and employing
slide molding in greater scope. For this release, they have taken
their M2 Bradley and included two new sprues as well as some rather
sparse decals.
Inside the standard sized box with a rather nice painting of a
Bradley, we find all the sprues and decals neatly packed while the
instructions and tracks are loose within the box. None of the parts
were damaged or broken free from the sprues.
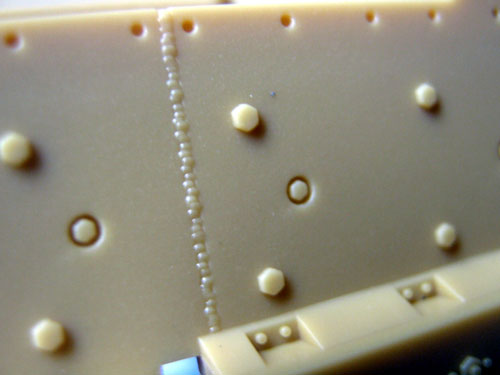
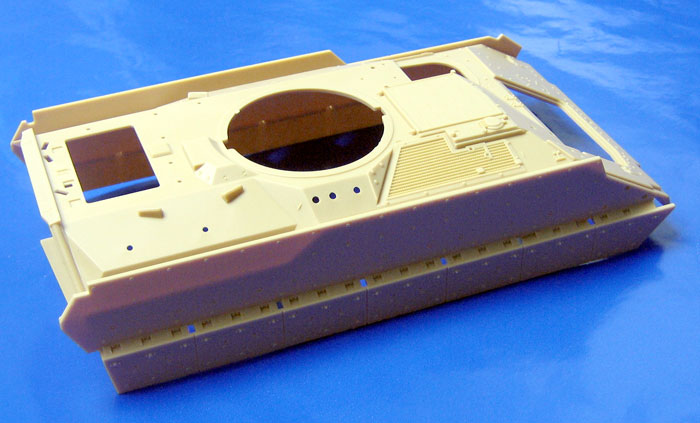
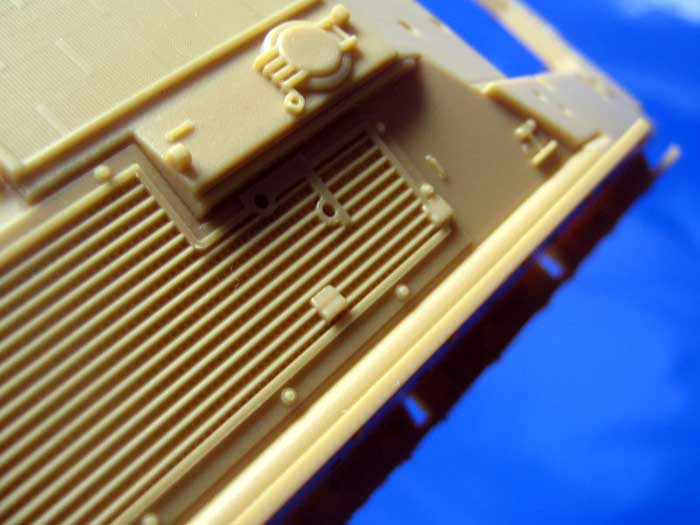
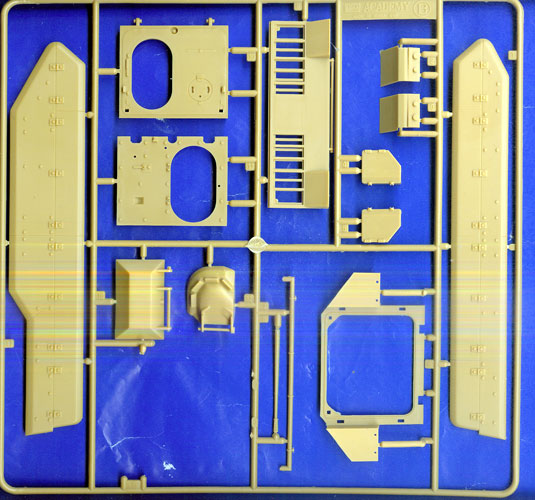
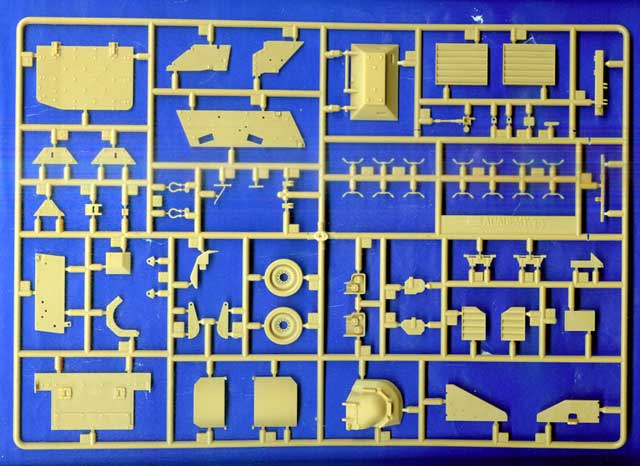
A new upper hull (see photo) has been provided with most of the side
armor slide molded in place. The detail is quite crisp and looks
good with the latest attachment points for the upper to lower armor.
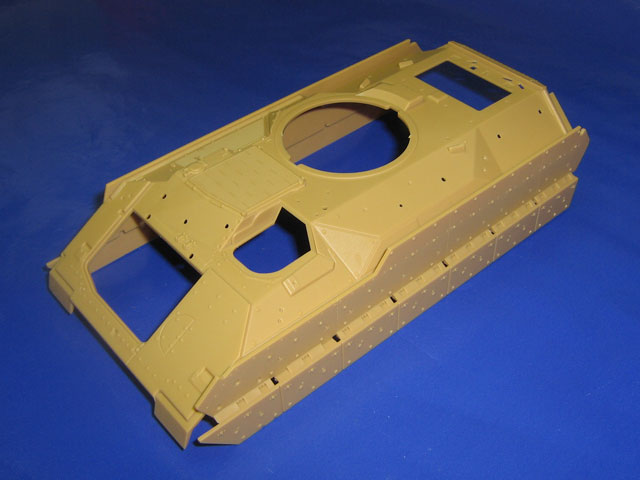
However, the lower armor is not the spaced armor seen in the TM
illustrations and vehicle photos. It is molded solid as seen in the
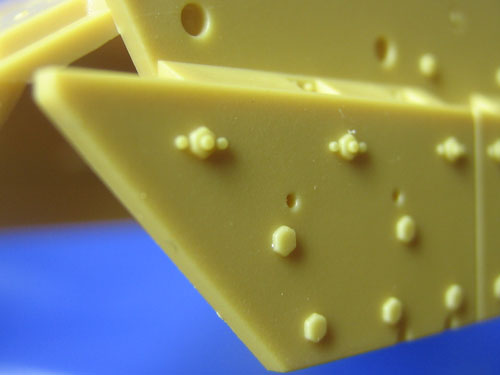
photo. Many of the nuances of the M2A2 ODS have been captured as can
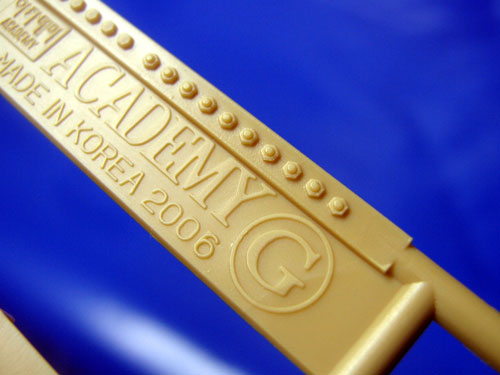
be seen in the detail kit part photos and extra nuts and bolts have
been provided on Sprue G. These will come in handy as the bolt
patterns are not a perfect match to photos.
The anti-skid texture must be added and the engine hatch is a
separate piece. The hinges need their loops added and would have to
be modified if an engine is to be shown. Real Model has an engine
set for the Bradley. However, the engine/transmission out of the
Tamiya Marder II IFV may be used with a little work.
I found three types of side armor combinations with two different
upper and two different lower armor configurations. The type
depicted in the kit is mostly correct (a few bolts are off) and is
seen on both the early and late lower armor mounts. The kit depicts
the later mounts. As stated, the lower armor should be two plates
spaced out with washers. The other configuration seen has, near the
top edge, two larger bolts flanking the center bolts which are now
smaller.
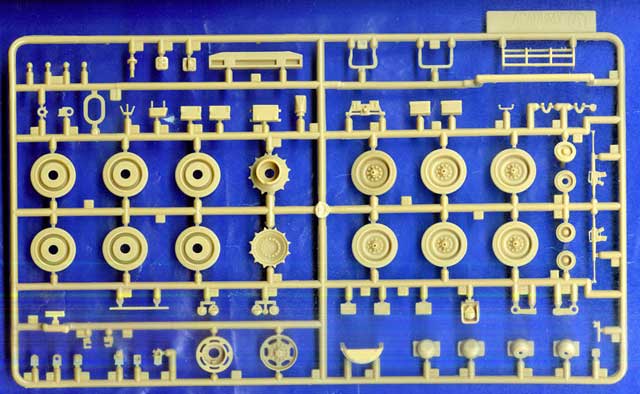
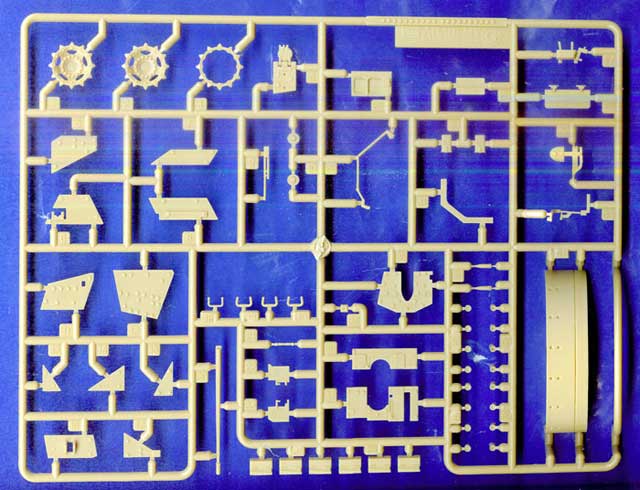
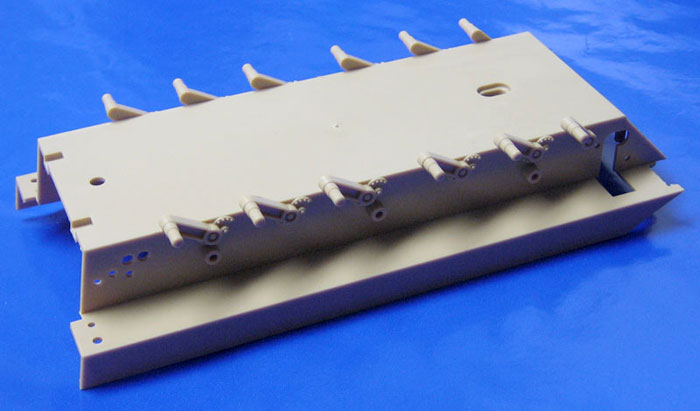
The lower hull is noteworthy in that the suspension is staggered as
it should be for a torsion bar system. Sadly, the idler mounts are
not so the left side needs to be moved further back. As Pawel
pointed out to me, this explains why the left idler guard is larger
than the right. As one can see in the photo of the lower hull, the
motorization holes are still there and need to be filled. The
roadwheel arms are different lengths while they should all be the
same. The shape is nowhere near accurate and the shock absorbers are
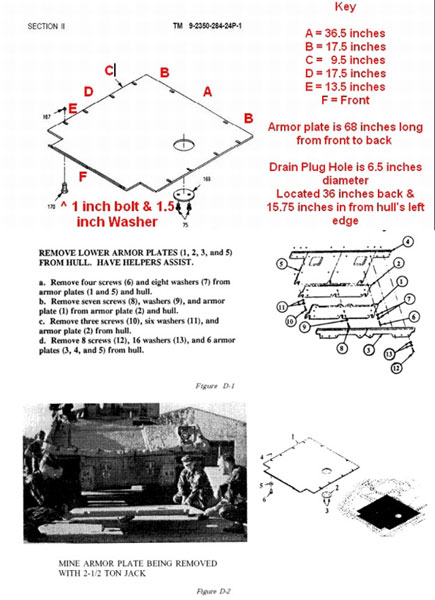
still missing. Also missing are the lower hull armor at the front,
weld seams, and the two drains. These are easily added though.
These weld beads should be 1.25 inch (3.175cm) wide and be located 5
inches (12.7cm) in from the sides. On the model, they were done with
0.03” (0.8mm) stretched sprue softened with liquid cement. The
anti-mine armor on the real vehicle is 0.375 inch (0.95cm) thick and
spaced off the lower hull by the same amount and fastened to the
lower hull with 1 inch (2.54cm) bolts with 1.5 inch (3.81cm)
washers. To replicate this, I used 0.010 inch styrene sheet with
spacers cut from the same material. Bolts were shaved off the left
over side armor (from the M2 kit). See the included illustrations
from the TM for dimensions and orientation.
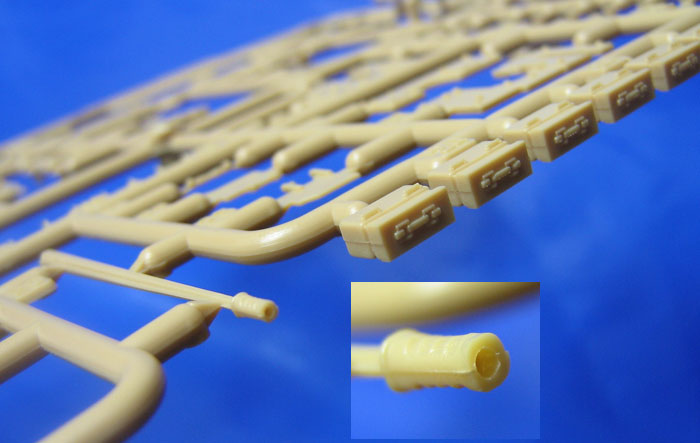
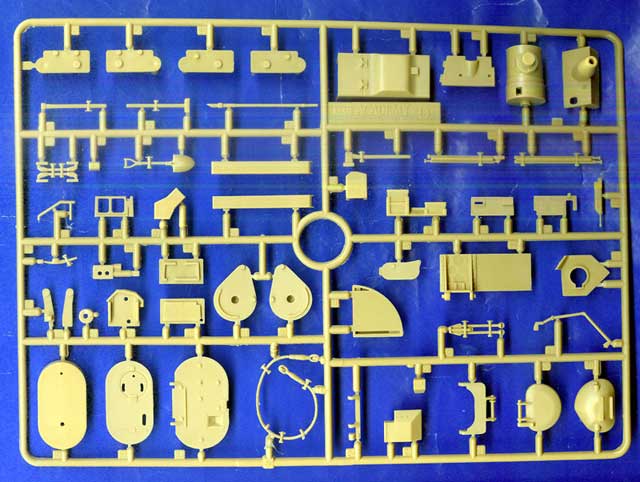
The two new sprues are F and G which include new hatches, CIPs,
lower glacis armor, engine bay hatch, separate hand holds for the
side armor, new headlights, new fluted barrel, new engine exhaust,
extra roadwheels and drive sprocket ring for stowage, new ammunition
boxes, and new drive sprockets. One of the close up photos show how
a sliding pin has been used to open the bore of the cannon and a
slide mold to create the top of the ammo boxes. However, also note
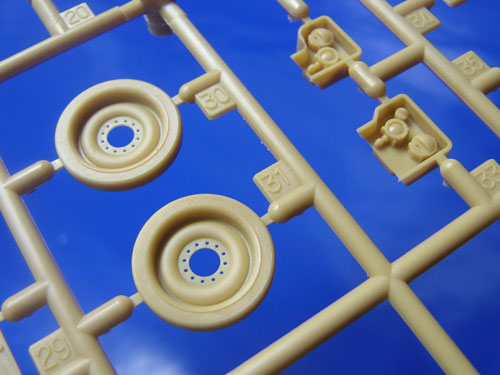
the seams which need to be removed from these parts. Another photo
shows a close up of the sprocket wheel and one can appreciate that
Academy has added the five open areas but the drive sprocket dish is
still too shallow.
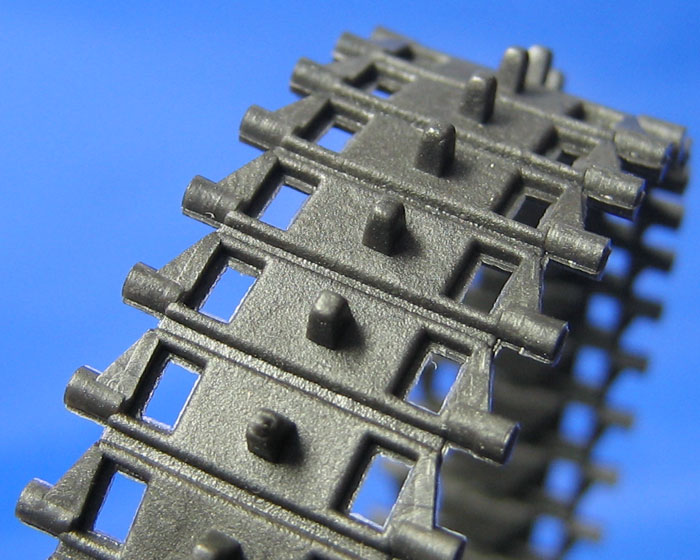
The tracks are vinyl and of the same pattern as their previous
releases. This is unfortunate as it will likely make the modeler buy
an aftermarket set since most of the Bradleys in OIF are sporting
the Big Foot tracks. Friulmodel and Blast Models offer these tracks.
I will probably go with Blast Models set for the AA7V RAMS since It
also includes the idler wheels, roadwheels with fine details, shock
absorbers, new roadwheel arms and mounts along with a correct
sprocket.
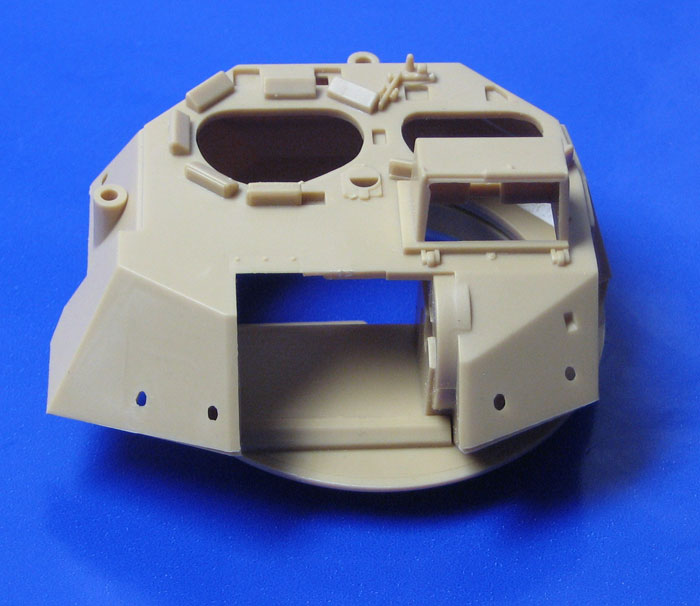
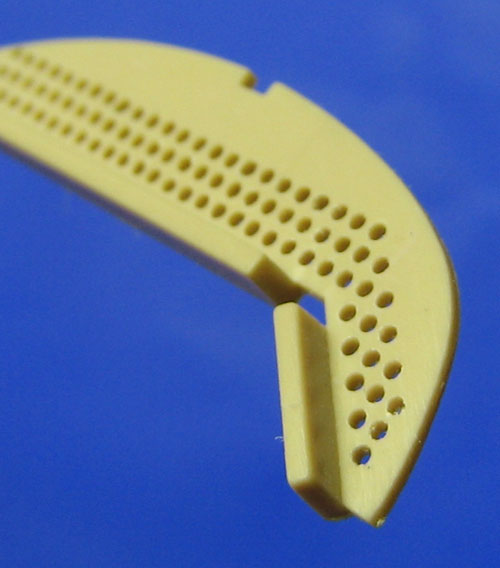
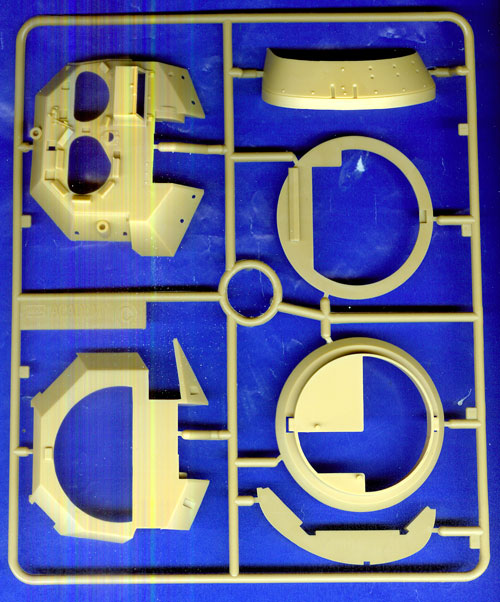
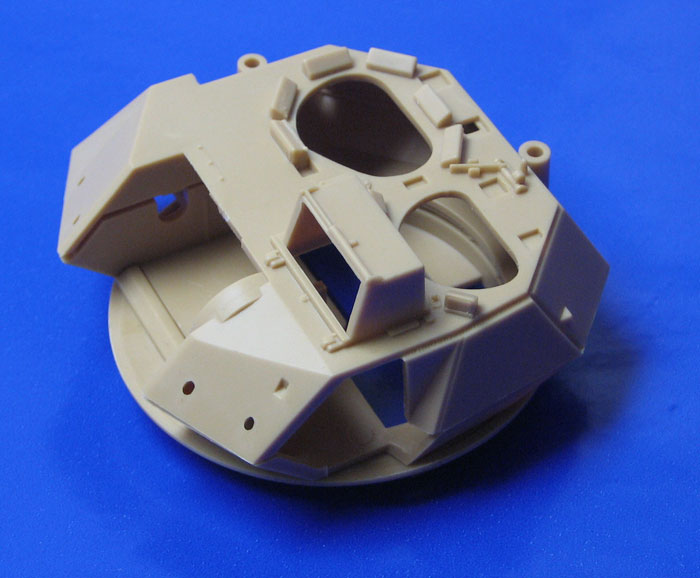
The turret has new items added, such as armor and the fit is
generally good. Taking time to eliminate a little flash will ensure
that a lot of filler will not be needed. The bustle rack has been
updated and I drilled out all 117 holes so that they are visible
from underneath the bustle.
A visit to Vodnik’s site (see references used list) reveals all the
work needed to get the Tamiya kit up to snuff. Fortunately, this kit
has many of the corrections already in place but a lot of work still
awaits the modeler suffering from Advanced Modeler’s Syndrome (AMS).
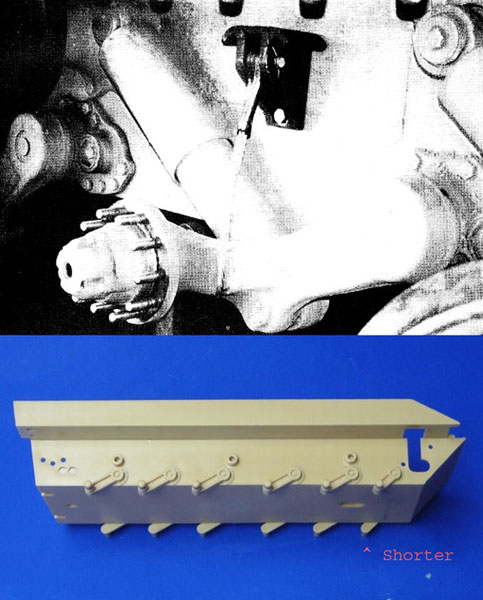
Correcting annoyances such as the undersized drive housings, wrong
angle for the gear housings on the sides (easy fix), as well as the
others already mentioned, will provide many hours of styrene
therapy.
The gear housings are not really underscale but are not proud
enough. Adding a piece of 0.04 inch plastic brings them out to the
correct height. Terry’s review has a photo of the latest lower front
armor compared to the kit’s rendition and the top row of bolts seems
to be low. Actually, the locations are correctly measured off the
bottom but the complete piece is too tall. This makes me wonder of
the angle is too steep and should be shallower. See the sketch
provided by Pete Becerra measured off the real vehicle.
I found the fit of most of the parts to be acceptable but others,
like the rear plate hinged, to be grossly over scale and inaccurate.
When locating the rear 5 inch drain located 8.75 inches form the
back and 13.5 inches in from the right side, I saw that the hinges
were interfering and the tie down bars were missing. The hinges had
to be cut down a bit as they forced the door out breaking the seal.
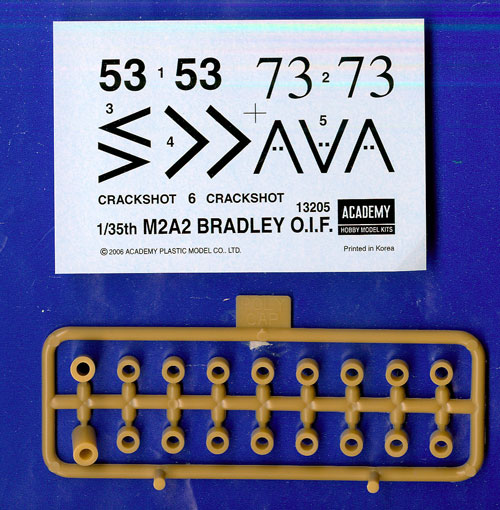
The rather bland markings included are for "Crackshot" with the 3rd
Plt, C Co, 1-64th AR, 3ID and the second is ‘73’ of the 2nd Platoon,
Alpha Company, 3rd Brigade, 3rd ID. The decals are thin but glossy.
No other markings, such as bumper codes are included. Photos of both
vehicles can be found in the Thunder Run book listed below.
Supporting Images
Recommendations and Acknowledgements
I would like to thank the following for responding to my inquiries
about the Bradley, Pawel "Vodnik" Krupowicz, Gino P. Quintiliani,
Chris Mrosko, and Pete Becerra. Illustrations from the Technical
Manuals are from declassified documents, approved for public release
by the Department of the Army (US) and distribution is unlimited.
The reader is further advised to look at the reviews submitted by
others such as Frank DeSisto’s at Missing Lynx’s Time on Target
forum, Cookie Sewell’s at Missing Lynx, and Terry Ashley’s at PMMS.
The first two are text only but contain information not found in the
others and Terry’s review is up to his usual standards with plenty
of photographs.
I was hoping for a better kit, but building it will be fun for me.
It is recommended for those who want an easier starting point for
their OIF Bradley. Mine will be done in the markings offered by
Dragon in the Can-Do range. It is of an M2A2 of B Company, 1-36
Infantry, CMTC, at Hohenfels, Germany 1999 with a sharkmouth (what
else?) on the Tow box.
References Used
Literature:
- TM 55-2350-252-14 Transport Guidance Technical Manual Bradley
Fighting Vehicle System (BFVS) Infantry, M2, M2A1, and M2A2,
Cavalry, M3, M3A1, and M3A2 Headquarters, Department of the Army,
November 1992
- Bradley, Fighting Vehicle M2A1, M3A1, M2, M3, and Proposed Variants
by Ed Gilbert and Allan Swan published by Full Detail M2/M3 Bradley
in Action by Jim Mesko published by Squadron Signal Publications
1992
- Bradley, A History of American Fighting and Support Vehicles by
Richard P. Hunnicutt published by Presidio Press 1999
- Thunder Run, The US 3rd Infantry Division’s Drive to Baghdad by
Robert W. Burik & Eric R Olson, published by Concord Publications
2005
On the Web:
http://vodnik2.republika.pl/pages/m2a2/m2a2-p1.htm This is
Pawel’s excellent article on improving Tamiya’s M2A2 ODS
http://www.primeportal.net
Superb photo coverage of the Bradley in OIF
Other Reviews
Frank DeSisto’s on Missing-Lynx’s Time on Target forum:
http://www.network54.com/Forum/477322/message/1143350348/Kit+Academy+13205%2C+M2A2+Bradley+OIF
Cookie Sewell’s on Missing-Lynx:
http://www.missing-lynx.com/reviews/modern/academy13205reviewcs_1.html
Terry Ashley’s review on PMMS:
http://www.perthmilitarymodelling.com/reviews/vehicles/academy/acd13205.htm
My
sincerest thanks go to MRC, Academy’s US distributor, for the review
sample.
Text and Images by Saul Garcia
Page Created 12 May, 2006
Page Last Updated
15 May, 2006
|