| |
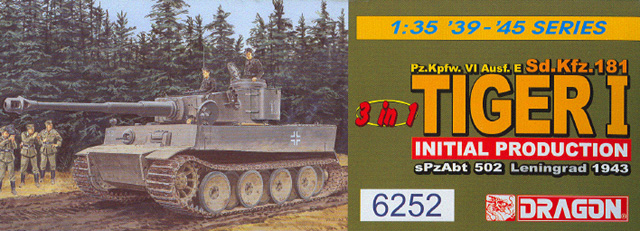
DRAGON MODELS LIMITED (kit no.
6252) Tiger I Initial Version in 1/35th-scale injection-molded styrene
plastic
by Frank De Sisto
Contains: 440 styrene parts (including 11 clear and 23 in DS100 soft
styrene) plus two bags of individual track links, 48 metal parts, three
frets of photo-etched brass, waterslide decals for two vehicles and 10
pages of instructions in 20 steps. Price: $31.95 USD.
There has been an unprecedented amount of hype and pre-release publicity
generated around this kit. I have seen the continuously updated previews
on the DML web site, Terry Ashley’s review at PMMS and comments
on the various DGs. To be honest, most of what I will say has already
been said by others, but there is much I have noticed that still may be
of use to those modelers that will never tire of having another Tiger
to build.
FIRST IMPRESSIONS
To start with, this kit is absolutely remarkable. The attention to the
small details, the features and the options that are included in the box,
have set this kit in a class by itself. One of the first things I noticed
was the protective vac-form plastic tray which contains the various metal
parts. These include: six full and six spent 8.8cm rounds; two versions
of pre-formed head-lamp wiring, smoke grenade launch tubes, brackets and
wiring; turned aluminum gun tube and recoil spring; pre-formed bucket
with wire handle and separate bottom plate; two different styles of tow
brackets along with their mounting studs; a cast brass shovel blade storage
sheath and finally, a turned brass spare antenna storage tube.
Attached to the now-typical card that holds accessory parts are three
separate photo-etched brass frets. One contains base plates (with engraved
lettering) for the brass and plastic 8.8cm rounds. The second contains
tool storage clamps and brackets as well as parts to be sandwiched between
the provided plastic jerry can halves. The last fret contains three variations
on the tread plates for the front mud flaps, a pair of rear mud flaps
and assorted other detail parts. Also included on the card are the decals
from Cartograf, and clear parts for head-lamp lenses, commander’s
cupola view ports, driver’s visor armored glass and access hatch
periscopes. In the now-standard DS100 soft styrene there are two figures
(representing cameramen from a PK unit) as well as two folded garments
and a pair of boots. There are two bags of pre-cleaned “Magic Tracks”,
which represent the very early “handed tracks”. The remainder
of the kit consists of parts molded in the typical DML light grey styrene
plastic. The kit’s designers have taken extra care to ensure that
there are only a bare minimum of knock-out pin marks, while using slide-mold
technology to provide an unprecedented level of detail in certain areas.
The kit’s basic options include parts to represent two different
stowage bin types, as well as the snorkel tube, deep wading fittings and
bow plate without fenders seen on prototype Tiger Is. Other options include
styrene parts to replace nearly all of the various metal bits, four mantlet
variations, head-lamp mount variations (including “plugged”
Bosch light sockets and alternate mounting brackets) and road wheel variations
(the front stations have the outer wheel left off, to be replaced by a
hub cap). Accessories in the form of three multi-part jerry cans and three
8.8cm ammo boxes, with plastic full and spent rounds are included for
diorama or vignette use.
There is a modest amount of interior detail included as well. For instance,
in the turret there are the commander’s and loader’s seats,
as well as basic gun breech and pistol port details. All hatches are fully
detailed inside and out, while the outstanding one-piece commander’s
cupola includes view slits and drain holes around the outer rim, as well
as separate clear glass block inserts for the interior. Beneath the engine
deck, the engine cooling fans, fuel tanks and radiators, which can be
seen through the grills, are included. The two rear grill sections are
separate and can be fixed in the opened position for a better view of
the fans. The internal torsion bars are included and can be made to work.
The bow MG34 is broken down into multiple parts and includes the internal
mechanism complete with sight, head pad and ammo sack. There are clear
inserts for the interior of the driver’s view port.
SUSPENSION
The tracks are the earliest version, which did not have the small cleats
on them. They are also “handed” in that each side is a mirror
image of the other. Later Tiger Is used the same track for both sides,
which would mean that each track run was positioned facing in opposite
directions. Mold limitations mean that the guide teeth are not hollow.
And since these are “Magic Tracks”, there are no sprue attachments
to clean up. But, this means that each link has two knock-out pin marks.
The modeler that wishes to, will only need to clean the outer marks, as
the others are effectively covered by the wheels. Another feature of these
tracks is that they fit together due to friction. But, they will not take
to rough handling; gluing them as soon as possible is something I’d
recommend. There is a jig to help shape them for attachment to the drive
sprockets and i
dler wheels. I would also recommend that the modeler does
not glue the idler wheel arm to the hull until the tracks are fitted.
This will allow for any gap to be covered by simply adjusting the idler
wheel (after removing the small pips that position it at a certain angle),
much like on a real tank. The road wheels are beautifully rendered and
include crisp bolts, nice texture and excellent weld beads. The tire manufacturer’s
name, “Continental” is purposefully misspelled as “Continentau”
to avoid copyright infringement. The modeler can change the “U”
to an “L” with a careful swipe of a knife blade, but it is
extremely difficult to make out without magnification, so I will not even
bother. The suspension swing arms can be mounted in such a way as to leave
them workable, but the modeler must take care with the glue.
HULL
The hull’s belly plate is representative of an early Tiger I and
includes the scalloped flanges that are used to connect the upper sections
to the lower sections. To this is added separate front- and rear-side
panels so that later tow hook mount variations can be made by substituting
parts. Likewise, the upper hull outer side panels are also separate and
do not have any mounts for fenders, cables or tools, which is correct
for these very early tanks. Excellent weld and interlocking plate detail
is given all around. There is a choice of front plates either with or
without the front mud flap bases. To these bases, the variations of photo-etch
tread plate are to be fixed. The lower glacis plate features spare track
racks and a part to be used as a template to properly place the brackets.
The upper plate features separate parts for the bow MG34, including the
option of either a cloth dust cover or deep-wading seal. The driver’s
visor is broken down into separate parts and can be positioned opened
or closed. All vents and tools are separate, but it would appear from
reference photos that the tool fit varied on these early vehicles. The
driver’s and radio operator’s hatches are completely detailed
inside and out and include locking levers and clear periscopes. The hull
roof has the proper weld layout (a first) as well as a separate engine
access hatch, a separate snorkel outlet cap, and as I mentioned earlier,
separate rear-most grill doors. The hull rear panel features exhaust pipes
without the sheet metal covers and either plastic or photo-etched rear
mud flaps. There are two sets of pioneer tools. One has basic clamps molded
on, while the other set contains bare tools to which three-part photo-etch
clamps are attached. Uniquely, DML has provided bending guides for the
photo-etch clamps on the sprue that contains the bare tools, which ought
to make things easier on the modeler.
TURRET
The turret features four mantlet variations and either a turned aluminum
or two plastic gun tubes. Both the aluminum and one of the plastic gun
tube options can be built with an internal spring to allow recoil. All
options feature the small faceted locking collar seen inside the muzzle
brake. The muzzle brake for the two recoiling gun options is molded using
slide mold technology for a hollowed-out bore. There are three new mantlets,
all with binocular sight openings. One has a small rain guard over the
sight, while the other two do not. Those two appear to be identical, but
upon closer examination, one was shown to have a casting number on the
top surface. That’s the one I used. As an aside, there are sets
of foundry casting numbers on the sprue, which are noted in the instructions.
The modeler can cut these off and place them where appropriate. There
is a rudimentary gun breech and a separate co-axial MG34 insert.The turret
shell itself is a one-piece affair created from a five-part slide mold.
This results in two faint seams towards the rear, which will easily disappear
after a light sanding. The turret sides are properly asymmetrical in shape,
featureing the dual pistol port layout. These are separate parts, with
separate internal plugs. The roof plate clicks into place and has a separate
vent that can also be configured in the standard manner or set up for
deep wading. The one-piece, slide-molded commander’s cupola features
well-shaped view ports, water drainage holes around the circumference
of the rim and a multi-part hatch assembly. The loader’s hatch is
also separate and completely detailed inside and out. There are two sets
of optional stowage boxes; one is a Pz.Kpw. III type, while the second
option features a pair of unique boxes as seen on a specific Tiger I that
was captured by the Red Army.
ODDS & ENDS
As is my custom, I assembled the major components in order to see if
there were any major fit problems. I did indeed find a few, but they are
minor and quite easy to correct. For instance, the commander’s cupola
needs to have its base sanded down a bit as it stands too high off of
the ring molded on the turret roof, leaving a gap. The upper bow plate,
part F20, does not fit very well to the hull. The two grooves that are
seen at the bottom need to be widened otherwise it will not sit properly
on the lower hull sides. There may also be a slight gap where it meets
the upper hull sides, so be careful when you mount the two outer side
plates (parts G2 and G3). The lower hull rear plate, part G25, may need
a bit of trimming on either side of the upright section of the “T”
shape.The instructions, although clearly rendered in the traditional drawn
style, are extremely “busy”. This may lead to some confusion,
so study each step carefully before applying glue. The variations are
pointed out, but again, it will be up to the modeler to keep track of
what’s going on. The crisply-printed decals from Italy’s Cartograf
will allow for more than the two schemes given in the markings and painting
section. Both options are for Tigers of s.Pz.Abt. 502 on the Leningrad
front from the summer of 1942, through the winter of 1943. The markings
feature white outline crosses and tac numbers, as well as the “Mammut”
unit insignia. Photos in references confirm the markings in the kit, while
I was able to confirm an additional set for Tiger number 111, which had
no stowage box on the turret, but did sport a large “Mammut”
insignia on the turret’s rear. Again note that tool stowage did
vary, so do check your references.
CONCLUSIONS
This kit has definitely raised the bar as far as features, engineering,
detail and value is concerned. Not only would I rate this offering superior
to all previous 1/35th-scale Tiger I kits, I would also say that it is
superior to most (possibly all…but this is open to debate) plastic
1/35th-scale AFV kits of the last ten years, regardless of manufacturer
or subject. As far as I am concerned, this kit has put DML on top of the
heap…for the time being, that is.
Highly recommended.
Frank V. De Sisto
DML kits are available from retail and mail order shops. For details
see their web site at: www.dragonmodelsltd.com.
|
|