|
An Armor Modeling Novice and the Roving Rhomboids of No Man’s Land: The Masterbox and Airfix British Mark I Tanks |
Masterbox and Airfix 1/72 scale |
 |
| Text & Photos by Tim Nelson |

Description
As was the case with my recent ship article, I’ll state from the get-go that I’m not an armor guy. I’m mostly an airplane dude, both by trade (retired engineer) and as a modeler. Since my teen years whipping out motorized Tamiya tank models in an evening, I’ve only dabbled in a couple of diversionary 1/72 armor subjects. However, there is a certain appeal to building something quick and rapidly getting into the paint stage (my favorite), and there is also something to be said for being able to hide your mistakes under mud!
History
As the Great War degenerated into a stalemate in the Autumn of 1914, static trench lines extended from The North Sea to Switzerland. 1915 would bring unimaginable attrition as frontal infantry assaults were met with withering automatic weapons fire and artillery. It would take some innovative thinking from some naval minds in the British Admiralty, including Winston Churchill, to envision a possible way to break the stalemate using “landships.”
The Landships Committee was formed in early 1915 to study the problem and develop prototypes. The “Number One Lincoln Machine” was the first to reach fruition in September 1915, using tracks imported from the Bullock Creeping Grip Tractor Company of Chicago. This initial design even included a drum shaped turret. However, the Bullock tracks, designed for agricultural use, proved unsuitable for the required loads, and the machine’s designers, William Tritton and Walter Wilson, sought solutions. Wilson came upon the idea of a longer track run and means to secure sagging tracks over trenches, and Tritton redesigned and “ruggedized” the tracks themselves. The “Lincoln Machine” was rebuilt to this design, with the consultation of Royal Army Engineer Col. Ernest Swindon. The new version, immediately a great improvement, was christened “Little Willie.”
“Little Willie” quickly proved much more able to navigate difficult terrain. Steering was accomplished by differential drive to each set of tracks, but the assistance of a “steering tail” from the “Lincoln Machine” was carried over, which now could be hydraulically raised and lowered when needed. “Little Willie” carried no armament but used ballast to emulate the equivalent loads. By the end of 1915, a further development was taking shape, officially named “His Majesty’s Land Ship Centipede”, referred to by some as “Big Willie”, but most famously known as “Mother.”
“Mother” took the core chassis of the “Little Willie” design, moved the track runs outboard and made them full circumference in the now familiar rhomboidal profile, and added outboard sponsons to mount weapons. “Mother” weighed in at 28 tons, 8 more tons than “Little Willie.” After a series of tests and trials, the Royal Army placed an order for 100 articles in early 1916.
An order for 50 more would soon follow. To preserve secrecy, the machines were referred to as “tanks.”
The production Mark I would appear in two versions, characterized by the size of their protuberances. The “Male” version would mount a naval Hotchkiss 57mm gun, knows as the “Six Pounder,” on each side. The “Female” version, introduced due to initial shortage of the 6-pdr, carried a pair of Vickers water-cooled machine guns on each side. The prototype “Mother” was, ironically, Male. All Mark I’s incorporated the steering tail, which proved to be more trouble than it was worth in operation.
The Mark I had a minimum crew of eight to operate the vehicle and the weapons, and it was miserable duty. The tank’s interior was a din of noise, combined with extreme heat and toxic engine exhaust. Columns of black smoke made it easy for enemy gunners to spot on the battlefield. The machine’s relatively thin armor would only protect against small arms fire, and some rounds penetrated anyway or generated high energy splinters. Top speed was no more than 3 mph on the most favorable terrain.
Production Mark I’s were shipped from Britain to Le Havre, France then transported by rail to the front. The sponsons were installed after rail shipment to minimize width. Sixty machines, a mix of Males and Females, were initially deployed to France. After a training period, they were set to participate in a late summer offensive on the Somme front (an extension of fighting that began with the infamous assault on July 1, 1916.) As might be expected, full understanding of how to most effectively deploy this new type of weapon would be gained only by trial and error.
On September 15, 1916, the world’s first tank action began near the villages of Flers and Courcelette, France. Mark I operations were characterized by confusion, mechanical breakdowns, and simply insufficient numbers of tanks, but the potential for this innovative machine quickly became clear. British General Sir Douglas Haig, Commander-in-Chief of the Royal Army in France, soon ordered 1,000 tanks and the design would be improved with operational experience. The improved Mark IV would become the dominant British tank for the remainder of the war, with several other specialized variants produced. See the References for more of a deep dive on the Mark I and its successors.
The initial Mark I’s deployed on the Somme Front in September 1916 featured a four-color camouflage scheme, with thin black lines of demarcation, developed by Solomon J. Solomon. The tanks were quickly covered in mud, so within a few weeks, the British decided to save themselves some effort and a simple dark tan or khaki scheme was implemented.
The world’s only surviving Mark I is on display at The Tank Museum in Bovington, Dorset, UK in a dynamic full-scale trench-busting diorama.
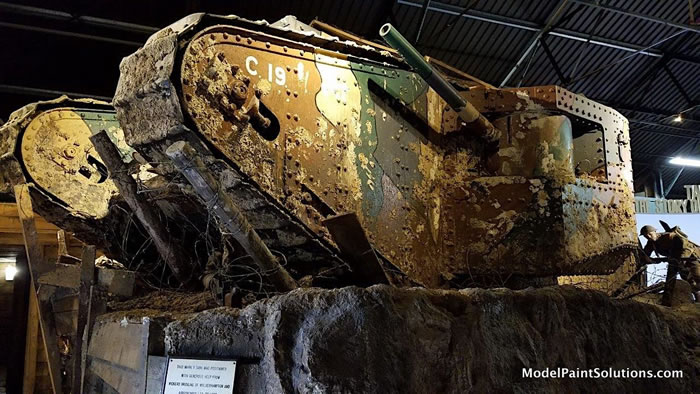
photo by Tim Nelson
In short, this is one of the most historically significant fighting vehicles on the planet, and deserves to be represented in even the smallest armor model collection.
The Kits
Somewhere lost in the mists of time, I acquired the Airfix 1/72 Mark I tank – most likely an impulse purchase at Skyway Model Shop in Seattle. I think I had a notion of doing a quick build to produce a companion to the Emhar 1/72 German A7V kit I built circa 2007. Then, in November 2016 on an epic “museum trip” to the UK (which included the wonderful Scale Model World event at Telford), I became intrigued with the Mark I on display at Bovington. In the gift shop, I picked up the modern tool 1/72 Masterbox Mark I kit.
Scalemates dossiers on these two kits can be found here:
https://www.scalemates.com/kits/airfix-01315-ww1-tank-mk-1--181632
https://www.scalemates.com/kits/master-box-mb72001-mark-i-male-british-tank--226918
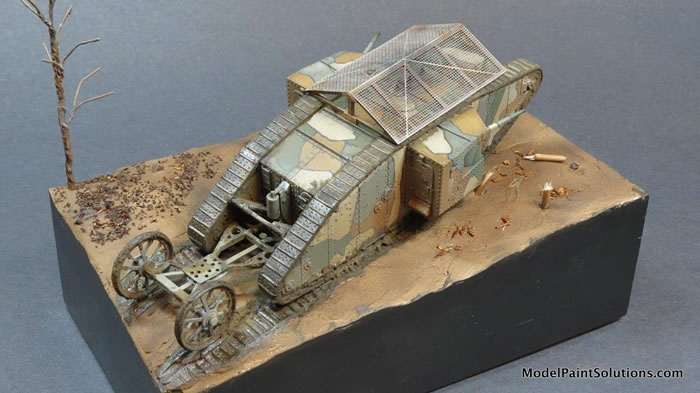
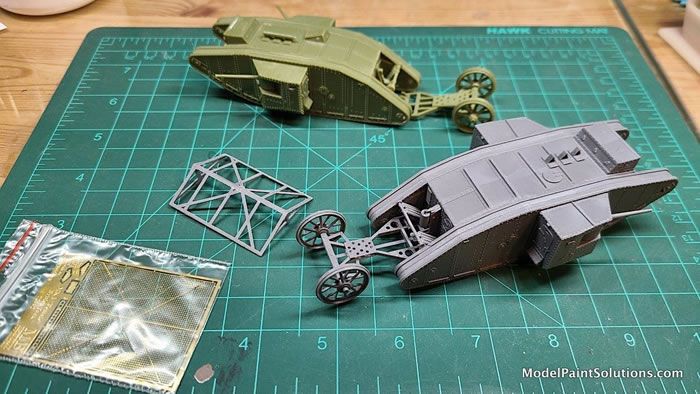
The Airfix kit was reissued in the mid-1990s and labelled as 1/72, but its origins date to the 1960s and actual scale appears to be 1/76. In recent months, while looking for another of my occasional change-of-pace “palette cleanser” builds, this simple kit resurfaced as a strong candidate. Pawing through the green sprues, I thought “you know, this is not bad for its time but it would be really cool to have that ‘chicken coop’ grenade shield that some of these used.” I then grabbed the Masterbox kit – which included that detail. Other than that particular feature with wooden-looking framing and photo-etch screen, the rest of the gray Masterbox parts didn’t jump out as being worlds apart from the ancient Airfix.
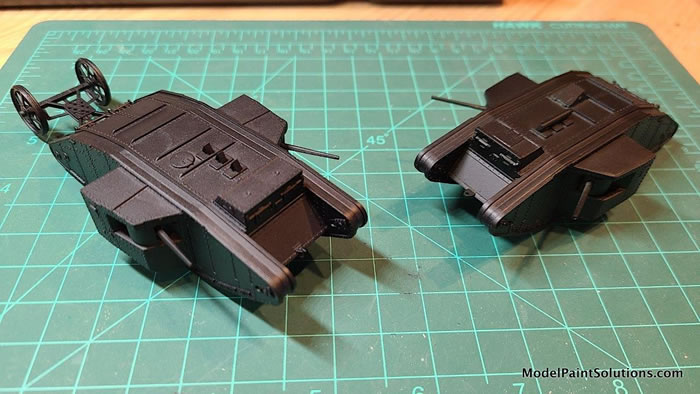
Masterbox clearly studied the Airfix kit in their design, and also the real article at Bovington. They render some extra rivet detail (big rivets here are actually appropriate), and came up with a better engineered steering tail assembly. The topside features such as the circular hatch and inverted “V” shaped exhaust baffles appear to be accurate, and they also provide small glacis-mounted “headlights” which were installed on early units (and usually quickly knocked off). Interestingly, the Masterbox sprues had significantly more flash than the ol’ Airfix. One welcome modern upgrade is true “rubber band” track, which can be easily prepped, then slipped around the circumference of the run late in the build.
The Airfix kit is missing some rivet detail (shocking!) on the top of the side sponsons. Its other surface details (hatches, doors, slits, etc.) are a match for the 45 years newer Masterbox kit, and more than adequate for the scale. The worst aspect of this otherwise pleasant chestnut is the vinyl track, which doesn’t easily bend nor want to adhere to anything. More on that later.
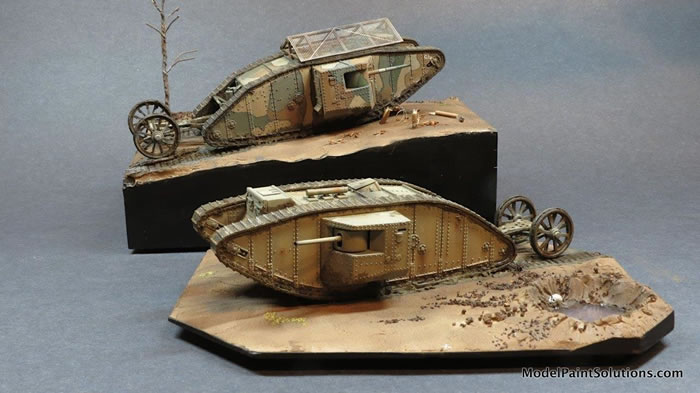
In summary, both kits are similar in construction (simple) and level of detail (good), and both can produce an attractive model of this important subject. Both are low in parts count – a plus in my opinion. Both are cheap and readily available. The Airfix 1/76 vs 1/72 discrepancy is negligible (although I noticed it in dealing with track widths on the bases, which needed to be fairly precise.) Since the kits are so alike, I thought – why not build both in parallel?
The Builds
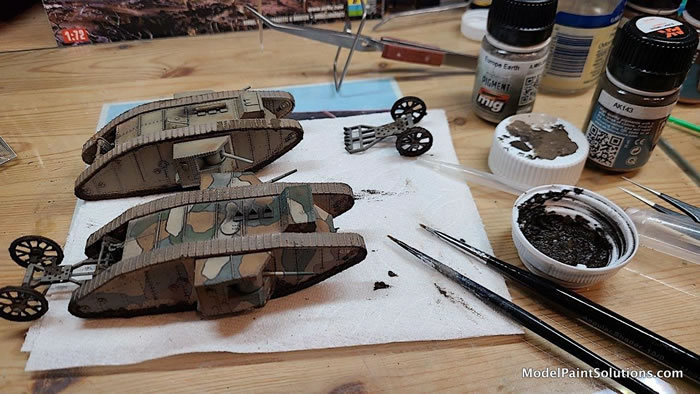
Both kits go together easily with no significant fit issues. Both benefit from drilling out the gun barrel ends for the 6-pounders. I added some simple rivets along the Airfix sponson perimeters with small dots of white glue. After a quick couple of hours devoted to basic construction of each kit, I was ready for paint. Although the markings of each model would differ, both were primed with Krylon ColorMaxx Satin Black, followed by some stark pre-shading with Mission Models MMP-001 White.
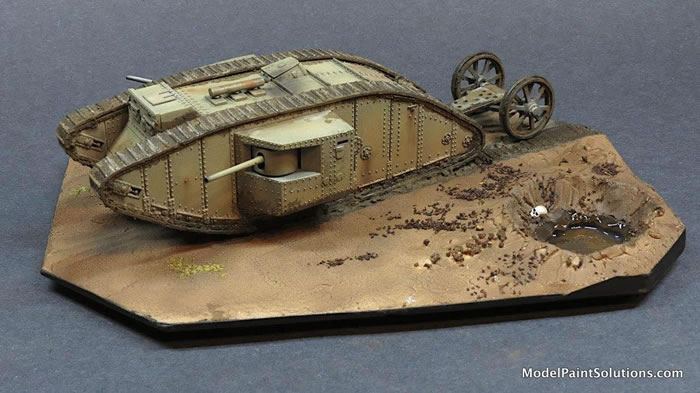
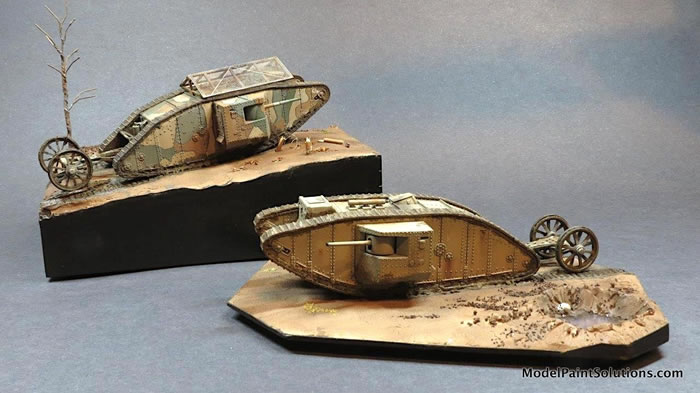
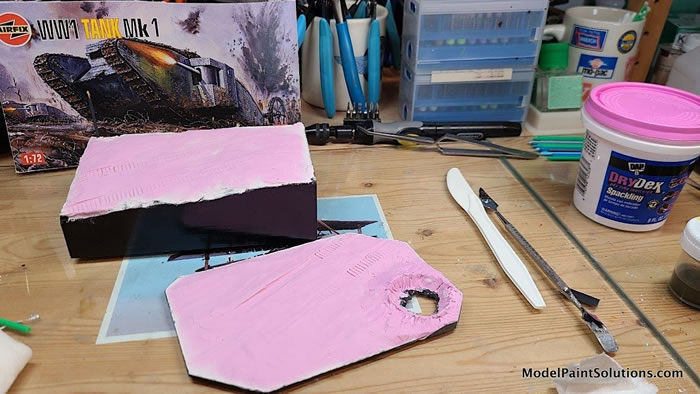
During this early stage, I also began to think about display base ideas. More than any other modeling genre, I believe armor benefits from the context of a base. One inspiration was the dramatic box art of the Airfix kit, showing a Mark I slogging across a muddy No Man’s Land amidst barbed wire and shellfire. I selected an old wood block for a barbed wire crossing scene, and decided to render another scene on thick plastic card featuring a big shell crater. I kind of wanted to add an advancing soldier or two but was stymied in finding anything decent along those lines in 1/72 scale.

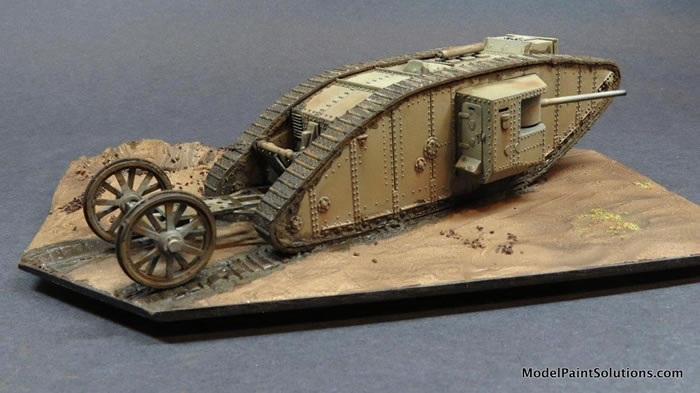
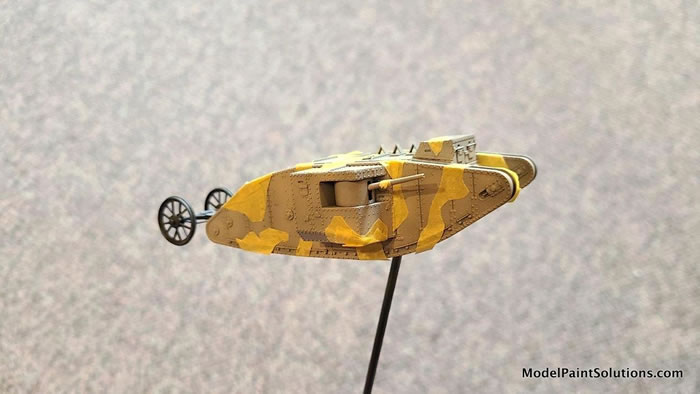
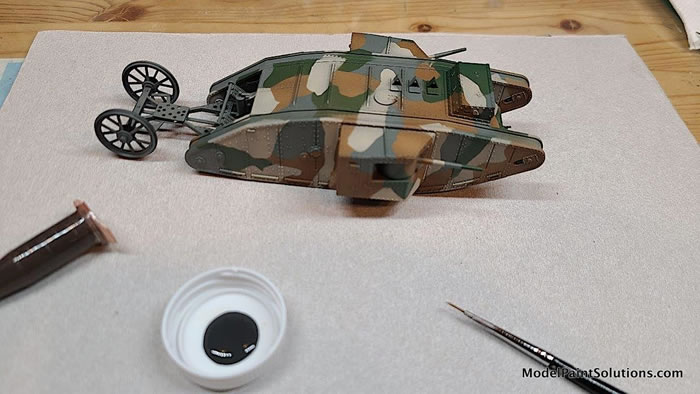
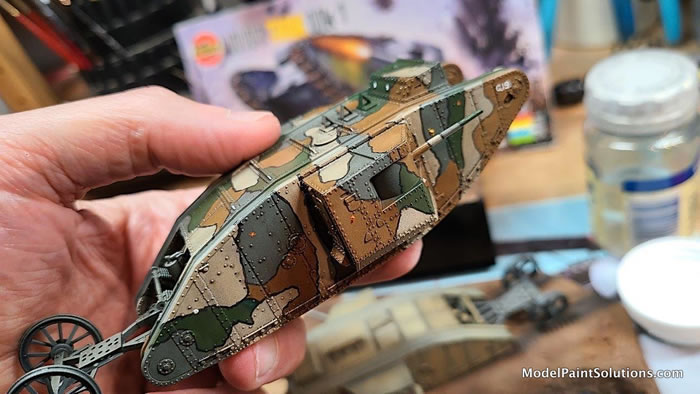
I decided to do one of each of the early camouflage schemes – Solomon scheme for the Masterbox, and basic khaki for the Airfix. The Solomon scheme, using the Bovington Mark I as a reference, would involve some extra hours of masking and painting, with some fine brush work to apply the black demarcation lines.
The following paints were used for basic coverage, all applied with a Harder & Steenbeck Infinity fitted with 0.15mm tip, and thinned about 40% paint to 60% thinner mix (where the thinner mix is John Miller’s solution of 70% Mission Thinner & 30% MMS-007 Clear Primer, a.k.a. “CP30”):
Masterbox
Tan: Mission MMP-043 British Portland Stone with a touch of Mission MMP-005 Orange
Brown: Mission MMP-012 Rotbraun
Green: A mix of 7/8 Mission MMP-004 Green with 1/8 Mission MMP-048 Blue
Grey: Mission MMP-045 Slate Grey with a touch of Mission MMP-048 Blue
Black borders: hand painted with Mission MMP-105 Worn Black in an airbrush-ready mix (including Tamiya retarder) for working time and leveling. (A super fine point Sharpie might have been better for tight lines, but less forgiving.)
Airfix
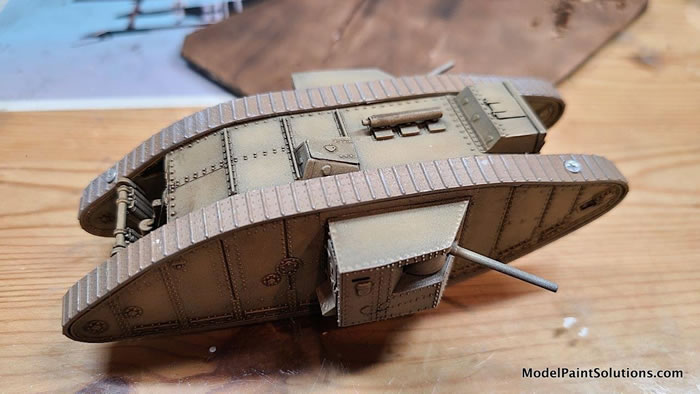
Overall tan: Mission MMP-011 Dunkelgelb, with some thin post shading of Mission MMP-060 Dark Tan here & there
Grey (for the steering tail): Mission MMP-045 Slate Grey with a touch of Mission MMP-048 Blue
Many armor modelers use Tamiya Dark Iron for basic track coverage on many subjects. Not having that on hand, I created the mix below for the tracks of both models, applied while still off the models. (Unfortunately I failed to record what I used as primer but believe it was Mission MMS-002 White Primer. I do recall that I wanted the Masterbox black rubber and Airfix silver vinyl to subtly show through.)
1/3 Mission MMM-01 Metallic Burnt Iron, 1/3 MMP-012 Rotbraun, 1/3 MMW-003 Transparent Rust
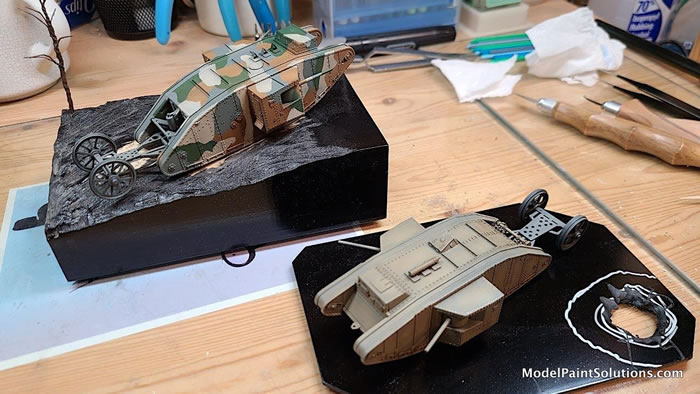
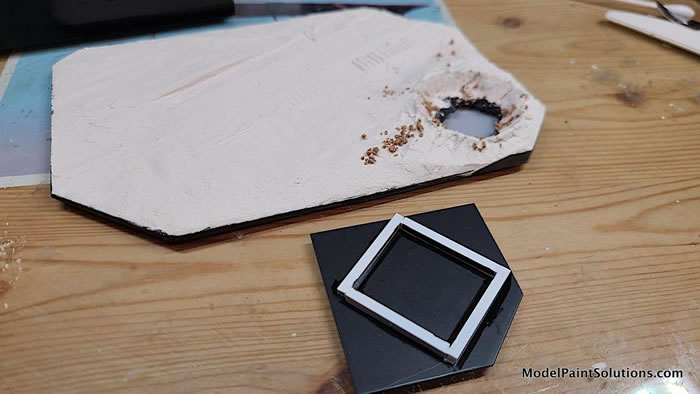
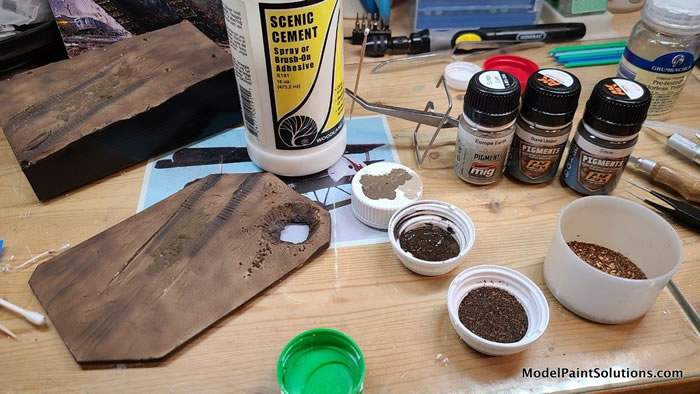
It was then time to further develop the bases. After final refinement of shapes, and excising a crater in the plastic sheet with a Dremel tool at low speed, I applied spackling compound to build up a thin layer of “terrain.” As the spackle was partially dried (this particular kind turns from pink to white as it cures), I set the tracks for each tank in the surface to form ruts.
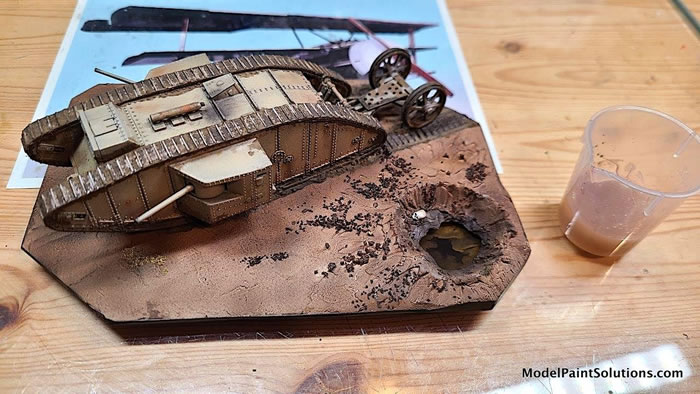
To enhance the illusion of depth in the crater, I created a little trough to go under the hole, with some AK pencil work to suggest further subterranean features. This would eventually be filled with Woodland Scenics Realistic Water.
I painted the terrain using pre-shading and base color techniques commonly applied to models themselves. A variety of Woodland Scenics and Uschi ground cover materials provided some (mostly dead) flora. I also like to use tea leaves for this purpose, in this case basic Lipton and Choice Organics Rooibos herbal tea (the latter makes very convincing splintered wood.) The dead tree on the wood base for the Masterbox model is a wire-frame model railroad product by JTT, which I filled out a bit with putty and painted in suitably depressing tones.
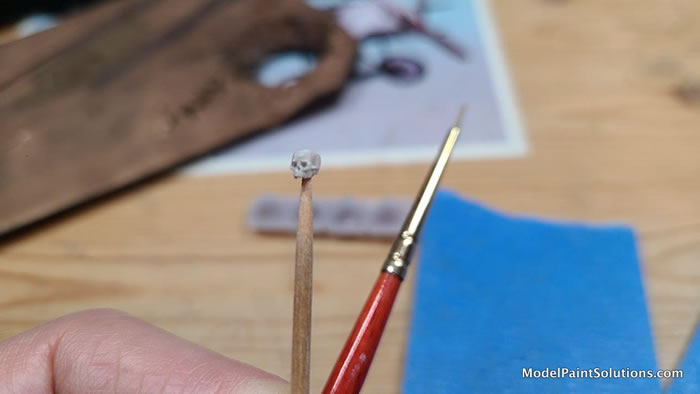
To further convey a small sense of horror, I commissioned friend and spectacular modeling artist Bill Huffman to 3D print a 1/72 scale skull. After some quick cleanup, the skull was ready for paint (Mission MMP-104 Insignia White), followed by Tamiya Black Panel Line Wash for the holes, and a little AK Interactive Burnt Umber pigment.
As foreshadowed above, the Airfix silvery vinyl track was problematic. I had to carefully mark the fore and aft major bend areas, then repeatedly heat and bend the track in hot water. CA glue was not particularly effective at holding it down. A combination of 1mm-wide, 2-sided tape (from Gaia), 5-minute epoxy, and even small machine screws were used to finally secure the track. The Masterbox rubber track was far easier to use.
Tanks of course aren’t tanks without weathering. There are many fine articles out there on armor weathering by modelers far more skilled and experienced at it than me. I’ll cut to the chase noting that I applied a sequence of overall oil-based washes, filters, pin washes, dust coats, and pigments to enhance the vehicles. AK Interactive Burnt Umber, European Earth, Track Rust, Light Rust, and Smoke were all part of the pigment palette – most of these were applied after the final flat coat to remain visible.
I backed off a bit on dusting up the lower half of the Masterbox model – having invested several hours on that Solomon scheme, I was not about to cover it all up! Let’s say it’s depicted in the first few hours of service in the Somme. I roughed and rusted up the “chicken coop” mesh a bit, and killed the shine with a flat coat.
After mounting the tanks to their respective bases with simple Elmer’s glue, I muddied things up with a slurry of Burnt Umber pigment around the track circumference and steering tail hardware, followed by a drizzle of Future (Pledge Floor Gloss) for appropriate “wetness.” I commenced the pouring of the Airfix crater trough with the Realistic Water in three iterations – this material shrinks // a lot // as it sets over 24-48 hours, so it’s best to work in layers. I tinted the first layer with a little Mission MMP-003 Brown to murk it up a bit.
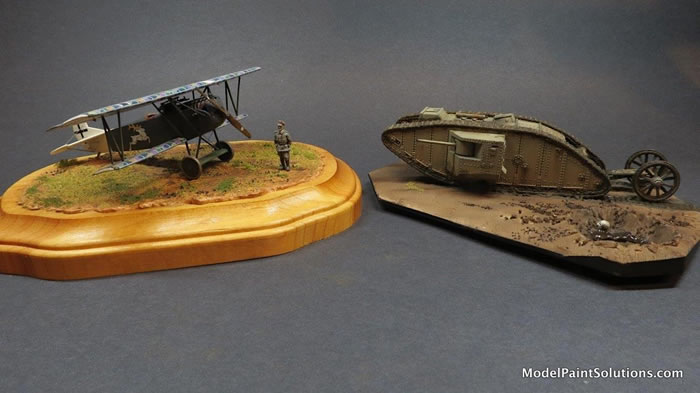
Barbed wire for the Masterbox scene required some head-scratching. I certainly didn’t want to get into a laborious hand-crafted scheme, but my recent 1/700 ship build provided some inspiration: PE railing. I took some spare railing and cut it length-wise to suggest the barbs, and I think it has an appropriate scale look. Multi-genre modeling has its benefits! Splintered toothpick fence-posts and a little rust pigment finished off this “box art” scene.
Summary
These were enjoyable, cheap, relatively simple, and quick builds. I’m happy to add these highly significant subjects to my display case, and I hope they convey both human design ingenuity and a little of the nastiness of war. It’s always good to try modeling genres and subjects outside your usual comfort zone – that’s how your comfort zone expands.
(As a side observation, tanks generate a feeling of hugeness. The actual Mark I at Bovington, although not a King Tiger or M1-A1 by any means, exudes this impression. But they’re not as large as you think. For reference, a photo is included of the Airfix Mark I parked alongside a Fokker D.VII (Roden kit in Carl Degelow’s markings).
Cheers!
For more on this review visit Modelpaintsolutions.com
https://modelpaintsol.com/builds/masterbox-airfix-british-mark-i-tanks-tim-nelson
Text and images copyright © 2020 by Tim Nelson.
References
“British Heavy Tanks of World War I,”
https://en.wikipedia.org/wiki/British_heavy_tanks_of_World_War_I
Mark I, The Tank Museum, Bovington, Dorset, UK, https://tankmuseum.org/tank-nuts/tank-collection/mark-i/ (Be sure to watch curator David Fletcher’s short video)
“British Mark I Tank 1916,” David Fletcher, Tony Bryan, Osprey Publishing 2004
Model, Images and Text by Tim Nelson
Page Created 10 May, 2021
Page Last Updated
10 May, 2021
|