Jagdpanther Late Production |
Trumpeter, 1/72 scale |
 |
| by John Miller |

Summary
| Stock Number and Description |
Trumpeter Kit No. 07272 - Jagdpanther Late Production |
| Scale: |
1/72 |
| Media and Contents: |
70 parts in grey styrene, vinyl tracks, and one decal sheet with markings for two Jadgepanthers.parts over five medium green sprues. Eight vinyl tyres and a small decal sheet offering two marking choices. |
| Price: |
£10.83 Plus Shipping from Hannants
$13.59 Plus Shipping from Squadron |
| Review Type: |
First Look |
| Advantages: |
Low parts count, simple engineering, good detail, and vinyl tracks, made this a quick and enjoyable build. |
| Disadvantages: |
|
| Recommendation: |
This kit does not disappoint both in subject matter and detail present. Tamiya just seem to have a knack of getting everything right. . |

Introduction
I first put an X-Acto blade to sprue somewhere around 1973. By 1975 I was a complete sprue junky spending most of my free time building and airbrushing airplane models: only airplane models. Being a certified wingnut, I’ve enjoyed a solid diet of scale aircraft (mostly 1/72) until this little Trumpeter Jadgpanther: my first armour model.
As an airplane guy I had a few “moments” during the build like “Why are there so many #&$@%@ wheels!” and “Jeez this thing made a mess of my bench!”……but I digress. In short, building and painting this Jagdpanther was a blast. The build required me to learn some new techniques and unlearn some old ones and I’m a better modeler for the effort. Most importantly this build was really fun and that’s the universal bottom line.
Background
The Jagdpanther (German: "hunting panther"), SdKfz 173, is a tank destroyer based on the chassis of the Panther tank and manufactured by Germany during World War II. It entered service in 1944 during the later stages of the war on the Eastern and Western Fronts. The Jagdpanther combined the 8.8 cm Pak 43 cannon, similar to the main gun of the Tiger II, and the armor and suspension of the Panther chassis.
A product of late war production, the Jagdpanther suffered from poor production standards, marginal maintenance, and a shortage of spare parts.
Development
The Jagdpanther had been preceded by two attempts at mounting an 8.8 cm gun as a self-propelled anti-tank weapon: the Ferdinand using the 91 leftover Porsche-built VK 45.01 (P) chassis and the Nashorn, using a Panzer III/IV chassis. The Ferdinand proved to be too heavy and the Nashorn too lightly armoured and underpowered.
A heavy tank destroyer design based on the 8.8 cm Pak 43 gun and the Panther tank chassis was ordered in late 1942. The full-size model by Daimler-Benz was demonstrated in October 1943 before Hitler. MIAG-built prototypes followed in October/November 1943.
Jagdpanther production started in January 1944. In February, Hitler specified the simpler Jagdpanther name instead of its original "8.8 cm Pak 43/3 auf Fahrgestell Panther".
To accommodate the heavier-caliber gun, as on previous Jagdpanzer-style un-turreted tank destroyers, the glacis plate and sloped hull sides of the Jagdpanther were extended up into an integral, turretless fixed casemate as part of the main hull itself. This provided a roomy interior for the crew. The Jagdpanther had side armour of increased thickness (50 mm) to offset the slightly reduced angle of the side armour necessary to provide enough interior space. Lower frontal hull armour was reduced to 60 mm while upper hull frontal armour was kept at 80mm. The chassis armour changes were also introduced on the main Panther tank assembly lines starting with the Panther Ausf G in the spring of 1944.
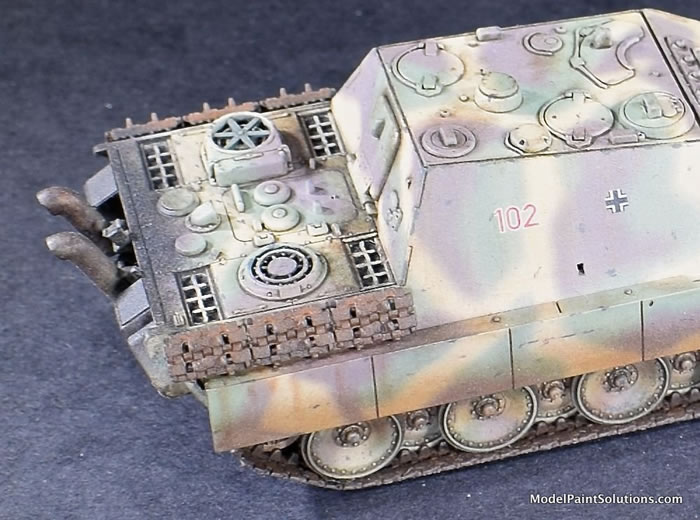
The Jagdpanther was armed with the long-barreled 8.8 cm Pak 43/3 L/71 gun, similar to the main gun of the Tiger II "King Tiger". The gun was mounted in a central mantlet, which gave it a limited traverse of 12 degrees to each side. A single 7.92 mm MG 34 machine gun for local defense was mounted in a ball mount on the right side of the front glacis plate. The machine gunner was also the wireless operator. The driver sat on the left. The gunner had a rangefinder and a periscope telescopic sight. The periscope - linked to the gun mount - was under an armoured housing on the roof.
The two main variants of the Jagdpanther, G1 and G2, can be distinguished by the following features. The earlier G1 1944 model had a small welded main gun mantlet, a one-piece Pak 43/3 gun, a modified Panther A engine deck, and two vision openings for the driver. The G2 used a Panther Ausf. G engine deck, a larger gun mantlet bolted externally (to cut down on production time?), and a two-piece KwK 43/4 L/71 gun. Some later G1 models may have possessed G2 features such as the larger G2 mantlet because changes to the design were implemented gradually and lack of spares turned many Jagdpanthers into hybrids. Zimmerit was applied to G1's up to September 1944, when it was withdrawn for fear of fire risk and to speed up production time. Early Jagdpanthers had two vision openings for the driver, whereas late versions had only one. The main gun originally had a monobloc gun barrel, but from May 1944 on this was gradually replaced by a two-part barrel, which was more economical as barrel wear was not even.
Production and Service
A total of 415 Jagdpanthers were produced by three manufacturers. MIAG in Braunschweig produced 270 from January 1944 until the end of the war. Maschinenfabrik Niedersachsen-Hannover (MNH) produced 112 from November 1944. And, Maschinenbau und Bahnbedarf (MBA) in Potsdam produced 37 vehicles from December 1944. Planned production had been 150 a month, but the disruption to German manufacturing had made this impossible.
The last 'production' Jagdpanthers were produced at the factory by German staff just after the end of World War II under the supervision of the Royal Electrical and Mechanical Engineers (REME) using available components. 9 Panthers and 12 Jagdpanthers were produced and shipped back to Britain for post-war trials. A complete Panther and a complete Jagdpanther produced this way are now at the Bovington Tank Museum, Dorset, with brass plates on them, explaining their history.
Jagdpanther equipped heavy antitank battalions (Schwere Panzerjäger-Abteilungen) and served mainly on the Eastern Front. In the West, they were first encountered in small numbers late in the Battle of Normandy, where the German 654 schwere Panzerjäger-Abteilung ("654th Heavy Antitank Battalion") deployed about 12 Jagdpanthers against British units. Later, significant numbers were concentrated in the West for the Ardennes Offensive.
Survivors
Three surviving Jagdpanthers have been restored to running condition. Two German museums, the Deutsches Panzermuseum at Munster and the Wehrtechnische Studiensammlung (WTS) at Koblenz, each have a running Jagdpanther. The SDKFZ Foundation in the UK has restored one Jagdpanther to running condition, using two wrecked Jagdpanthers to complete one. The other wreck will also be restored.
There are at present seven additional surviving Jagdpanthers, which are on display at the following museums:
-
Bovington Tank Museum, Dorset, UK—one of a number assembled by British Army Royal Electrical and Mechanical Engineers for trials, late production model.
-
Imperial War Museum Duxford, Duxford, UK. Early production variant. This has three shot penetrations on the right side of the engine compartment while the left side has been sectioned and opened to public view. Was hit during the battle of Hechtel, Belgium by Hugh Griffiths, Baron Griffiths
-
Kubinka Tank Museum, Moscow, Russia
-
Musée des Blindés in Saumur, France
-
Sinsheim Auto & Technik Museum, Sinsheim, Germany
-
Panzermuseum Thun, Thun, Switzerland
-
Anniston Army Depot, Anniston, Alabama, USA - In storage at Center for Military History Museum Support Center - Anniston
-
The Wheatcroft Collection in the UK owns a small collection of parts of Jagdpanthers and hopes to restore one.
(Edited from Wikipedia)
The Build
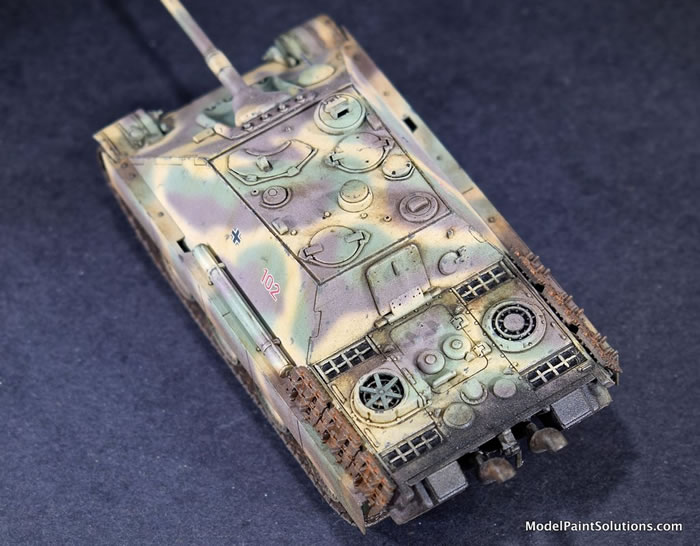
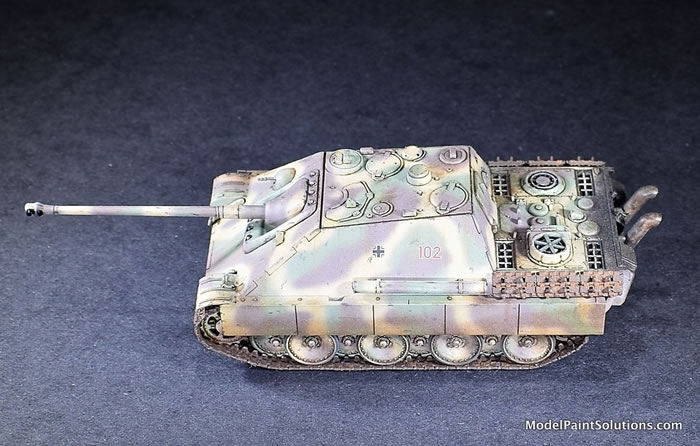
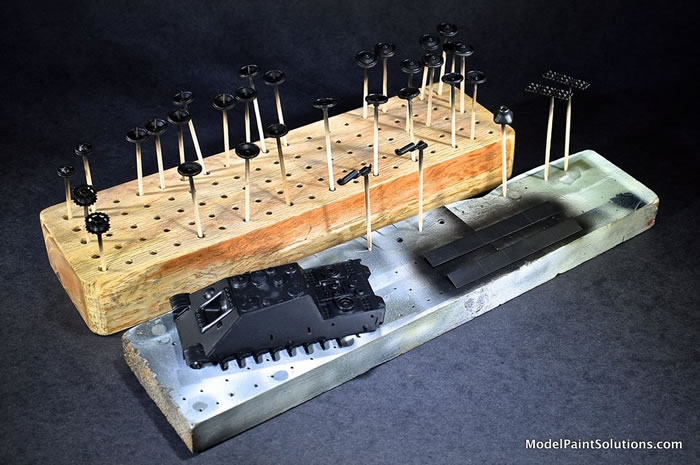
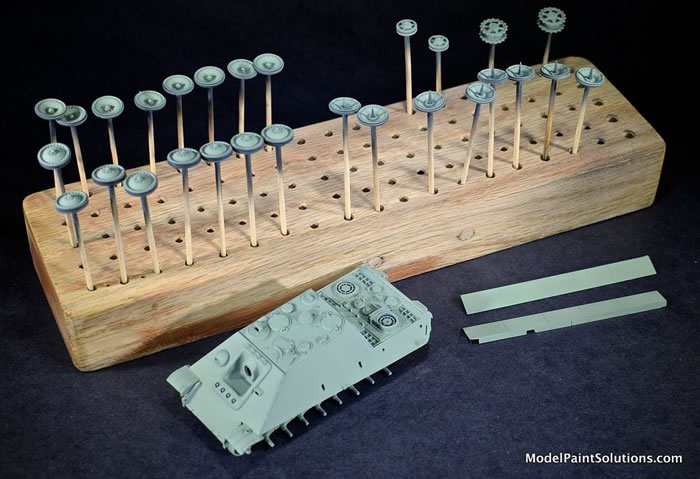
The kit is crisply molded with surface details rendered in relief an inscribed. As with my aircraft builds, Tamiya Thin Cement was used for most of the larger pieces and thick CA glue by Bob Smith Industries for smaller parts. The drive, road, and idler wheels are each composed of halves making for 24 little wheels rolling around my bench at one point. Since I’m used to two mains and a tail wheel, I developed a brief case of axel anxiety. Fortunately, a couple of friends from IPMS that are accomplished tank modelers, (Eric C., Bruce B., and Aaron H.) gave me some pointers on this and other tank-related issues: many tanks guys---sorry.
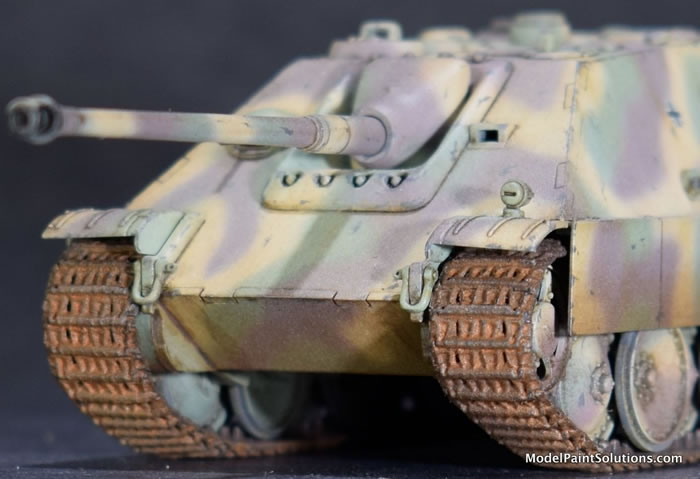
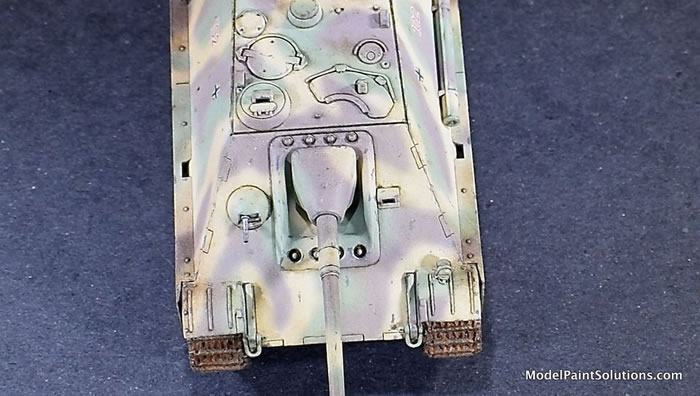
The build was straightforward with no problems. The one small issue is a hole that has to be carved in the mantle piece permitting the barrel to be added. With this done, I prepped all the main parts for priming and turned my attention to painting the tracks.
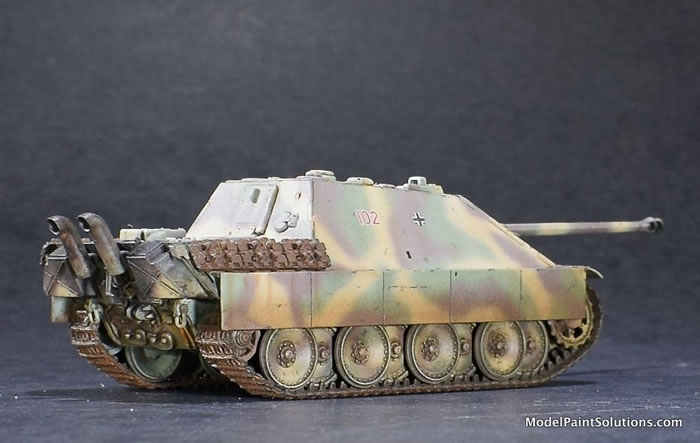
The tracks were first shot with Mission Black Primer followed by a custom “Track Mix” composed of Mission Standard Rust, Rotbraun, and Worn Tires at a ratio of 6:3:1 respectively. This was lightened with a few drops of White for scale effect.
After the tracks were dried they received a wash of enamel-based AK Light Rust ((AK 046). When the wash was dry, it was sealed with a coat of Mission Semi-Gloss. When the Semi-Gloss was dry, pigments (Vallejo Burnt Umber [73.110] and Vallejo Light Sienna [73.104]) were dabbed on with a short-bristled brush and set in place with AK Pigment Fixer. After an additional coat of Semi-Gloss, drops of a Dark Brown enamel filter (AK076) were carefully applied with a pin brush for a sense of shadows. The track ends were then joined using CA glue (Bob Smith) and the completed tracks set aside while I returned to building something to put them on.
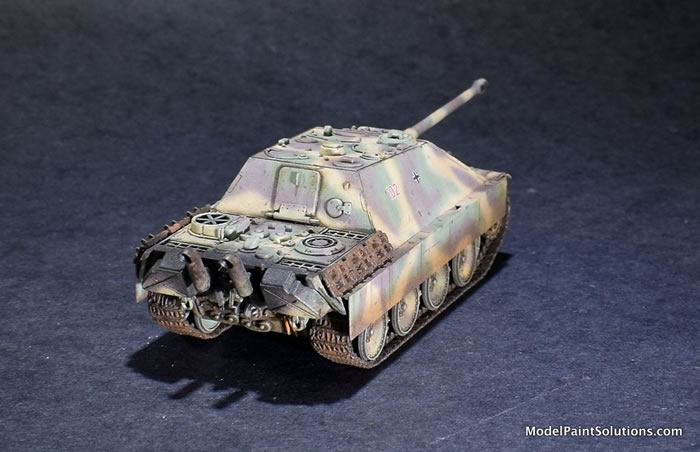
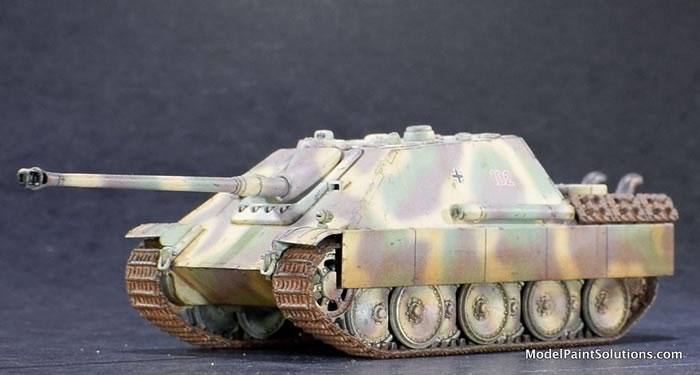
Color and Markings
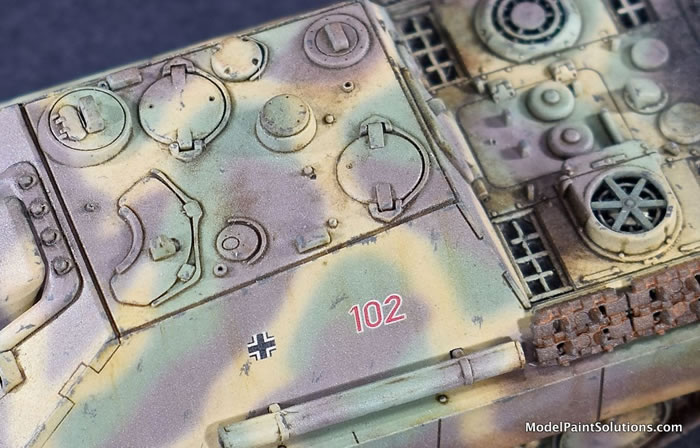
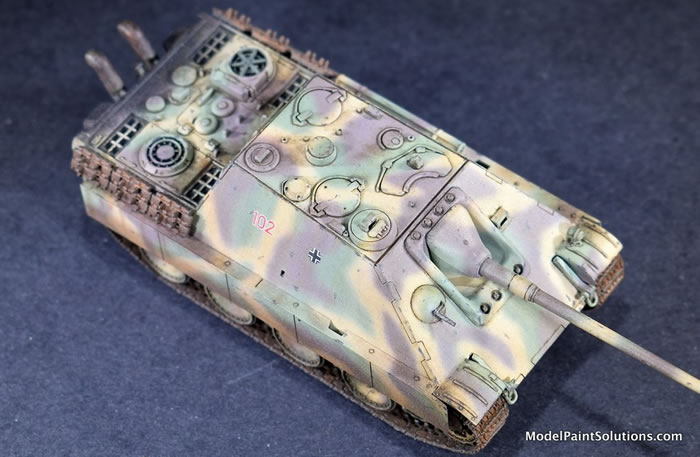
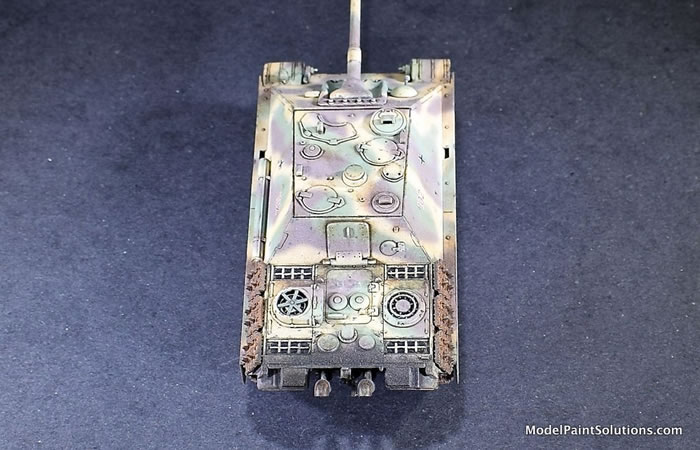
This scheme is an exercise in fine-line airbrushing: my favorite thing J The Dunkelgrün, Rotbraun, and Dunkelgelb were all Mission Models diluted for fine-line airbrushing and shot at ~6-8psi with an H&S Colani hybrid-action airbrush.
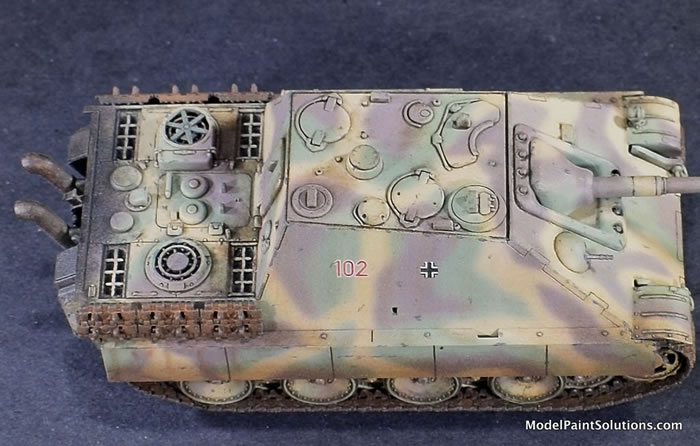
With the scheme complete, I applied a coat of Mission Gloss in preparation for decaling. The kit decals responded well to Micro-Set and –Sol and were sealed and blended with a coat of Mission Semi-Gloss.
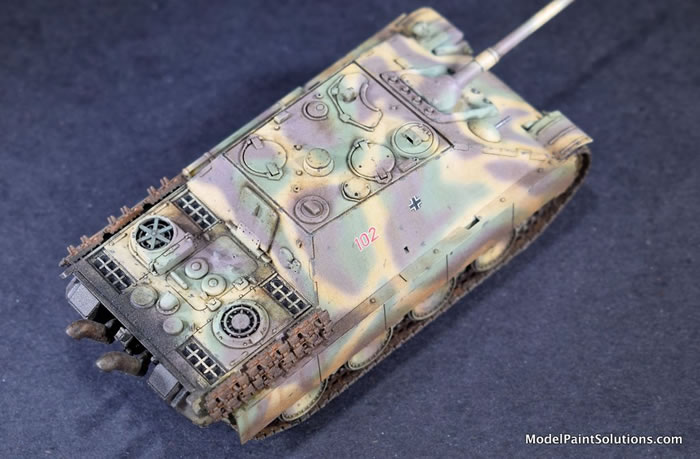
Once the Semi-Gloss was dry I tried my hand at weathering the Jagdpanther with artists oils: a new technique for me. Following the guidelines provided in TankArt I by Michael Rinaldi, I used Light Flesh Tone, Yellow Ochre, Vandyke Brown, and Burnt Umber oils to replicate smudges and smears that, when dry, were then locked in place with a coat of Mission Semi-Gloss: great trick.
Additional weathering in the form of road dust on the skirts and crew marks on the fenders and around doors and latches were applied with the same pigments used on the tracks (above). After locking the dry pigments in place with a coat of Semi-Gloss, the model was given a final light coat of Mission Flat to tie it all together: what a blast!
Conclusion
Not only was this kit quick and easy: the painting and finishing was a complete hoot. I enjoyed myself immensely and learned a bunch of new finishing tricks that I’ll be using again no matter what it is I’m building. I want to send a special thanks to Brushmaster Aaron H. of Seattle IPMS for the hands-on tips he provided on weathering with oils: cool stuff.
Now gotta go paint something: maybe a tank!
John
Kit eagerly purchased by the builder.
For more on this build visit Modelpaintsolutions.com.
Text and images copyright © 2019 by Model Paint Solutions.
Model, Images and
Text by John Miller
Page Created
25 January, 2019
Page Last Updated
25 January, 2019
|