Summary
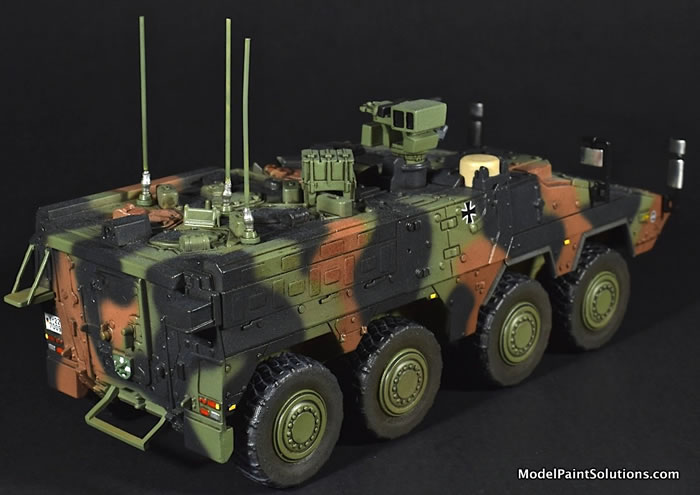
IntroductionAK Real Colors, a relative newcomer to the model paints neighborhood, is a pigment -dense, acrylic lacquer that can be diluted with lacquer thinners as well as some water-alcohol-based thinners. For finishing this 1/72 GTK Boxer, three different AK thinners (XTreme, Nitro, and High Compatibility) were used to dilute custom mixes of AK Real Colors for fine-line airbrushing. The results were both predictable and surprising….. First, a little background on the Boxer…… The GTK Boxer is a multirole armored fighting vehicle designed by an international consortium to accomplish a number of operations through the use of installable mission modules. The governments participating in the Boxer program have changed as the program has developed. The Boxer vehicle is produced by the ARTEC GmbH (armored vehicle technology) industrial group, and the program is being managed by OCCAR (Organization for Joint Armament Cooperation). A distinctive and unique feature of the vehicle is its composition of a drive platform module and interchangeable mission modules which allow several configurations to meet different operational requirements. Other names in use or previously used for the Boxer are GTK (Gepanzertes Transport-Kraftfahrzeug; armoured transport vehicle) Boxer and MRAV (multi role armored vehicle). Confirmed Boxer customers as of February 2020 are Germany, the Netherlands, Lithuania, Australia and the UK. The Boxer has been produced and seen service in A0, A1 and A2 configurations. The UK Boxer will be an A3 configuration while Australian deliveries are an A2/A3 hybrid. Text and pics edited from Wikipedia
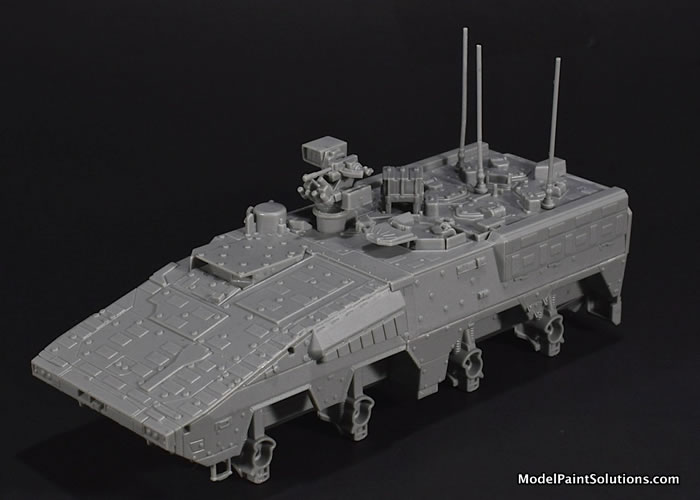
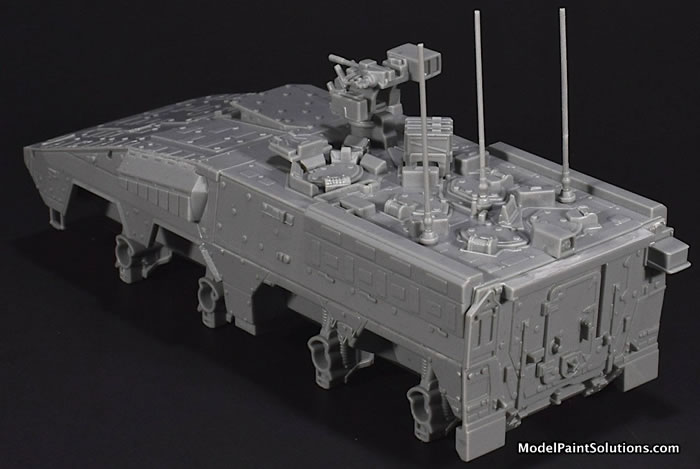
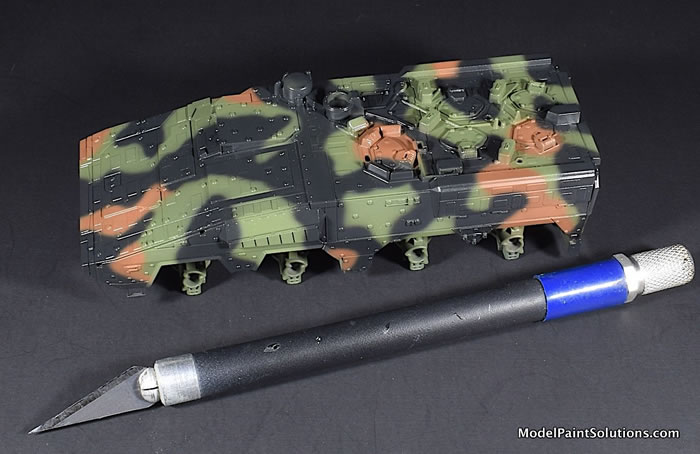
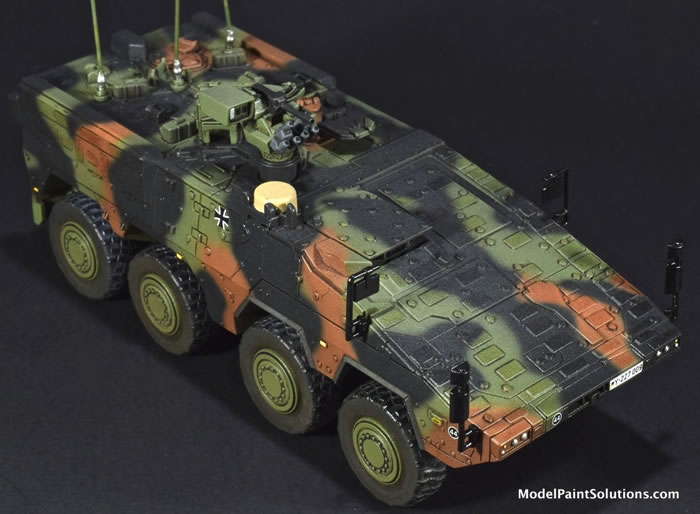
The Kit:Typical of most peanut scale Dragon armor kits, the details on their Boxer (kit# 7680) are abundant and crisply rendered. There are only ~40 styrene parts and the main hull is divided into upper and lower halves with a rear section making assembly a breeze.
The six wheels slip into vinyl tires that have well-molded, scale-appropriate treads. Three aluminum rods serve as “axels” and pass through wheel mounts thence into each wheel where they’re held by a tight friction-fit; simple and easy. The decals are minimal providing a few i.d. numbers, insignia, and a license plate. For the crew view ports, a sheet of die-cut, peel and stick reflective “windows” are provided that look surprisingly convincing when applied.
The Build:Assembly of the model was done in one, stress-free ~4hr building session. The build starts by joining the upper and lower hull pieces followed by the rear section.
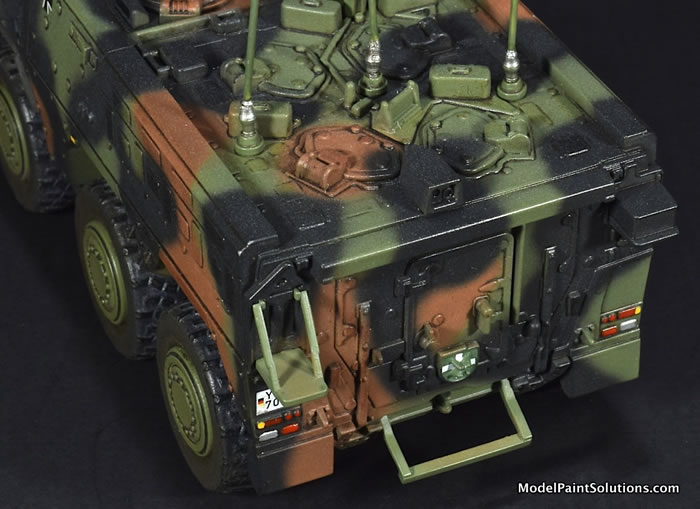
Once a door and various steps are added assembly turns to armament and view ports. Final additions like antennae, rear-view mirrors, and tires/wheels were finished separately.
This was a quick, easy, and thoroughly enjoyable build and a change from some of the more demanding aircraft kits I’ve been dealing with of late.
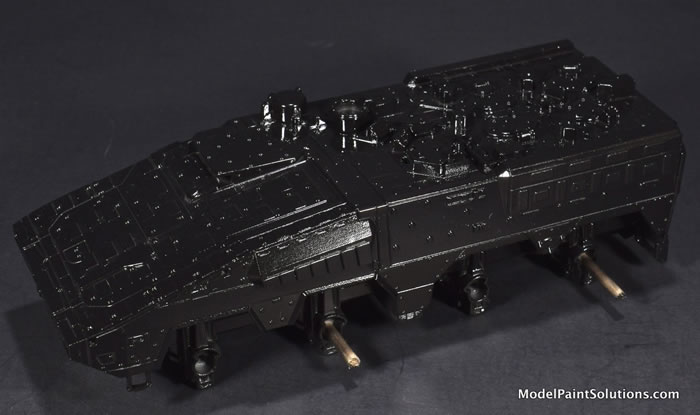
Color and Markings: (The fun part :)But first…….. Before we get to the dilutions and pressures and thinners (Oh my!) please keep in mind that the conditions I airbrush in (humidity, temperature, and elevation) may differ greatly from those occupied by your paint booth. I’m fortunate in that Seattle is usually on the humid and cool side; ideal for spraying most types of paint. That said, if your environs are warmer, less humid, and/or at a higher elevation, results as those discussed here may require increased paint dilutions and/or the use of higher concentrations of wetting agents and drying retarders. Thus, the suggestions provided below are intended only as starting points from which the best paint dilution, pressure, and thinner for your specific location can be determined by experimentation. The Primer Coat As is my norm, the model was wiped down with a Kimwipe saturated with Denatured Alcohol (for Cleaning Glass) prior to priming. The model was then shot with AK XTreme Metal Black Base diluted to 70% paint with AK XTreme Thinner/Cleaner (70% Black Base : 30% Thinner). This was applied at ~12psi with an H-S Evolution fitted with a 0.20mm tip; first as a light, dry coat followed by a wet, fill coat. This was allowed to dry for 24hrs in preparation for the first color coat.
NOTE: AK Black Base and all the AK XTreme Metallics spray very nicely when diluted to ~70% paint with AK XTreme Thinner/Cleaner. If you prefer to stay away from strong lacquers for health reasons, the XTreme Metallics range can also be diluted with AK High Compatibility Thinner (same dilution; 70%). AK High Compatibility Thinner has a slightly sweet, alcohol-like smell nowhere near as strong as lacquer thinner. Either way, all airbrushing should be done in a paint booth that’s ducted outside while wearing at least a surgical mask to protect yourself from particulates. Mixing the AK Real Colors Used for the Scheme
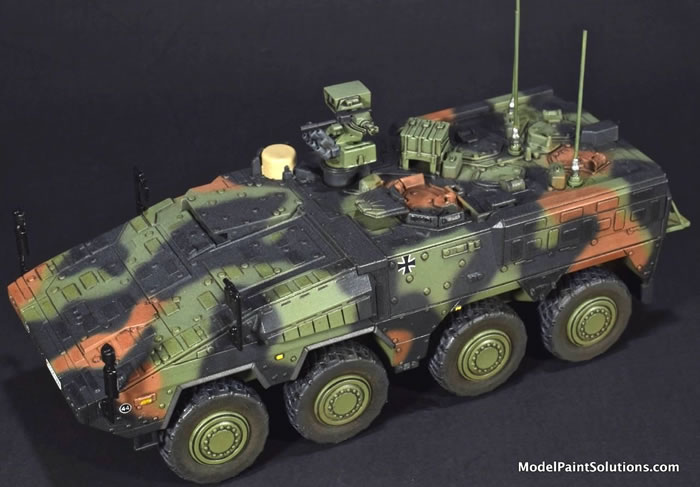
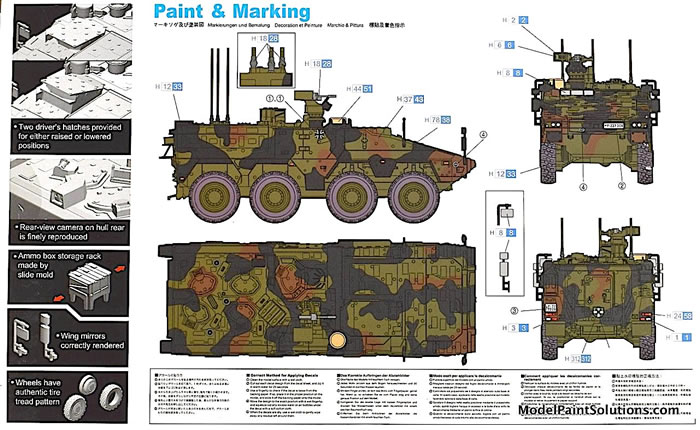
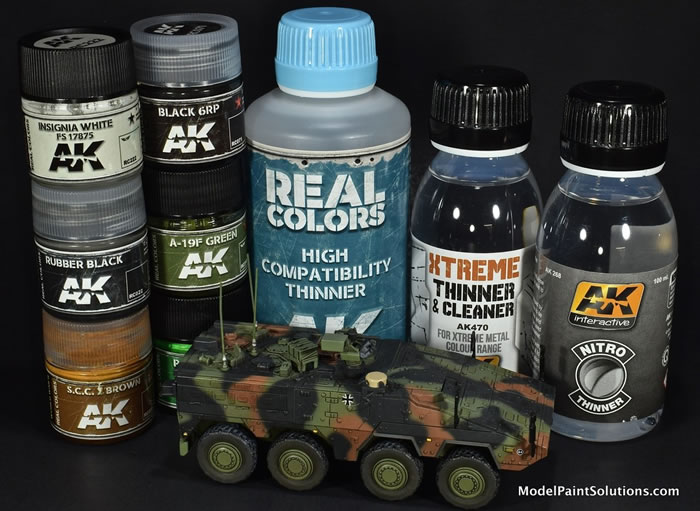
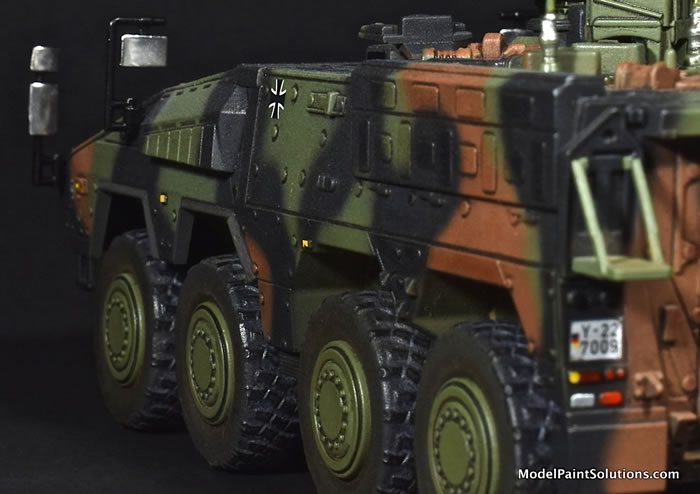
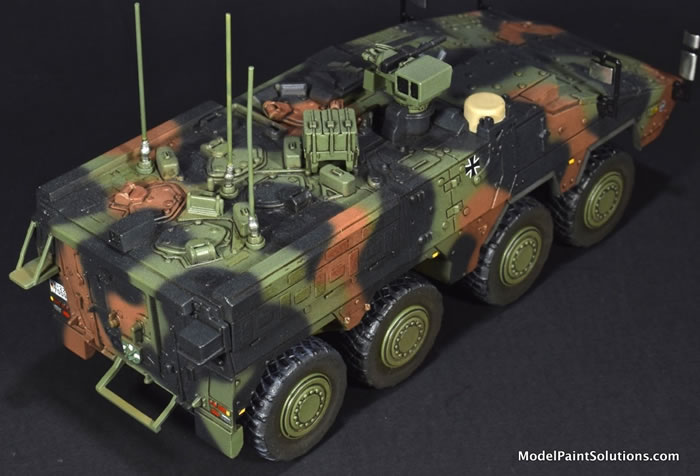
The tri-color camo called out in the painting instructions is in GSI Creos numbers/names and consists of Flat Black for which I substituted AK Black 6RP; a very nice scale black (i.e., dark black-grey). The “Wood Brown” was a good match with AK S.C.C. Brown after lightening with 10% AK White. The green (Olive Drab #2) was a puzzler as I had no “Olive Drab” in my paint collection that came close.
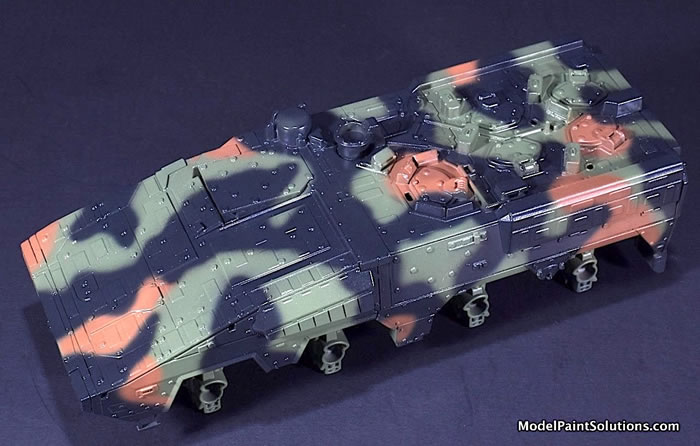
After spending some time looking at this particular Boxer scheme, I went with my eyes and mixed a custom green composed of 90% AK A-19F Green and 10% AK Pure Green. Color Sequencing When painting a multi-color scheme such as on the Boxer, I generally try to start with the lightest color followed by the remaining colors in order of darkness; lighter to darker. Generally.
However, I found the AK S.C.C. Brown/White mix to have such good coverage that I started with the green color first followed by the “Wood Brown” thence the AK Black 6RP.
Prior to starting any painting, the walkway on top of the Boxer was painted and after drying overnight, masked off in preparation for the camouflage. Dilutions, Pressures, and Working Distance For airbrushing the Boxers’ scheme, paint dilutions of 40, 20, and 10% paint were prepared in each of the 3 thinners being tested. Each of the dilution/thinner combinations was then assessed for ease of fine-line spraying using the same H-S Infinity fitted with a 0.15mm tip. In general, most of the Boxers’ scheme was painted with dilutions of ~20% paint, which easily gave a line of the desired width for this scheme. The lower dilution of 10% was used to spray fine-line touch-up work for some colors. In addition, ~10% paint is often the dilution I would use for super-fine-line (less than 1mm wide) work. The working distance (the space between the tip of the airbrush and the model) was ~1/4inch (~6 mm). Yup, that close. This is often the biggest challenge for someone new to doing fine-line work; maintaining the close working distance required to shoot an intact line of paint while spraying around curves and irregular shapes. To make things as easy as possible, I also stabilize my airbrush hand on a shooters rest bag and immobilize the model on a vise with a swiveling head. This permits the model to be ideally positioned for each “shot” while keeping the required hand movement to a minimum. This is key for those of us that have issues stabilizing our hands while airbrushing fine lines. Diluting AK Real Colors for Fine-Line Airbrushing The three AK thinners used to dilute AK Real Colors for fine-line airbrushing were: AK XTreme Thinner/Cleaner The AK XTreme Thinner/Cleaner is just that; a very strong lacquer thinner similar, but I suspect more refined, to what would be available from a hardware store.
Fine-Line Spraying with XTreme: Being a strong lacquer, XTreme Thinner tends to make Real Colors paints spray very dry with intermittent clogging, tip goobers, and a rough finish when dry. Although decreasing the paint dilution from 40 to 20% allows the paint to flow better, there is still appreciable overspray indicative of a paint being too dry. A dilution of 10% produced a more pronounced overspray. The addition of Gunze-Sangyo Mr. Retarder Mild (a drying retarder good for lacquer thinners; Picture) to 10% by volume decreased the tip-dry and overspray but only to barely acceptable levels. Bottom Line: AK XTreme Thinner/Cleaner can be used to dilute Real Colors for spraying, but making XTreme Thinner “wet” enough to be a good diluent for fine-line dilutions of Real Colors paints is an up-hill battle. The addition of a wetting agent or retarder is strongly recommended or the results will be far from ideal. That said, XTreme Thinner is great for cleaning Real Colors paints from your brush and for diluting the AK Xtreme Metallics range for spraying. AK Nitro Thinner The “Nitro” denotes a nitrocellulose-based lacquer that’s recommended for use with the new AK Clear Colors range as well as their Real Colors paints and clear coats. This is a pretty strong lacquer that doubles as a cleaner for Real Colors and most lacquer paints. I use it regularly to dilute AK Gloss producing awesome results with a shorter drying time than other thinners. That said, using Nitro to prepare dilutions of Real Colors for fine-line work is a different story.
AK High Compatibility Thinner As stated on the side of the bottle, High Compatibility Thinner (HCT) contains both 1-methoxy-2-propanol and monopropylene glycol methyl ether. The thinner has a slightly sweet, alcohol-like odor, which is not entirely objectionable. As the name implies, HCT can be used to dilute many different brands of acrylic paints for airbrushing. In my hands, HCT is almost a miracle thinner :) Of the three AK thinners tested, I found HCT to be the best, by far, for preparing dilutions of Real Color paints for airbrushing. All paint concentrations tested (40, 20, and 10%) in High Compatibility Thinner were found to easily produce fine lines of ~1mm in width. At the highest paint concentration tested (40%), mild over-spray and tip-dry were encountered. Decreasing the paint from 40 to 20% reduce both to completely acceptable levels. Addition of Liquitex Flow-Aid to 5% decreased the tip-dry further producing some best dilutions of paint for fine-line spraying I’ve encountered. Bottom Line: AK High Compatibility is my new fave thinner for diluting AK Real Colors paints. Dilutions of Real Colors Paints in HCT provided the best fine-line performance and were the dilutions used for all of the touch-ups required for the Boxer scheme. Addition of Liquitex Flow-Aid to ~5% decreased what little tip-dry was evident. A dilution of 20% paint with 5% Flow-Aid in HCT provided such good fine-line performance, the addition of Liquitex Slow-Dri (to ~5%) had no effect; amazing. Other Thinners Good (and not so good) for Diluting AK Real Colors Paint
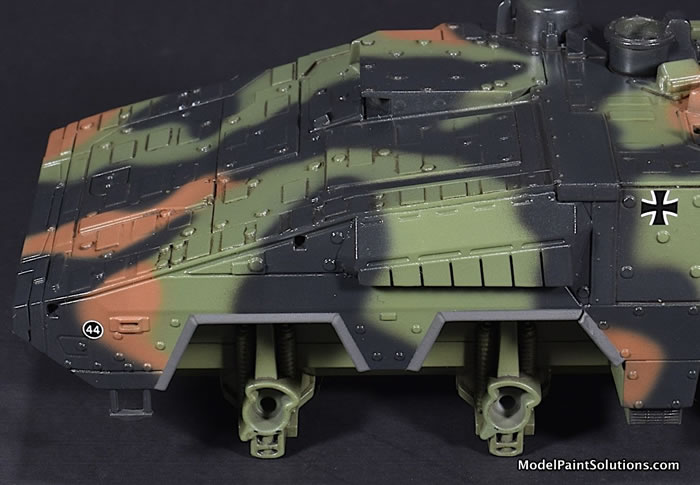
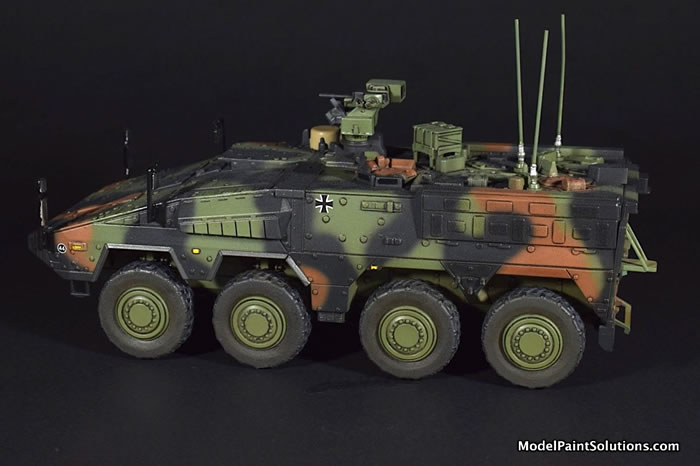
Finishing the ModelOnce the camo was applied, the finish was sealed and prepared for decals with a coat of AK Gloss diluted to 25% with AK Nitro Thinner. I like AK Gloss in this thinner as it provides a very nice, sturdy coat that drys fast. After this was dry (12hrs), the few decals required for the scheme were applied using Micro-Set, -Sol, and conventional techniques. After the decals were sealed with another coat of AK Gloss, panel lines were picked out with Black Tamiya Panel Liner delivered with a small brush. The model was then shot with AK Satin diluted in High Compatibility Thinner (25% Satin : 75% HCT). This was applied at ~15psi as multiple light, dry coats with an H-S Evolution fitted with a 0.20mm tip .
Thumbnail panels:
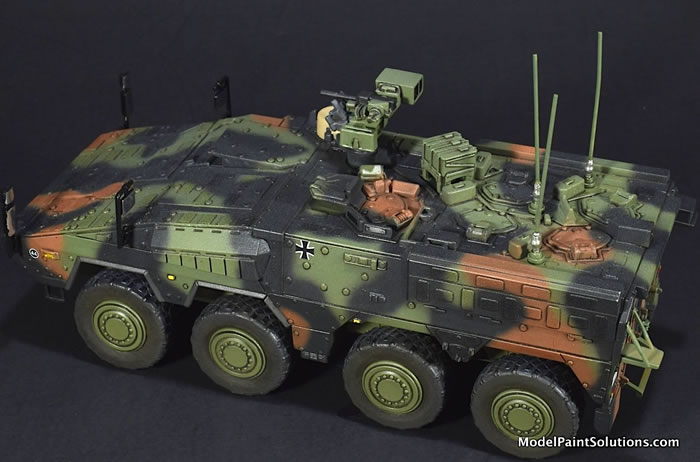
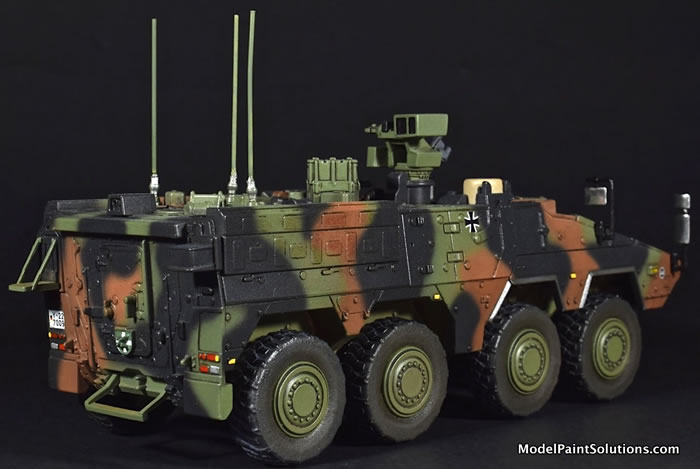
After the AK Satin was allowed to dry over night, individual panels on the Boxer were accentuated by essentially “coloring them in” using a sharpened and appropriately colored AK Weathering Pencil. This conferred a subtle difference in hue and tone to the panels versus adjacent sections of vehicles’ frame. For green panels I used (AK10006; Olive Green) while the Wood Brown panels were highlighted with (AK10011; Light Rust). The black panels were hit with AK Black (10001). After coloring-in the panels, a small brush was used to remove flakes of pigment. Then, the pigments on individual panels were blended with a small brush (no water). The model was then shot a final coat of AK Satin diluted in High Compatibility Thinner (25% Satin : 75% HCT); applied as described above.
The TiresOne of the best aspects polyurethane-based paints is how well they stick to properly prepped vinyl tires of the type so often found on modern armor kits. To that end, the kits tires were shot with a custom mix of Mission Models Tire Black (MMP-040) and British Slate Grey (MMP-045). This was diluted 1:1 with CP30, which is a solution of 30% Mission Clear Primer in Mission Thinner. CP30 (Clear Primer—30%) is what I use to dilute most of my Mission paints for spraying. Once the tires were allowed to dry 24hrs, the treads and other details were high-lighted with rendered oils diluted with Mona Lisa Odorless Thinner and the completed tires were mounted on the model.
Rear View Mirrors and Final Details The fenders were taped off and shot with AK Rubber diluted to ~30% in (you guessed it) AK High Compatibility Thinner. The rear view mirror frames were sprayed Mission Black and the reflective portions were hand-painted with Molotow Liquid Chrome as were various lights and signals on the Boxers’ frame. The mirrors were left unattached so as to be laid flat while the Molotow dried. They were attached later with thick CA (Bob Smith).
|
|||||||||