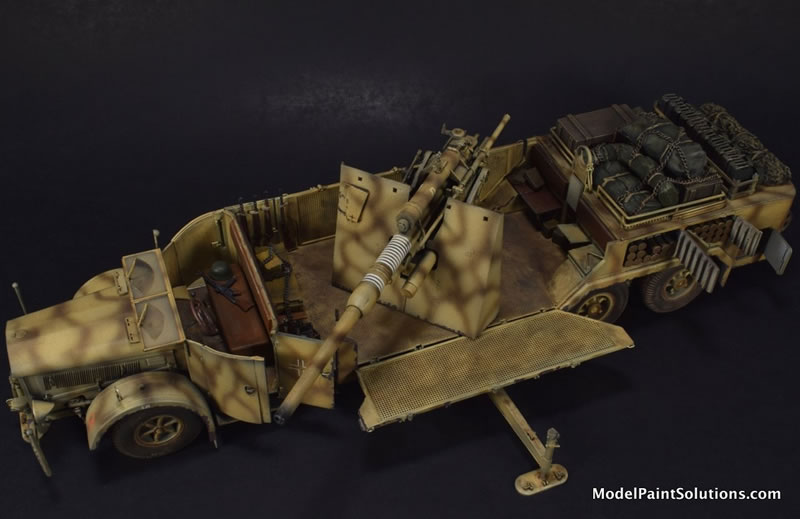
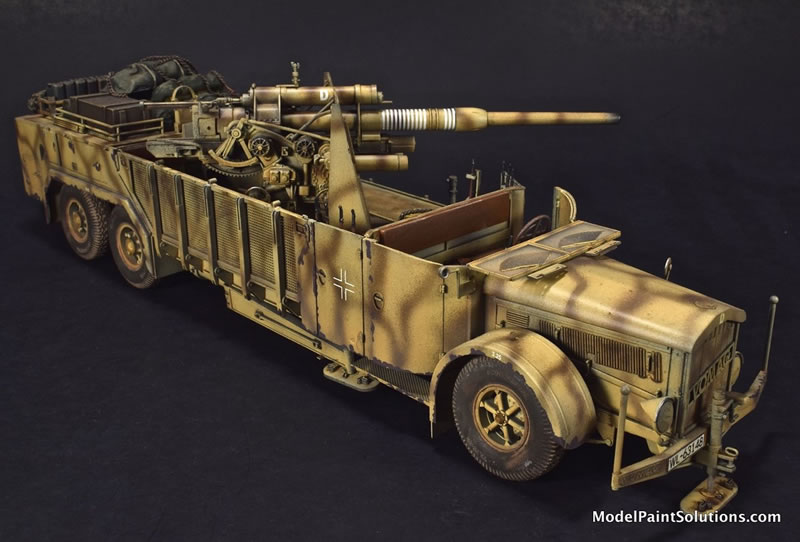
IntroductionYears ago, at an IPMS Nationals, I saw a fantastically-weird military vehicle called a Vomag, in tiny 1/72nd scale. All resin, from a Czech company called CMK, I think it was priced at $145, cash-only. I (very briefly) considered buying it, but alas, apparently even I have limits (who knew). Especially since I thought at the time that this was another German paper-vehicle; something that never saw the light of day. A decade or two went by and I found myself at yet another IPMS Nationals, this time with only one model kit on my buy list – a 1/35th scale version of that very same vehicle, the ‘8.8cm Flak on a 9ton Vomag’ by Das Werk. The weird ‘paper’ truck turned out to be a very real vehicle. Only twelve units were built, completed in 1941, and assigned to Hitler’s ‘Personal Protection Unit’. As such, they never saw combat until the closing days of the war in Europe, during ‘The Battle of the Vomags’, in Budapest, Hungary. The only two vehicles to see combat were finally destroyed by the advancing Russians, coming across the bridges from the Pest side of the Danube river.
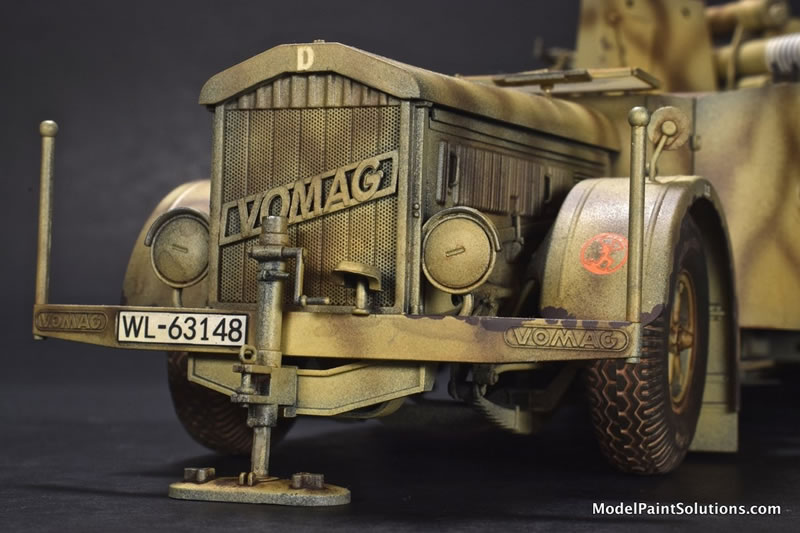
The Vomag, named after the German Truck company of the same name, started out as a heavy-lift truck, with some being converted to passenger buses. The entire top of the vehicle was removed and reworked into an open-air design, capable of mounting the large and lethal German ‘88’. The rear of the vehicle was built up to store 64 rounds of ammunition and a variety of crew-related equipment. The vehicle is held in place during combat by four outriggers that extend from underneath the chassis. The length of the loaded vehicle and its paltry range and speed were probably contributing factors to it not being used much during the war.
What’s in the BoxThe Vomag is a complicated build and I was surprised that it was offered by Das Werk, a company that has a good rep for fielding kits with ‘not that many’ parts in the box. This kit is different. Not only is there a complete 88mm Flak 37 gun included (sans the gun shield), but there is also a complete engine and six multipart ‘sandwich’-style wheels. All of the storage compartments and doors can be modeled open or closed, and both PE-mesh side panels can be assembled open or closed. Two sheets of PE and a set of perfectly registered decals round out the contents of the understandably oversized box.
The 32-page, glossy, full color instruction booklet is orientated sideways, with color callouts for Ammo-Mig acrylic paints. A detailed parts map falls before the construction section, and four gorgeous, full-color five-view color/decal schemes bring up the back end of the booklet. The following unit schemes are called out:
Assembly:Lower Chassis
Assembly starts with the lower chassis, and it is not pretty. The two longitudinal frame members that reach from the front to the very back of the vehicle are connected by no less than twelve cross-members that MUST be square with the frame and each other, or things start to go sideways in a hurry. The single front and dual rear axles are busy with a lot of small parts, and the wheel connections are not great. Each wheel (of six) depends on two separate female holes accepting their male counterparts in a small, restricted area. Spoiler alert – the wheels ended up going on fine later, so I must have done something right here. There are a variety of fuel tanks and tubes and pipes that run up and down the chassis, all with a good fit and straight-forward assembly.
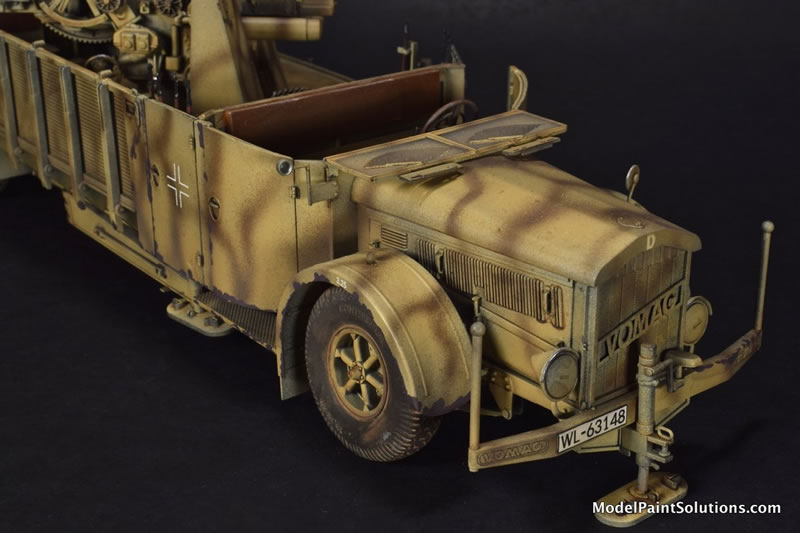
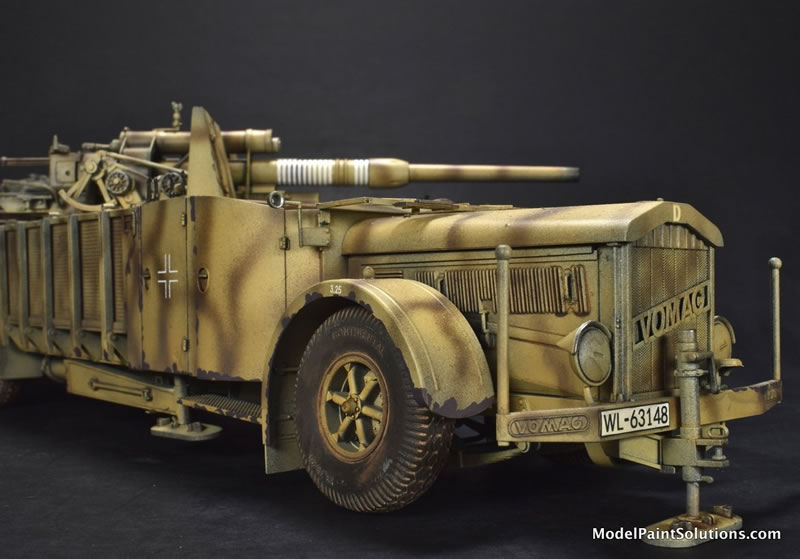
Engine and Front End (No Transmission)The highly-detailed engine is a nice addition and the front end can be modeled to show it off by omitting the two engine compartment side panels (a common practice on some of these larger German trucks and halftracks, like the 18t FAMO). I felt I had enough going on in the back so I closed the compartment and saved the engine for my spare parts box.
The fiddly headlights and engine panel locking clasps are a pain, but bring a lot of detail to the front end. The fenders did not fit well, with everything depending on several long, thin pieces being situated correctly (the instructions were not very helpful here). In the end, it was all about a ‘push here and a pull there’ until things looked relatively symmetrical.
WheelsEach of the six wheels on the Vomag (and two spares) are plastic and assembled using five ‘sandwiched’ rounds - a design pioneered by MiniArt - and perfect for these huge tires where the seams between the rounds double as the tread. No clean up required here, and the plastic takes paint and weathering beautifully.
Tape masks for the wheels will not work since there is an awkward protruding hub in the middle of each wheel. That said, there is a small rim that will assist in guiding your paint brush when you get to that part of finishing the wheels.
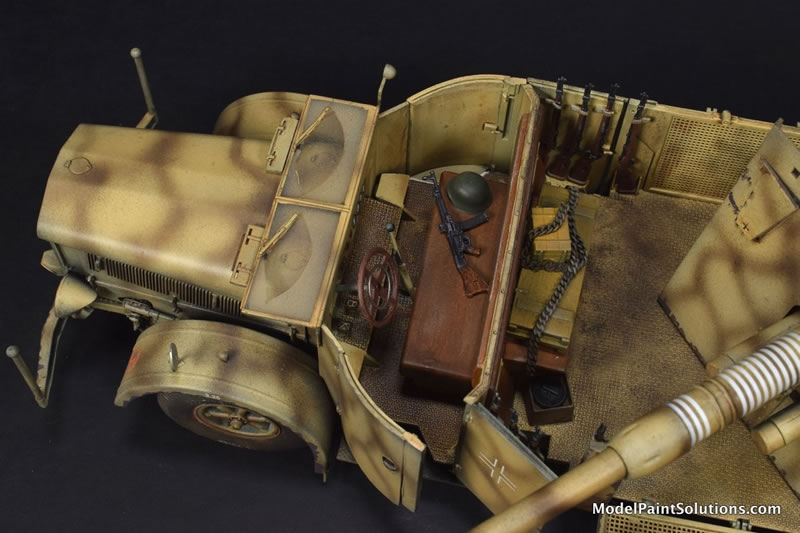
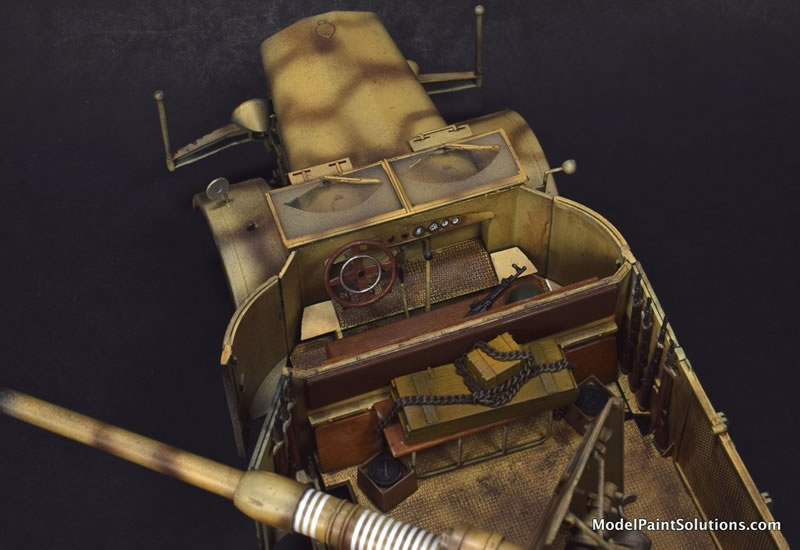
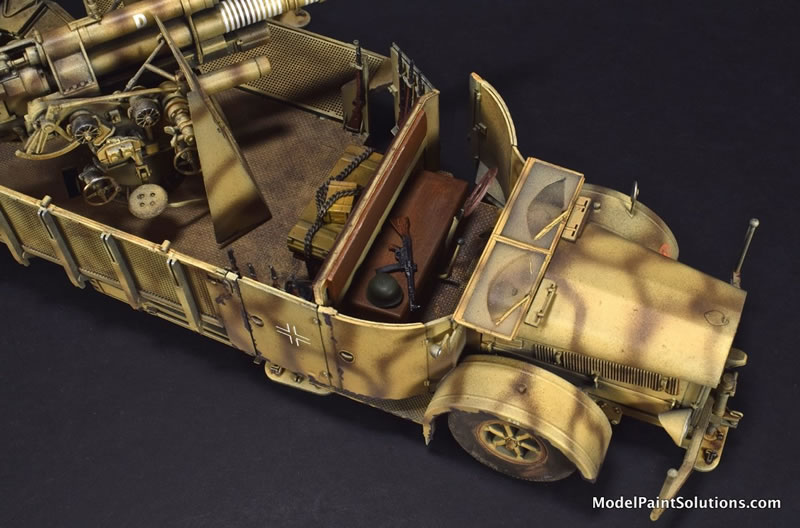
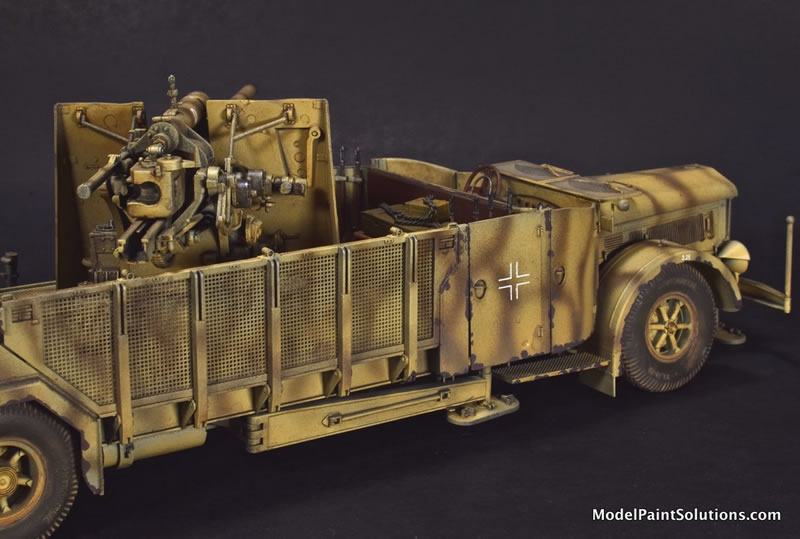
Drivers Compartment and WindshieldThe redesigned Vomag truck sports a ‘boy howdy’ driver’s compartment – clearly visible to all who care to look. Yup, no hiding anything with this truck build. Like any other model, I could have gone the full nine yards here, adding what didn’t come in the box, and weathering it to pieces. With so much else to do, however, I ended up using what parts came in the kit, and then making a few passes with washes and filters to get the job done. Fortunately, I was able to airbrush the exterior surfaces without masking off the driver’s compartment, so the open-air aspect of everything turned out to be a snap. It is important to paint the seat backs and backboards (F7/F8 and F20) separately (which I did not do) to achieve a fine visual line between the three parts. I will probably pay the price for missing that at the next competition – luckily there are so many other visible flaws it will hardly matter! The construction of the compartment and its two sidewalls is simple, but fiddley, and the angle that you end up with on each side will affect the fit of the side doors on the rear deck as well. Go slow, and study the images in the instructions.The dashboard decals went on smoothly using Future floor polish. They help the eyes move along the lines of the console – the dashboard ‘looks’ right as a consequence.
The windshield is a one-piece affair with the wipers, inexplicably, molded right on to the ‘glass’ surfaces. Weathered windshields are complicated enough to pull off; adding the masking and painting the miniscule wipers is a head-scratcher, especially since Das Werk provided detailed sun visors mounted directly above them as separate pieces.
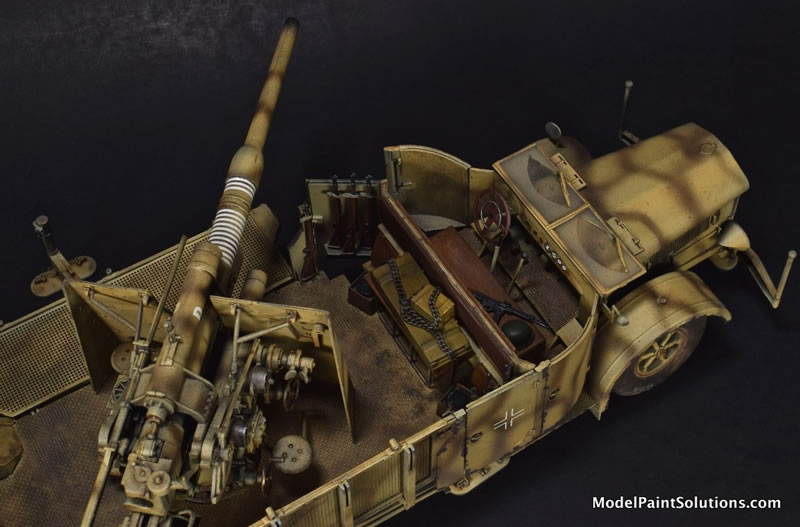
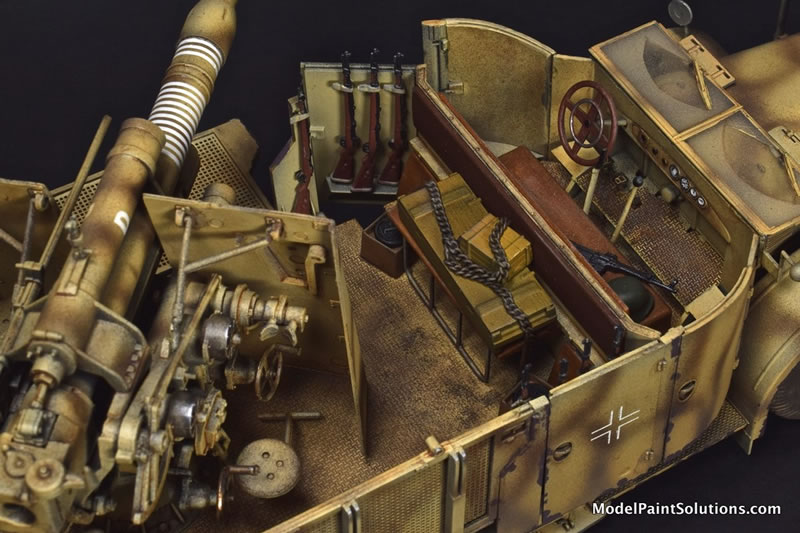
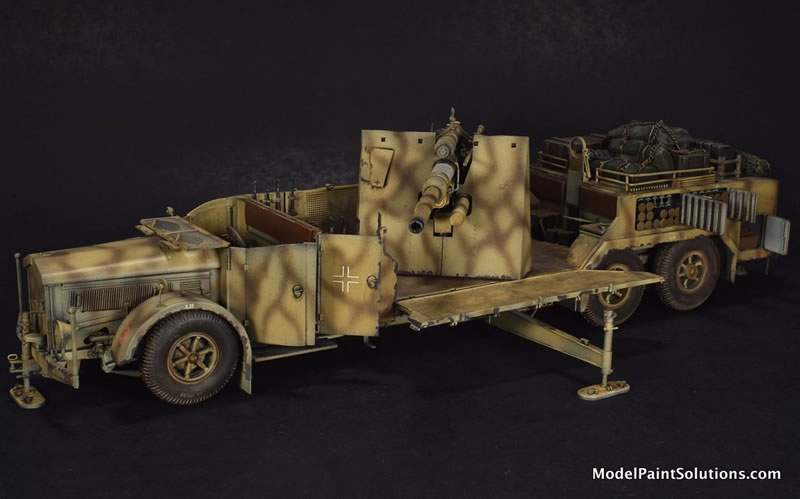
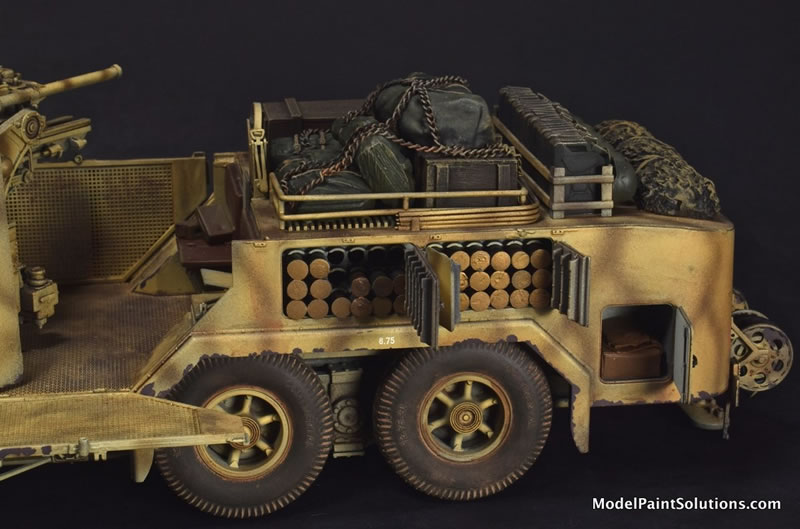
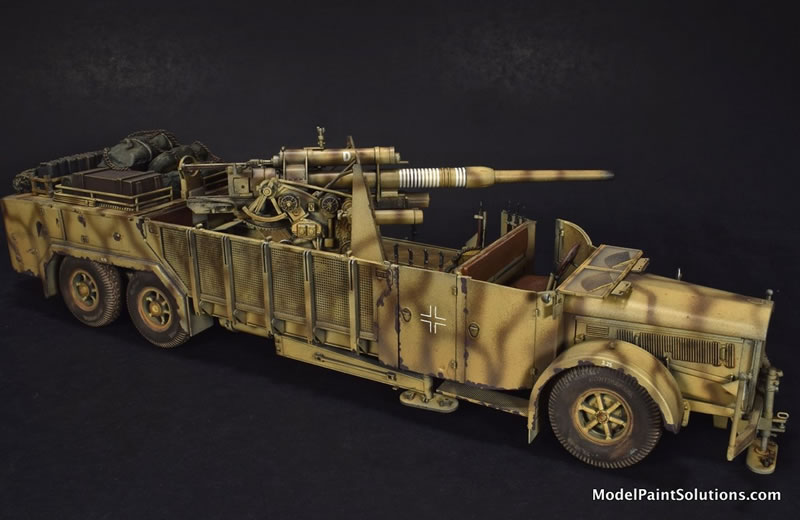
Gun Bed and Storage LockersNext comes what I considered the coolest part of the build – the gun deck, drop sides, outboard station riggers, and a plethora of storage lockers. I decided early on that I would show the port side of the model deployed for combat, and the starboard side in transport mode. This way I could easily show both ‘looks’ of this magnificent model, and vehicle. The main bed consists of several large parts that are assembled from the front to the back. The underside of the bed has a rather complicated set of plates that must line up perfectly for the bed to seat correctly on the frame underneath. Somehow, I got all of that to fit right – I recommend using thick, slow-drying glue to do this, giving yourself time to adjust things as you go. Back on top, each vertical component of the main deck has some kind of detail added to it, such as gun racks (that hold four infantry rifles each) or foldable chairs and/or benches. There are three openable storage lockers in the main gun deck – I blocked one with a bench, (on the starboard side) and left two open, opposite. Likewise, I deployed two seats and one bench, while stowing their counterparts on the other side.
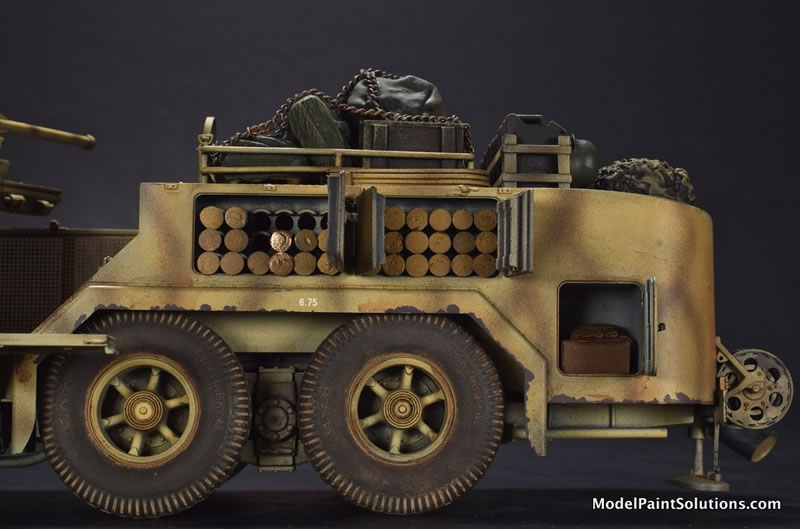
There are three ammunition/fuse lockers on each side of the vehicle, complete with ammo racks and detailed doors. I used a bunch of 88mm shells from my spares box to fill up the set of port-side lockers, and closed the three doors on the other side. I was sure that I was going to break off these open doors a dozen times but their mere presence forced me to handle this porcupine of a model very, very carefully during finishing. The two drop-down side panels came with three full PE mesh screens each. The instructions said to triple the thickness of the PE on each side. Um, no. A single screen on each side was more than sufficient, and looked much better than the stacked and subsequently opaque side panels envisioned by Das Werk. I now have four very nice PE side panels in my spares box.
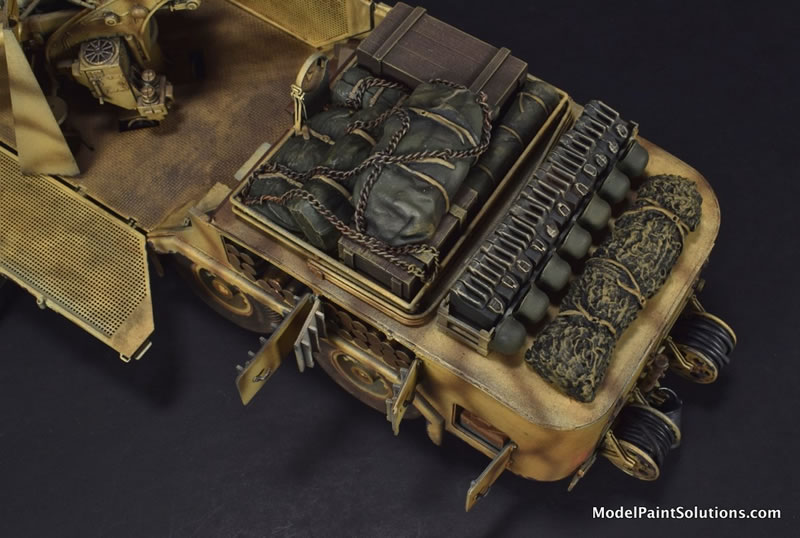
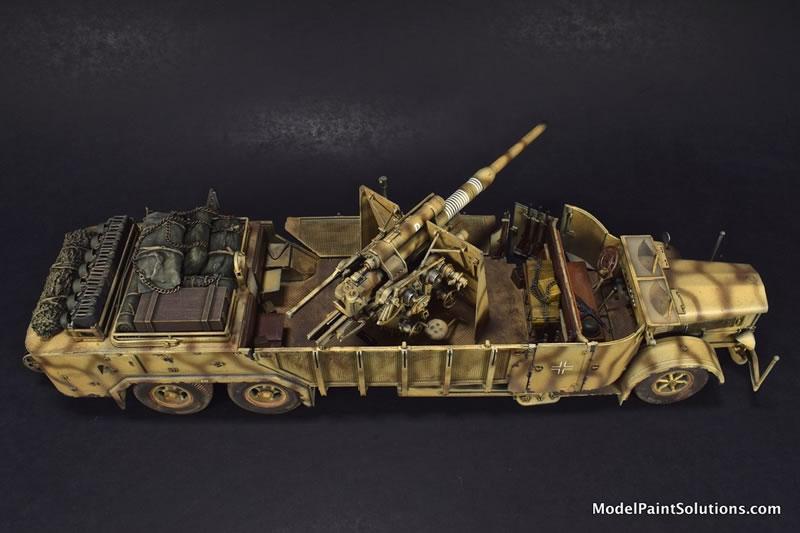
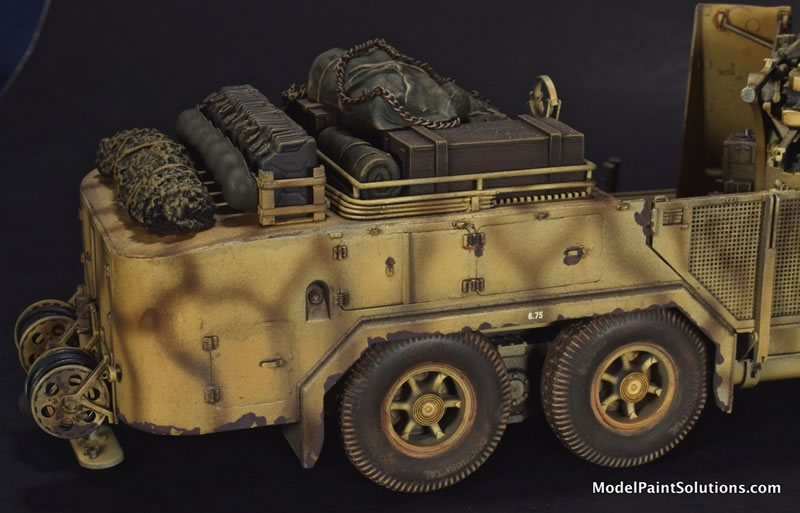
The Rear Deck and Fire HosesThe large rear deck of the Vomag and its equally large luggage rack was meant to accommodate the baggage of all the passengers back when it was a bus (before they cut the top off). As a result, there is a huge open space to fill right up there on top, where all the eyes gaze.
The luggage rack is made up of a stack of five U-shaped brackets included in the kit, and filled with a bunch of Value Gear (not) included in the kit. I added a rack of Jerry cans and a smattering of German helmets, all from my spares box. Finally, I added rolled-up Value Gear netting at the very rear. The busy rear-end of the vehicle contains two spools of rubber hose (in the kit) and an outboard drop-rigger to help hold the vehicle in place whenever the big gun opens up.
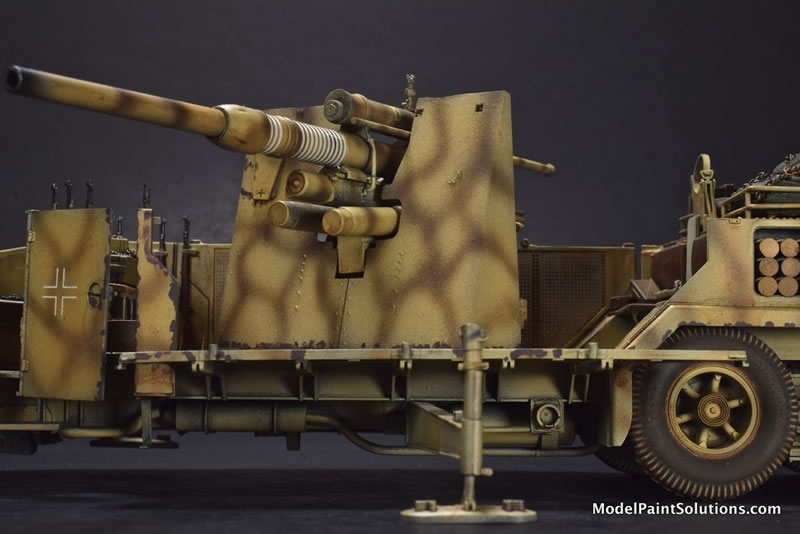
The 8.8cm Flak18 37 GunWhich leaves the gun itself. The pictures of the completed model in some of my literature show the main weapon on the Vomag sporting the ubiquitous front skirt/shield often seen on towed 88mm guns. Unfortunately, no such gun shield exists in the kit. I considered making my own out of styrene sheet when it occurred to me that I have several $20 Tamiya 88mm kits in my stash that include the shield as a single piece.
Looking at the multiple sprues of tiny plastic pieces that Das Werk wanted me to assemble (only to end up without a gun shield), and then looking at the shake-and-bake Tamiya kit, well, I lazily opted for the latter. Yes, my Vomag has a Tamiya gun on top, but I challenge you to call out the differences, other than that missing gun shield. All I can vouch for is that the complete Das Werk gun looks to be accurate enough and has slide-molded parts where needed to assist in seam-line cleanup. Das Werk uses 28 steps spread over eight pages of instructions to assemble their masterpiece, which now resides in my very fine spare parts box. Honestly, this kit is challenging enough – I carry no guilt in swapping that dude out.
Painting and Finishing:The Vomag camouflage schemes come in early war German Grey and late war German Yellow. I thought the yellow scheme would be best to highlight the detail on a vehicle with so much going on. The single (German Yellow) example in photographs had large spots of German Red-Brown and German Forest Green applied somewhat randomly all over the vehicle and the gun. I decided to calm that down a bit and applied a wavy mix of both of those colors instead.
Here are the remaining callouts from my notes:
WeatheringI wanted to show a slightly-weathered vehicle and gun, so I started with an overall filter of Abteilung Wash Brown Oil thinned with Mona Lisa to tie the background yellow with the brown camouflage.I then spot-sprayed Alclad II Aqua Gloss Clear (acrylic) wherever the decals would go and let that dry overnight. The thin decals went on with the Micro-Set and -Sol system without any issues. Once dry, I used a two-step process to set the surfaces up for weathering: First, I applied an overall coat of VMS Satin Varnish to give everything just enough ‘etch’ to grab and hold the weathering products that followed. Next, I applied a second coat of VMS Flat Varnish to just those items that would never have any kind of ‘sheen’ on them, like the canvas bags and wooden boxes. VMS varnishes are excellent and will ‘disappear’ any decal edges you spray it on, guaranteed.
When that was dry, I applied an overall dark pin wash using AK325 Dark Umber, cut 1:4 with Mona Lisa. Once that enamel wash had ‘de-gassed’ overnight, I went to work using a variety of oil paints, un-thinned, to add streaking, dot-washes, rust spots, etc., stopping often to check my work. The general application consisted of applying small amounts of the oil in spots, and allowing that to become ‘touch dry’ – about 10-15 minutes. I then use a medium wide brush, slightly dampened with Mona Lisa, to pull the oil in the direction I wanted. If too much oil came off, I re-applied the oil and used a dryer brush. Paint chips came next. For this build I simply painted them on using un-thinned Vallejo MC822 German Camouflage Black/Brown, applied with a small brush. This was followed by carefully airbrushing a coat of Vallejo MA027 Light Brown for dust, working from the bottom up. I also hit the windshield with the light brown as well, spraying a light coat, removing the windshield wiper masks I had made, and then spraying another very light coat. The only steps remaining were pigments and ‘bling.’ I use (MIG) Concrete and Dust pigments to lighten areas, Russian Earth to darken areas, and European Dust as a mid-level dirt-color dusting, if necessary. I will also think about applying black or brown soot-colored pigments to engine exhausts, gun barrels, etc. I follow the mantra – Go Easy! – here. I do not seal the pigments with anything – I find that sealers change the color and texture of what I’ve put down. I just learn how to pick the model up without leaving fingerprints on the exposed pigment. My final step for every project is an application of Uschi Chrome Pigment, to add bling.
ConclusionThis vehicle has intrigued me for years, and I am thrilled that I was able to build one before my eyesight and hands failed me. Who knew a model company would choose to commit the resources for such an endeavor? I mean, unlike other large armor projects that have come before (Tamiya’s DragonWagon comes to mind), I’m guessing the Vomag is probably not on everyone’s must-build list. Still, it is unusual, and I am hoping it will delight armor enthusiasts who come to model shows to see the weird stuff. Overall, this kit was a challenge, with many small pieces and complicated sequences. I would recommend this kit to only those modelers who have the patience to slow down and think their way through the tasks required. Problem solving is also a good skillset to have. In the end, however, it looks great in my case and will draw attention at the model show display tables. Thanks! Thumbnail panels:
For more on this build visit ModelPaintSolutions.com https://modelpaintsol.com/builds/das-werks-35-8-8-flak-vomag-truck-35024 Visit Modelpaintsolutions.com. Home
Model and Text
© 2025 by Eric Christianson |
||||||||