After a quite long and involved diorama build, I felt I needed
something interesting, with a fairly quick build time, to refresh me
a little. Italeri’s latest Military Vehicle release, the AS 42 “Sahariana”,
fitted the bill perfectly.
When I first saw photos of this new kit at Model shows, in the
Modelling press, it immediately grabbed my attention. So when I saw
it on Hannants web site I wasted no time in ordering one. Six days
later my kit arrived. My first impressions on opening the box were
given in my first look review so I won’t repeat myself here.
A Brief History
The Italian AS 42 was built as a
response to the highly successful British deployment of the LRDG
(Long Range Desert Group) in North Africa during WWII. It was
therefore specifically designed for desert operations, primarily in
a reconnaissance role. The basic chassis was based on the AB41
Armoured car, with some changes, and it was manufactured by SPA, a
part of FIAT. The AS designation stands for “Africa Settentrionale”,
which literally translates as Northern Africa.
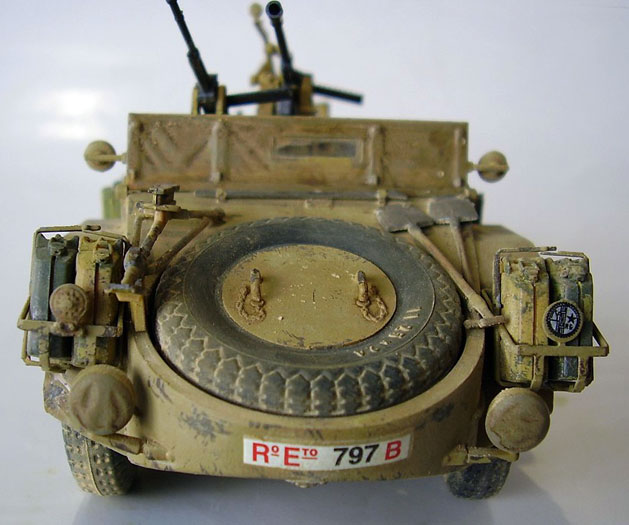
The AS 42 first saw action, with “Raggruppamento Sahariano AS”, in
November 1942. Two vehicles from this initial deployment, 792B &
797B, are the options in this new Kit.
After the African campaign the AS 42 served in Sicily and on the
Italian mainland. A few of the vehicles even found their way onto
the Eastern Front. Post-War the AS 42 found a role in the Italian
Police force, painted Red, until finally retiring in around 1954.
None of the vehicles are known to have survived to the present day.
Construction
From the outset I decided this kit
would be built totally out of the box, with no additional parts or
detailing.
Construction starts with chassis and suspension, with all parts
fitting together easily. I would suggest that this stage is all done
in one go, to ensure all parts are properly aligned and spaced.
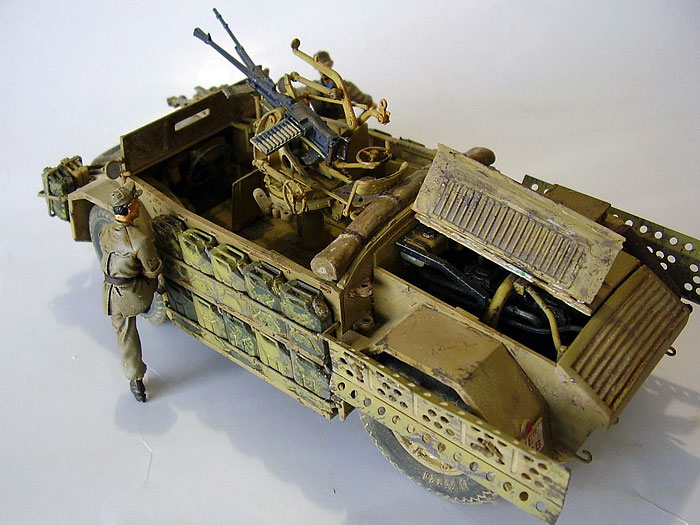
Fitment of the engine is optional as there is little point in making
it if you are going to build the model with the engine covers
closed. Having said that, even if you do decide not to fit the
engine, you may still want to fit the radiator, as it blocks the
view of the empty space, through the rear grille. The engine block,
gearbox and radiator are all made in resin, with all other parts in
styrene. To be honest I can see little benefit in these parts being
resin, as detail is not really any finer the normal styrene parts.
Add to that fact that the best cast resin part, the radiator, is
almost totally hidden, even with the engine cover completely
removed.
The construction of the engine is in two stages. Firstly the engine
and gearbox are fitted to the chassis, the lower body is then fitted
over these. Once the body and firewall are in place the other engine
details are fitted. Remembering that resin does not respond to
normal styrene glues, you will need to use a super (or crazy) glue
on the engine parts. At this stage it is best to test fit parts, as
I found later in the build that the radiator sticks out a little too
far. This prevented the engine bay side-panels bridging the gap
between the firewall and the grille. A few millimetres need taking
off of the radiator hoses to bring the radiator closer to the
engine. With this done all rear body panels fit okay.
I must admit from this point on I didn’t always follow the
instructions step by step but fitted things in an order that suited
me.
The next area I tackled was the driver’s seat and controls; all
parts fitted well but did need a little clean up. Most suffered from
fairly large mould seems. I also fitted the pillar for the main gun
at this stage. This was done so I could paint the wear and tear on
the floor of the fighting compartment, and I needed the pillar there
to give a guide to where the crew’s walkways would be. With the
floor painted and weathered the body sides and front were fitted.
These parts all fitted very nicely and only a small smear of filler
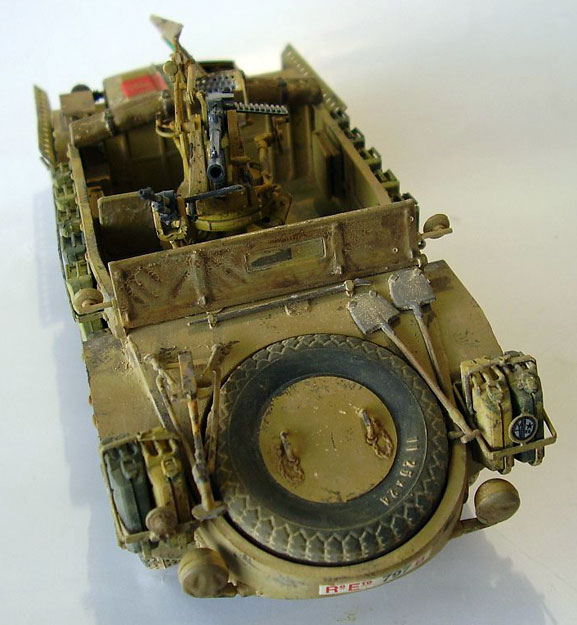
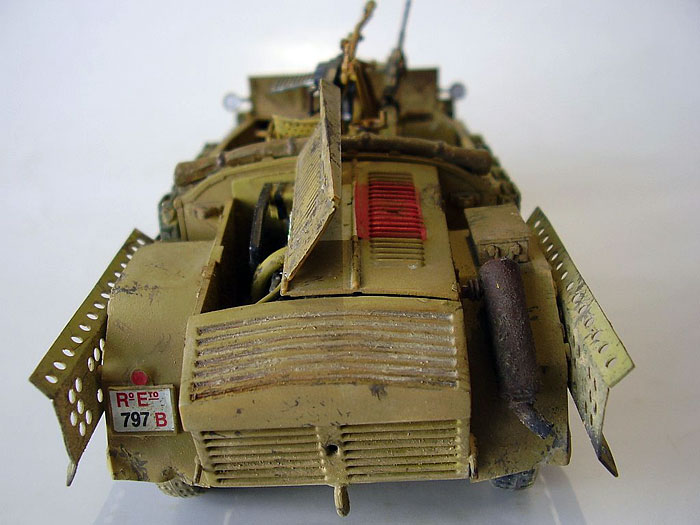
was needed around the front to conceal the join. The fit of the rear
fenders was also nice and neat. The only body part that doesn’t fit
so well is the engine cover, which is slightly short of the space it
covers, leaving a small gap at one end. The poor fit can be seen
clearly in the photographs of the model’s rear.
With the bodywork done I moved on to the wheels and my first real
niggle about this kit. I feel the fit of the wheels is sloppy. They
have a dished backside, which fits over a disc on the wheel
mounting. A small shaft protrudes from the disc and into a hole in
the centre of the wheel. A cap is glued to the end of this shaft,
after the wheel is fitted, and allows the wheel to rotate. The
problem is that the fit is not very positive and the wheel can not
only rotate but also move back and forth, out of the vertical. I
decided the only way to be sure of a strong fit was to glue the
wheel to the disc to prevent the movement. This stops the wheel
rotating, but I’d rather a strong fit than a wheel that rotates (it
doesn’t need to rotate once it’s finished anyway).
As well as the resin engine parts, Italeri provide some Photo Etched
brass (PE) parts for several areas of the model. The first parts
used are crew access steps on the fenders. These are also moulded
onto the fenders in plastic, and need shaving off if you are going
to use the PE parts. To be quite frank the PE is rather thick and
these parts look barely any different to me, in plastic or PE. Super
glue will again be needed to attach the PE parts. The next PE parts
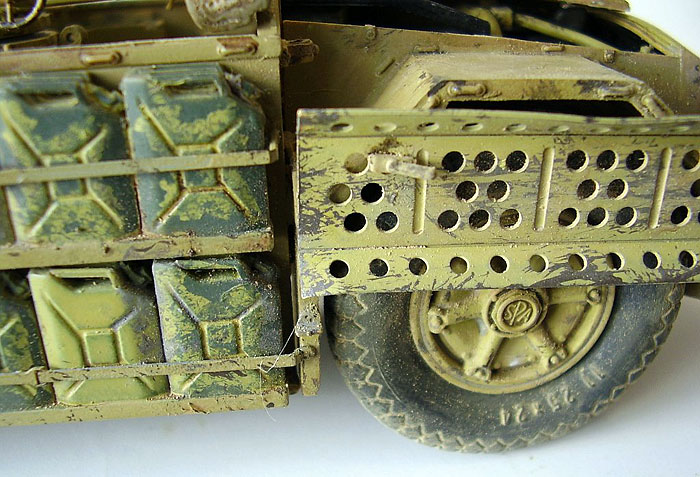
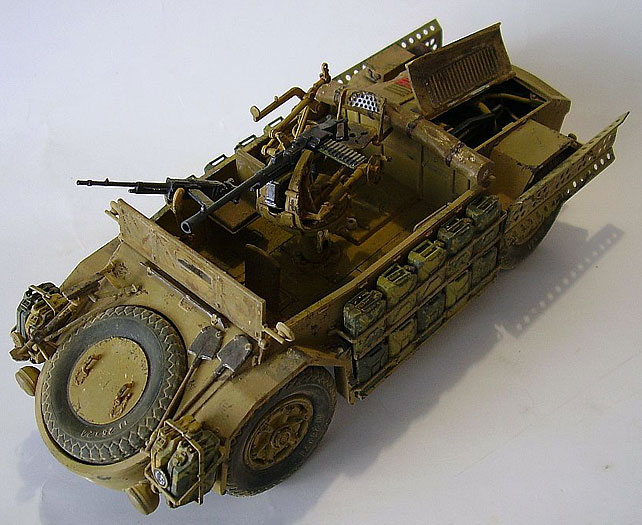
are “baskets” for jerry cans fitted to the front fenders. These
parts are easily bent to shape, even with fingers, and look fine
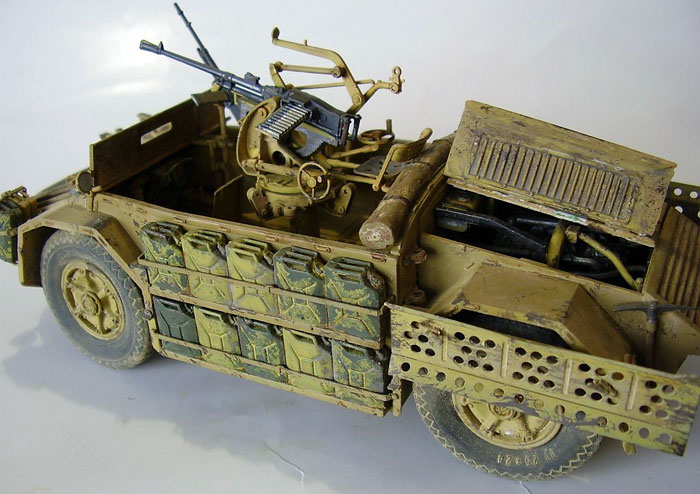
when in position. Four individual Jerry cans are provided to sit in
the baskets. They are well moulded and look good in position. The
side mounted Jerry cans are moulded in blocks of 5 and stuck
directly onto the body. Around these are PE brackets to keep the
cans in place in transit. I personally would have preferred
separate, individual cans, rather than these moulded blocks. It
wouldn’t take much to build the shelves for the jerry cans from
plastic card and to use other cans instead. The Italian jerry cans
are very similar the German late model cans (except for the stamped
on markings) and with a little extra work, spares box, German cans
could be used.
The final pieces of PE are for the sand channels. As mentioned
before the PE is on the thick side and you will need more than
fingers or pliers to bend these parts. I have the Etch-Mate,
photo-etch folding tool which is perfect for this type of job. Once
bent to shape I gave the channels a few little twists, with pliers,
to make them look as though a small truck had run over them to get
out of deep sand.
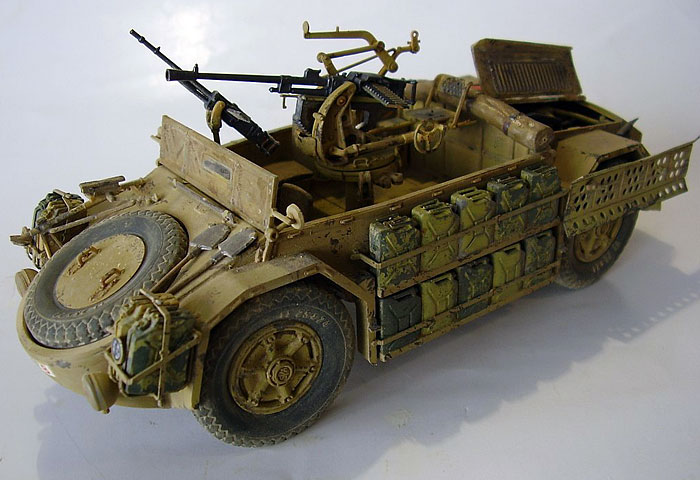
The last major component to build is the 20mm AA gun. This has nice
finely moulded parts and good detail, although like the driver
controls some parts need seams removing. The fit of parts is nigh on
perfect and you are left with a very nice looking gun. It is a
slight pity that when they were making the PE parts they didn’t do
the gun sight in it, instead of moulding it in plastic, but there
you go. One word of warning, the fit of the gun to the pillar is
very loose and it is best left off until you don’t need to move the
model again. I think the gun and the wheels would benefit from the
poly-cap style mounting that Tamiya use so effectively. I ended up
gluing the gun to the base to prevent it toppling off.
Figures
Two resin figures are included
with the kit. The quality is okay but nothing special. I made them
up quickly, but won’t be displaying them with the kit, so didn’t put
much time or effort into them. They do have rather club like hands,
for resin figures and the faces have little expression. I included
them in some photos to show their poses and to give an idea of
scale. This said they are a welcome inclusion as Italian Desert
figures are pretty thin on the ground at the moment.
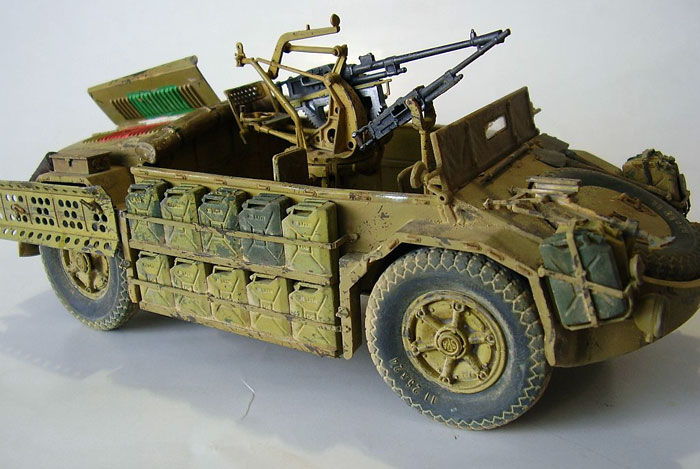
Painting & Weathering
A single colour scheme can seem
bland, but on the AS 42 that is definitely not the case. The Desert
truck is a weathering dream. Italeri’s reference booklet provides a
good range of photographs of these vehicles, in theatre, and they
clearly show these vehicles chipped and weathered quite a bit.
The basic colour of the Sahariana is Italian Yellow; I mixed my
version with Vallejo acrylics. I used varied amounts of their Dark
yellow and RLM 05 yellow, (note - not the 04 yellow seen on 109
noses etc.) occasionally mixing in some camo beige to vary things
further. WWII Italian paint was known for it’s inconsistent shades
and for being prone to flaking/chipping.
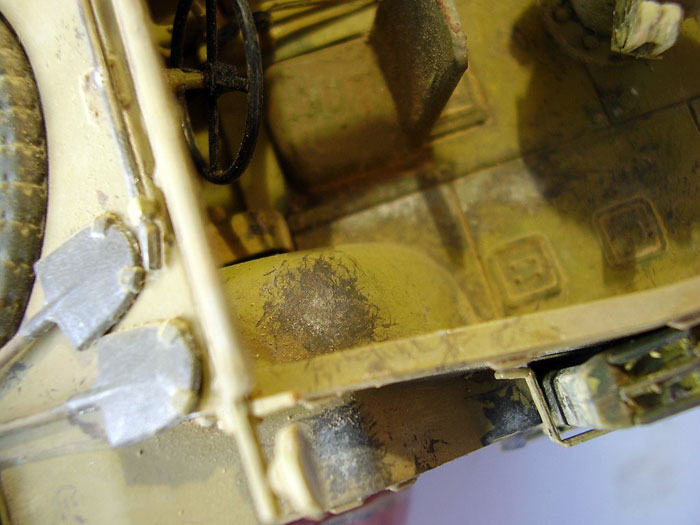
The first area painted was the floor of the crew compartment. First
a coat of a yellow was applied overall and left to dry. Next up
large areas of wear were painted around the driver area and in
sections of floor that would have heavy foot fall. The first colour
used was a mix of Chocolate Brown, German Grey and just a touch of
Steel (again all Vallejo); this was used on a pointed brush. Around
the larger areas hundreds of small scratches were added. To do this
a very old long thin brush was used. The brush end was pushed into
the workbench to spread the hairs in a wild and random pattern. (So
it looks like a hippy that’s been struck by lightning, then been
dragged through a hedge backwards!) The brush is then very lightly
dipped in the paint and the excess taken off on a tissue. Then the
brush is dabbed around the big areas to give “feathered” edges made
of masses of tiny scratches. Whilst this is still wet Vallejo steel
was dry brushed into the centre of the bigger areas, then blurred in
with a fingertip. Lastly, graphite from a soft artist’s pencil was
rubbed in, to give a metallic “sheen”. The whole floor was then
given a light wash of a darkish brown oils to show up the panel
lines and other details.
The outer body was painted in the same yellow mixture, with chips
applied in areas around the body using the Brown mix. On steps and
areas of the fenders that crew would tread on to get in and out of
the vehicle, the scratching technique was again used. Over this
filters of oil were used to fade the paint (mixes of yellow, white
and burnt umber).
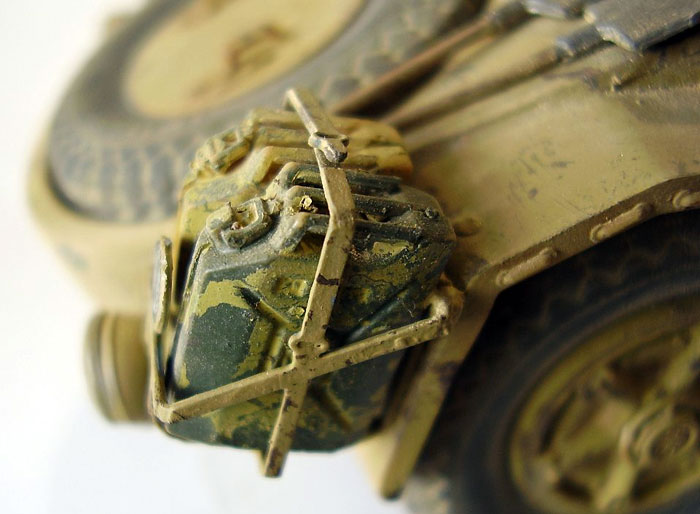
The photographs of real AS42 show some heavy paint wear on Jerry
cans; they appear to have been hurriedly painted in yellow over the
original colour, which I took to be Dark Green. To try and replicate
this all cans were firstly sprayed Dark Green. Once totally dry some
cans had blotches of maskol applied down the edges and around
handles etc..Then all cans were sprayed yellow. With the paint dry,
the maskol was taken off. Some flakes of maskol were left behind to
give the paint on the cans a flaky look. To do the many tiny
scratches the “hippy” brush was used again, this time using Dark
green, in the same way as on the floor.
With all fixtures and fittings attached to the vehicle it was given
a heavy dry coat of dust. I used MIG weathering pigment “Gulf War
Sand” for this. One area I criticized in the “First Look” were the
rubber tyres, but now I have to say that with a layer of dust they
look just fine.
Armament
At this point, I want to address a question I received after the
first look review. A HyperScale visitor wanted to know about the
main weapon options in the kit.
The AS 42 had several
configurations of weaponry. The main weapon could be a Breda 20mm AA
gun, a Solothurn S18 20mm anti-tank Rifle or a Breda 47mm Anti-tank
gun. Secondary armament was usually provided by 8mm Breda machine
guns.
The Kit includes only the 20mm AA
gun and one 8mm machine gun. This is correct for the 2 vehicle
options in the kit, although vehicle 797 B should have two of the
8mm machine guns. (There is only one in the kit).
Early pictures of the Kit showed 2 choices of main weapon, the
second choice appeared to be the 47mm Anti-tank gun. It would have
been nice to see this in the production kit and would only have
required another small sprue and 2 extra decals (for vehicle 791B’s
plates). Alas we don’t get the option in the kit, so will have to
pin our hopes on after market kits, to supply the extra options for
us. The S18 anti-tank rifle looks particularly nice in photographs
included in the reference booklet that accompanies the kit, and a
kit of this would be most welcome too.
Conclusion
I have no hesitation in
recommending this kit. I bought the model with my own money and
would do so again (and probably will).
Apart from a couple of fairly minor niggles, regarding sloppy fit of
the wheels and main gun, it is pretty hard to find fault with it.
Italeri has produced an interesting and eye catching model that will
please most levels of modeller. More experienced modellers will no
doubt want to super detail the engine, fit individual Jerry cans and
replace the moulded in tie down points with copper wire. Whilst
modellers wanting a first try at multi-media parts will find this
kit an easy introduction.
Hopefully not too far down the line the likes of Alpine miniatures
or Royal model will produce some crew figure sets, to accompany the
Sahariana.
In summary, this is a nice kit that offers value for money and is an
enjoyable build. All we need now is a nice kit of a desert SPA TL 37
to go with it and we have ourselves the makings of a desert patrol
diorama.
Click the thumbnails below to view additional images: