|
|
| Home > Articles > Dioramas> Cheap and easy diorama bases and groundwork |
|
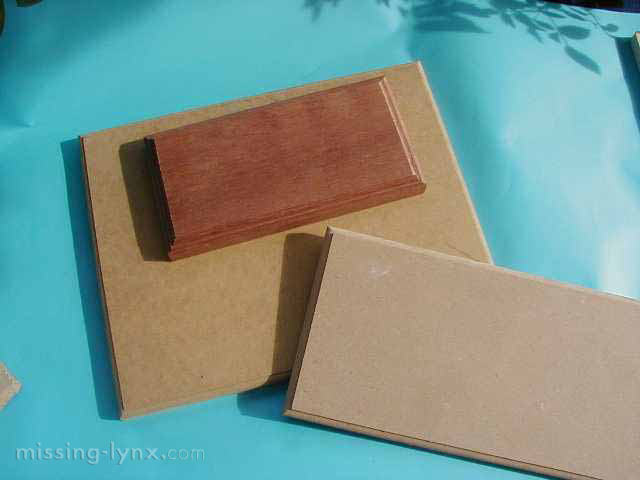 |
Wooden bases: The dark one is a hardwood, the lighter ones are MDF. |
For me a better source for bases is my local woodwork shop. There I often find bits and pieces and leftover boards of varying sizes. Occasionally you’ll find a piece of hardwood, but for me the most common product is MDF board. I ask the people who work there if they can cut the boards into rectangular and square shapes of different sizes and if they can burr a nice rim on the edges. Normally this is very cheap, for 10 to 15 dollars I’ll end up with about 10 baseplates of varying sizes and shapes.
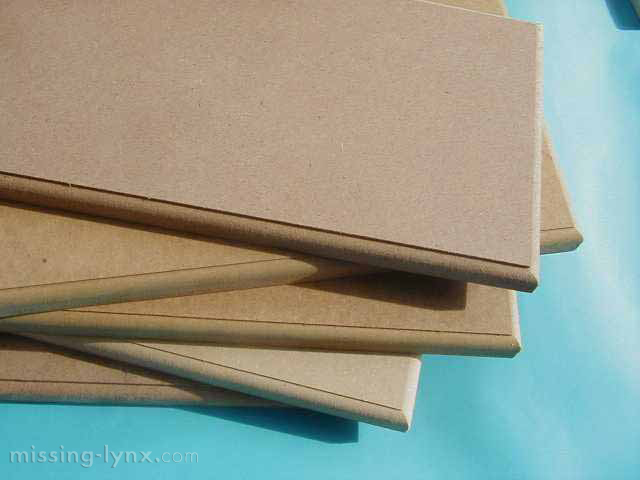 |
About $10 worth of
MDF bases in different sizes. |
The next step is the boring part: you’ll need to sand the edges as smooth as possible, and you get the best results by doing it by hand. Once you are happy with the results you can use household paint to give the edge a nice colour. The best results are achieved with those semi-transparent paints in woodcolours that are used to enhance the surfaces of furniture. After this coat has dried thoroughly (at least 24 hours) the finishing touch can be added: a thick coat of gloss varnish will surprise you with a near professional finish. Personally I prefer Polyurethane varnish – a bit more expensive but it dries quickly with a perfect gloss. And this varnish has an even better use as well, so a can of this stuff will be worth the extra bucks you pay for it. More about this varnish later.
After the varnish has dried your board is ready to use as a baseplate for your diorama/scenic display. If you sand and paint a couple of boards at the same time you can build yourself a small stock of boards in different sizes, so the next time you need one it’s just a matter of grabbing the best size for your plans.
 |
After sanding and painting: is it MDF or hardwood? |
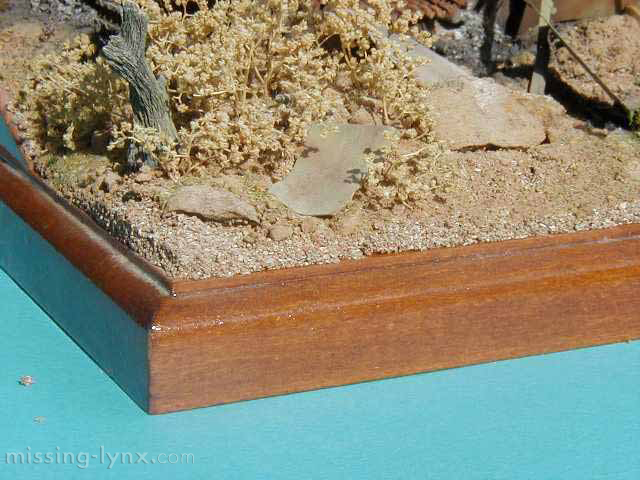 |
Believe me, it's all
MDF! |
 |
Total cost of this base: less then $5. |
I want to end this section about the bases with a couple of tips for cheap bases, partly from experience, partly found on the ML forums:
Photoframes: Ready to use, the more expensive ones
can be used straight from the shop.
With the groundmix I use I have made several dioramas straight on the
glass of picture frames. All I did to prepare the glass was degrease it
with some windex. These dioramas are taken to several shows each year
and I've never suffered any problems.
Second hand plaques. In many businesses, you’ll be able to find award plaques that nobody cares about anymore. I found some really nice ones at my place of work!
Rocks… Rocks? YES, Rocks!. I’ve seen very pretty dioramas and vignettes build on a nice flat piece of stone. This works specially well when you just want to display a single vehicle in a scenic setting.
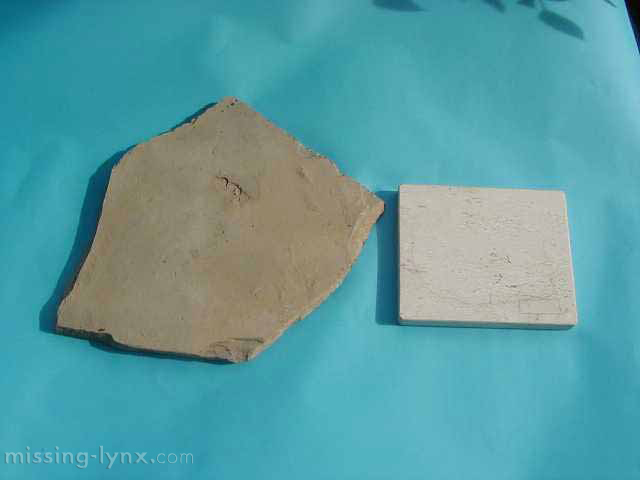 |
An alternative for wood: a piece of rock slate and a piece of marble tile. |
Step 2: The groundwork – the basics
Before you even think about adding groundwork you must put things like walls, buildings and other larger items in place. If you want to add a stream or puddles make these in advance by spraying pieces of plasticard in darkgreen/greenbrown patterns and glue these on the spots where you want the water. Remember that all these items should be completely finished before you add them to the base, it will make life so much easier for you.
After trying several things for my basic groundwork on dioramas I’ve stuck to using a mix I make myself. This mix is dead easy to make, very cheap and always works.
Step one is to find yourself a nice fine-grain sand. This has to be sand, not powdered clay because this tend to crack when it dries. Put the sand in a large plastic bowl.
If you have selected a nice fine sand you need to mix some water with a liberal amount of “white” glue. I think in the USA and Canada it’s known as Elmers glue. You need to use the type of white glue used in woodworking, and specially the kind that dissolves in water real easy.
Mix enough water and glue untill you get a liquid that resembles closely to milk.
Now you can poor this glue carefully into the bowl, and stir this well. Keep adding glue until the sand becomes a thick muddy substance, completely wet but without any free-floating liquid visible.
This mix is what you use for your basic groundwork. Using a spoon, old paintbrushes or whatever you find comfortable to work with you can spread the dirt all over the board and shape your landscape.
If you plan to put some higher features in your groundwork you can start by glueing some polystyrene foam roughly cut into the shape you want. I also often add a rim to the base to make a low “box” that contains the groundwork. Using a picture frame instantly provides you with a nice rim. If you are adding walls and other features make sure you push the mix flush to the walls.
Step 3: The groundwork – finishing
To finish your groundwork you now need to work rather quickly! First I sprinkle very fine powdered dust all over the groundwork. I have several types of dust collected from various sources like vulcanos, mountains, and even from my job. Rock quarries or stone masons are also a great source for these dusts as well, or you can buy them in railroad modellingshops.
I mix several colours and vary the colours on my groundwork: it works best when you use the darker shades in the lower areas whilst the higher parts should be sprinkled with the lighter shade of the same colour. Don’t worry if it all turns wet and dark. After drying you’ll see that it works. It’s now also time to add some smaller stones. Group them together, but do this randomly. Nothing looks as dull as stones, plants and other features that are spread in an even way.
Then I add several shades of static grass where I want that to be visible. Don’t add a solid coat of grass unless you are building a dio of a football field or tennis court. Patches of grass along terrain features works best. Again, do this randomly and take care not to make it too even-looking.
Now I add my dried plants, figures, equipment and vehicles. I push the vehicle(s) firmly into the groundwork: recently I started to use a screw to attach the vehicle firmly to the base. This has two advantages: First it will prevent your vehicle from coming off, and also by putting some "bite" into the screw you can give the vehicle some “weight” . Don’t exagerate this, just make sure the vehicle is attached firmly to the ground. (Note that this doesn’t work when you use a picture frame as a base. There’s a glass plate beneath your groundwork!)
To make sure the figures are attached to the groundwork I drill a small 1/5th-inch-deep hole in the sole of the figure's boot and add a small metal pin. Next I drill a hole in the baseplate and attach the figure with some drops of CA glue.
When you've added everything you want you can leave the diorama to dry. Depending on the amount of glue, humidity, thickness of the layers and temperature this can take between two days and a week. You’ll know that you have a succesfull mixture if the leftovers in the bowl start to cure after about 15 minutes. The thick layers on your diorama will take longer.
When everything has dried completely it can be neccessary to attach things like crates again with a drop of glue. You can now finish the groundwork as you please using ground pastelchalks, drybrush techniques, or my personal favorite – an airbrush filled with a dust-coloured acrylic paint. Use several very thin coats and vary the number of coats all over the dio, you don’t want to end up with an even coloured dustbowl.
Finally, if you plan to add water to the dio you can pour a couple of thick layers on the greenish-brown plasticard you added before. The best result is achieved with Polyurethane varnish. And you've already bought a can of that stuff, remember?
Good luck, and remember that it takes practice, skill and some luck to get really good results!
Rob Plas
| |
|
Home |