
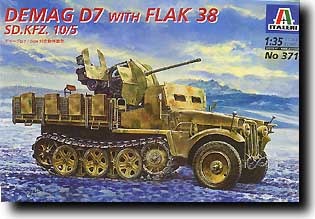
Italeri #371 Demag D7 Sdkfz 10/5 2cm Flak 38
John Prigent
What you get here is a quite decent basic Demag chassis and front end, which includes the complete transmission and builds up well. Some thick cable runs can be added to run from the gearbox unit under the dashboard if you have good references, but will be largely hidden by the three shift levers. The really good thing is that Italeri has given the complete drive cross-shafts, with the reinforcement where they meet the side walls which Dragon missed from their original SdKfz 250 kit.
With the basic cab built you can deal with the suspension. The front suspension is nicely done and includes its steering link, but the track elements are a different matter. Each side builds on to a separate plate which is added to the chassis - a good idea in principle and it lets you add the tracks and weather to taste first. Unfortunately Italeri not only shows the track running backwards on the instruction sheet - the open end of each link must point forward on the top run - but gives you links that are too long in pitch and have drastically under-sized rubber pads. To cap this, the drive sprockets are about 2 mm too big! Not a lot, admittedly, but it makes the whole assembly look wrong. This kit is in dire need of an aftermarket sprocket and track set, so let's hope one appears soon. Otherwise you have two choices - either ignore it or steal the sprockets and tracks from a Dragon 250 if you feel rich enough.
Assuming that you still want to finish the model, you now have the driver's armour and rear body to add. These parts are good, but do note that the armour angles outwards from the front not inward as shown by a dotted line on the instruction diagram. The inner legs of the U-shaped body supports shown in stage 16 should go inside the armour. Plasticised mesh is provided for the drop-down body sides, but it's quite difficult to get it to adhere and you should take care anyway not to use the templates provided by Italeri as they're too small to fit. Measure the sides and cut the mesh to fit inside them properly instead.
The FlaK 38 is good, and I enjoyed building it. The only built-in snag here is that the sight elevation arm is fixed in position at about 45 degrees elevation, so if you want any other angle for the gun barrel you need to either cut the arm's connecting strut or lengthen it to suit, altering its angle in either case. Not a major problem but it would have been better if the arm had been a longer separate part which you just cut and fixed at the desired angle. There is another snag - Italeri don't provide the spent case catcher basket. This was detachable on the real gun so at first glance it might be reasonable to leave it off, but the gunner's legs would be showered with hot shell cases every time he fired!
Finally you come to the painting and markings. A three-colour scheme is suggested, reasonable enough as these were in service from 1943, but you're left to make up your own pattern. The actual markings aren't even indicated in the instructions, but presumably the intention is that you use the blank plates given and make up your own registration numbers from the three sets of separate numbers given. This would work better if Italeri had enough sense to give two WH or WL prefixes - but no, you get one of each so it's impossible to mark a vehicle with the same plates front and rear! The only option left is to cover one plate with strategically-place "mud" to obscure the incorrect letter. Italeri also gives you a weird extra markings, three vertical bars with a diagonal across them. I assume this is supposed to be a kill marking for the gunshield, but most crews would use four verticals with the diagonal to indicate a fifth kill.
So, at the end of this criticism, I can only say that it's a nice kit spoilt by bad mould engineering and stupid inaccuracies. I recommend that modellers wait for an aftermarket sprocket and track set, as mentioned above, and hope for an etch set to provide the radiator armour and shell catcher basket.
| Main | What's New | Articles | Reviews | Gallery | Think Tank | Contests |