M109A6 Paladin
Kevin Kenny
Fire Mission! This certainly has been a great year for fans of artillery. The Academy M-12, the Revell-Germany Panzerhaubitze 2000, and finally, Italeri has released the M-109A6 Paladin self-propelled howitzer. The Paladin is the current U.S. 155mm self-propelled howitzer equipping mechanized brigade/division level artillery units. Amazingly the M-109 platform first entered service in 1963 and has evolved into its current ( and perhaps final) form in the A6 Paladin model. From a short tube 155 to the current long barrel, from land line communications to state of the art digital communications, the M-109 has come a long way and been adapted to new technologies.
A brief description of the distinguishing features and upgrades to the various models are as follows;
M-109 - 1963. Original vehicle with 23.4 calibers M-126 155mm cannon.
M-109A1 - 1973. Introduction of longer 39 calibers M-185 155mm cannon with strengthened suspension.
M-109A2 - 1980. Sight ballistic shield, rear turret bustle/increased ammo storage, floatation devices deleted.
M-109A3 - 1980 on. M109A1 upgraded to A2 standards.
M-109A4 - 1984. Additional upgrades to existing vehicles, primarily NBC filtration system.
M-109A5 - 1992 on. Additional upgrades to A-2/3/4’s from Howitzer Improvement Program (HIP); new M-284 155mm gun (39.3 calibers), Gun direction display, radios, NBC filtration system.
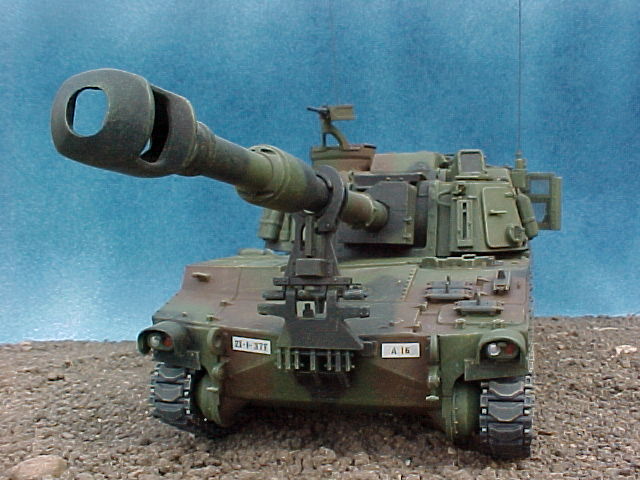
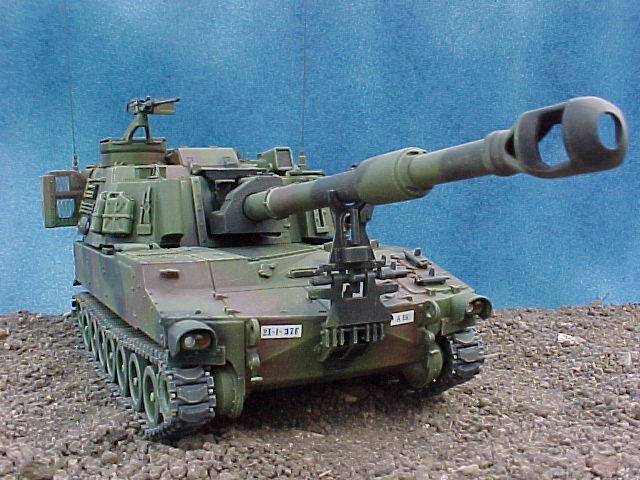
The Paladin nickname was first adopted with the A6 improvements and the A6 has had the greatest changes to the basic platform. The most visible change is an all-new turret from the that found on the M-109 thru A5. The larger turret was necessary to include some of the following; a microclimate condition-ing system (AC/NBC), secure voice and digital communications, GPS (Global Positioning System), enlarged ammunition storage, segregated hydraulic systems, and an automatic fire control system. The turret also has a kevlar spall liner. A nice addition as the vehicle is made of an aluminum armor alloy. The suspension system was also strengthened again. All these changes have increased the weight of the vehicle by 6 tons over the original 109.
The Paladin was first delivered to the U.S. Army in 1992 and was expected to be replaced by the new Crusader system in the new millennium. However with development and funding problems in the Crusader program, the Paladin may well have to soldier on a little longer than planned.
The model itself is as the real thing, a mix of the old and the new. Sprue A and B are from the old M-109 kits consisting of parts for the hull and running gear. This isn’t bad, as the basic hull in the original kit is sound.The tracks are the same old vinyl. The major disappointment is the same old poor pioneer tools, an area Italeri could improve in all its kits. Sprues C and E are all new tooling and consist of the new turret, gun tube and all new travel lock. On to the construction.
The Hull.
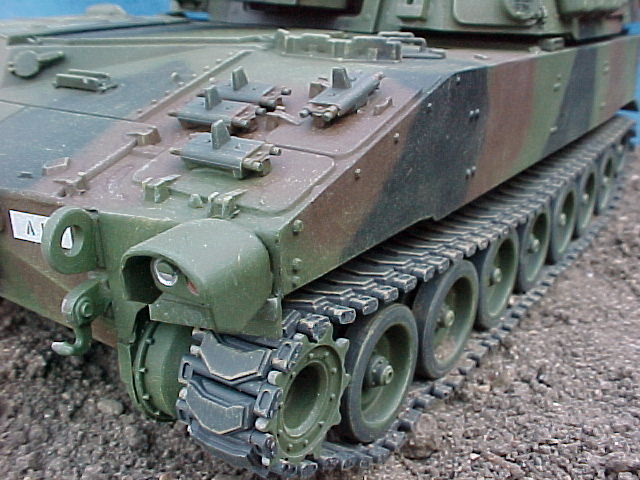
Construction starts with the hull. Italeri correctly notes to remove the floatation mounting points on the front of the hull, part 15a.These were deleted at the time of the A2 upgrades. Everything goes together fairly well. There are some hull fit problems, which require some putty filler. These are apparent after mating the upper hull to the lower. Minor on the top, but major at the front glasis. Careful filling and sanding will solve the problem. There are also holes in the middle of the sprockets that need to be filled. Very annoying.
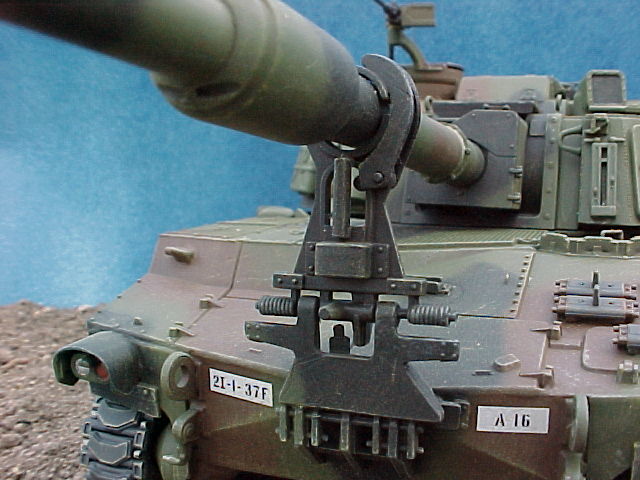
The large spades at the rear also require a lot of cleanup of knockout marks and fill extensions. Also note that the painting advice for the front headlamps is incorrect. Both left and right have identical light arrangements. Thread was added to part 48 to simulate commo wire. And don’t forget to drill out the large exhaust pipe, part 55a. The travel lock has lots of detail, but has restricted range of motion. I believe that the travel lock should lay flatter during firing. Two of the improvements on the Paladin were remotely operated travel lock and spade release to speed up the time getting into action. That pretty much wraps up assembly of the hull.
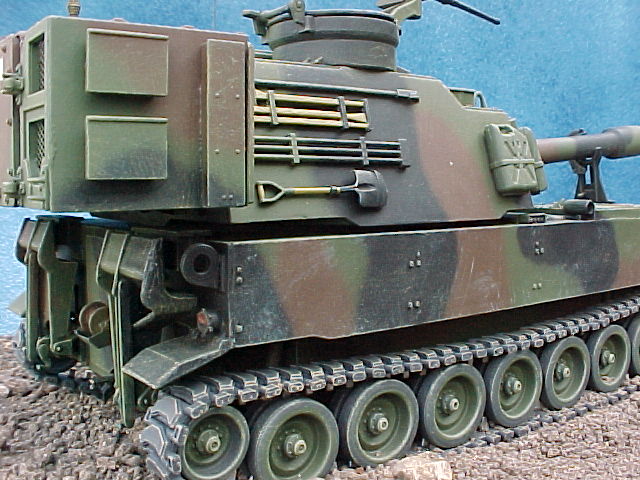
The kit tracks aren’t the worst things around, but are very stiff and don’t lie down at all. We now have an excellent alternative from Skybow. I used the Skybow M-109 T-136 tracks and are they sweet. They go together like the real thing with a track and two end connectors. The end connectors press fit on the track pins and no glue was required. The flexibility allows you to get the slight sag found on the 109’s. Skybow also thoughtfully included spare tracks with hold down clamps molded on . These are mounted on the battery access doors.
The Turret.
Assembly of the turret starts with the trunnions and (crude) breach, leftovers from the old kit. The barrel is new and an improvement, but not as good as it could have been. The barrel length has been corrected (it was some 3/8" to long in the original kit). Noticeably missing is a collar/sleeve located just forward of the armored recoil system. I made this by wrapping some .030" plastic strip around the barrel and adding 6 bolts made from .025 " rod. Locate this collar 3 mm back from where the barrel begins to taper.This collar could better have been molded by Italeri and slipped on to the barrel. Seems easy to me. Perhaps the photoetch boys will help make correcting this oversight easier.
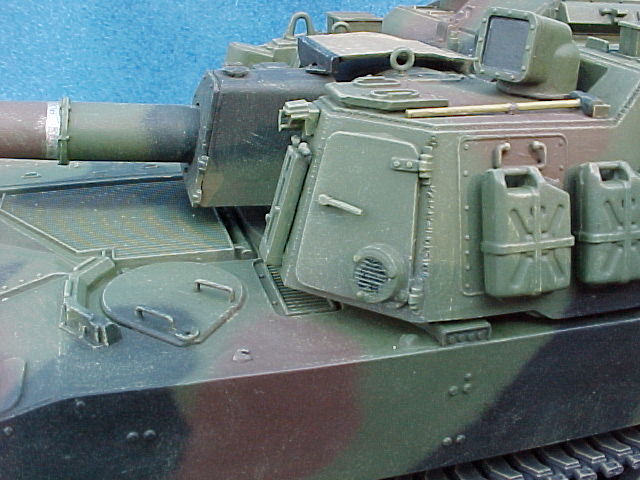
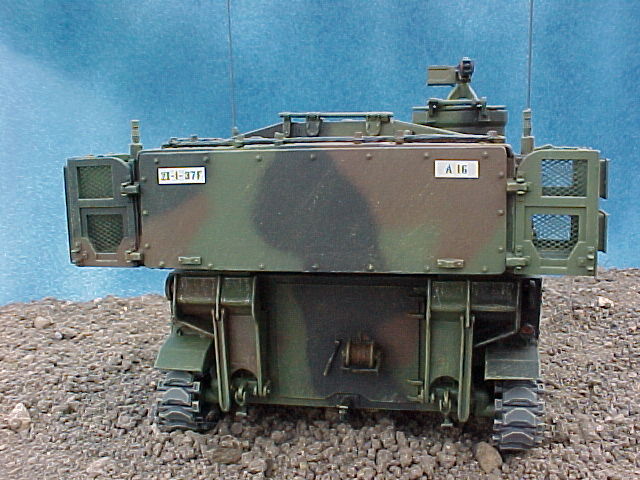
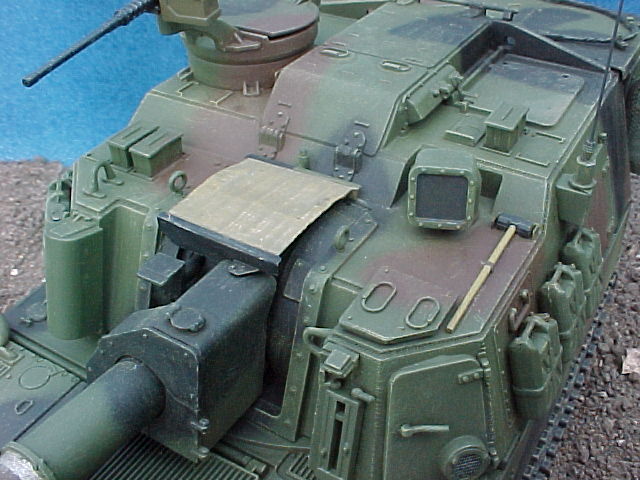
The next bit of surgery required is part 101c, the door for the segregated hydraulic compartment. The vent/access cover is way off. I agonized how I was going to make that tiny cover, but luckily, a simpler solution presented itself. Here’s how you can fix it. The top section isn’t required. Carefully cut it off at the shoulder with a razor saw, preserving the molded in mesh pattern. Then (also carefully), run a metal scribe horizontally between the horizontal lines of the mesh, in the process removing the vertical mesh lines. You’re left with horizontal slats. Add three bolt heads in an offset triangular pattern to the rim.
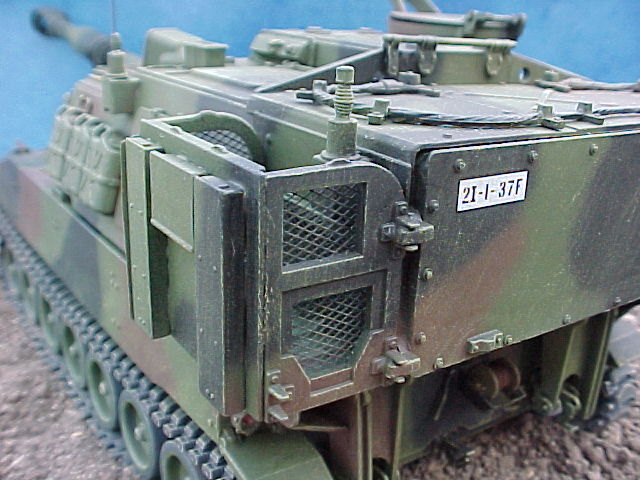
The rest of the turret goes by the book, except for the following. The side turret joints can use some weld detail. I scribed this in with an Exacto chisel. I omitted grab handles from part 91c, the armored cover for the auto fire control, as I have not seen these on real vehicles. The rear turret ammunition bustle will require a bit of filling also. The pioneer tools were replaced with Tamiya items where possible. The .50 cal MG is also a Tamiya spare. On the Mark diagonal photo etch screen was used on the rear turret bustle racks. It’s more accurate than the kit supplied nylon mesh and great looking. These racks are hinged and can be swung back behind the turret for rail transport on the real thing. Italeris instructions note optional positioning. .015" music wire was used for the antennae.
The Paint Job.
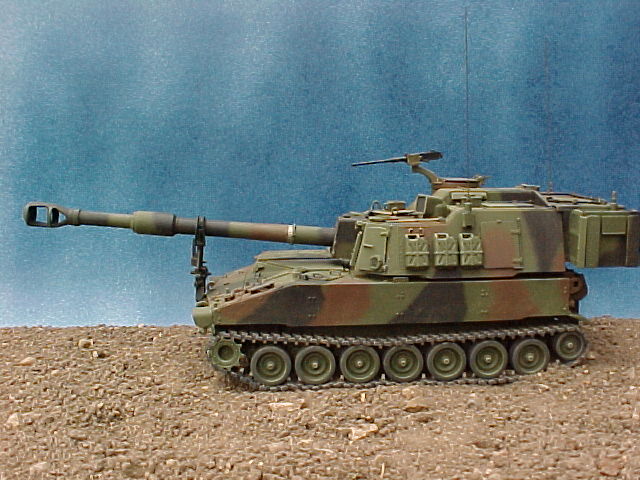
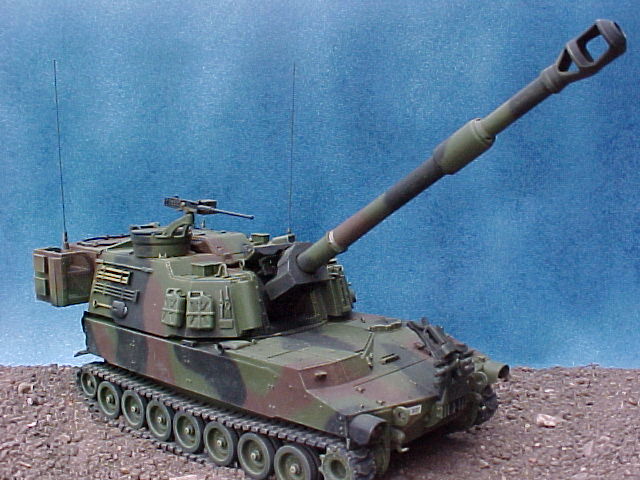
The model was primed with Floquil Grimy Black. A Polly S NATO Green base coat was then applied. Floquil NATO Brown and Black were used for the camo pattern. Paint that hydraulic vent/cover black and drybrush the slats green. There is an old army saying " If it moves salute it, if it doesn’t move, paint it". Typically pioneer tools metal parts are painted black or O.D., but I like some gunmetal for color sometimes. The markings are sparse and the kit-supplied decals were used. I don’t like their color and will replace when I find better. For finishing, the model was coated with Testors Dullcote. After a couple days dry time, a wash of Raw Umber oil paint in mineral spirits was applied. Dry-brushing
was done with the base colors variously lightened with white oil paint. Some aluminum paint was brushed on high wear areas like the spades and hatches. And finally, an overall treatment with a light earth to highlight and dirty it up a little, especially on the tracks.
Having served on the M-109A1’s I have a fondness for artillery and these in particular. I’m happy Italeri got around to producing the Paladin. Overall I was very pleased with the final result and highly recommend the kit for artillery and modern fans. The required improvements are easy and I’m sure the photo etch guys are working as we speak. My one lament is the lack of in action photo reference on the Paladin. Now that I’ve built the kit, I’m sure something will come out in the near future. So get your Paladin today. Remember that you can never have too much artillery.

References:
For all you online guys, the best close up photos of the Paladin I’ve found are at Tom Rea’s website, Tom’s Armour www.thot.net/~trea/armour.htm He has posted a series of photos taken by Keith Ross of some Paladins at Ft. Sill.
Also check out www.army-technology.com Great intel on modern hardware.
The best line drawing I’ve seen of the Paladin is on the Skybow track kit box.
Sheridan: A History of the American Light Tank Volume 2, Richard Hunnicut, Presidio Press, 1995. Good background on the M-109 series development. I was pleasantly surprised to find S.P artillery covered in this volume.
| Main | What's New | Articles | Reviews | Gallery | Think Tank | Contests |